
Network Policy Server (NPS) is a service included in Windows Server. Its acts as RADIUS server to authenticate clients against Active Directory.
RADIUS (Remote Authentication Dial-In User Service) is a client / server system that secures the Local Area Network (LAN) against unauthorized access. The RADIUS server must be configured to support the IEEE 802.1X port-based authentication and to enable the communication to the authenticator (switch) for authentication requests.
The instructions below refer to Windows Server 2016. Other systems may need another configuration. See the vendor documentation for the complete instructions.
Perform the following instructions below in the order they are listed.
In [Server Manager], click [Manage].
 [Server Manager] options
Click [Add Roles and Features].
The first page of the [Add Roles and Features] wizard is displayed.
On the [Before You Begin] page, click [Next].
On the [Installation Type] page, ensure that [Role-Based or feature-based installation] is selected. Then click [Next].
On the [Server Selection] page, ensure that [Select a server from the server pool] is selected. Then, select the local computer from the [Server Pool] list.
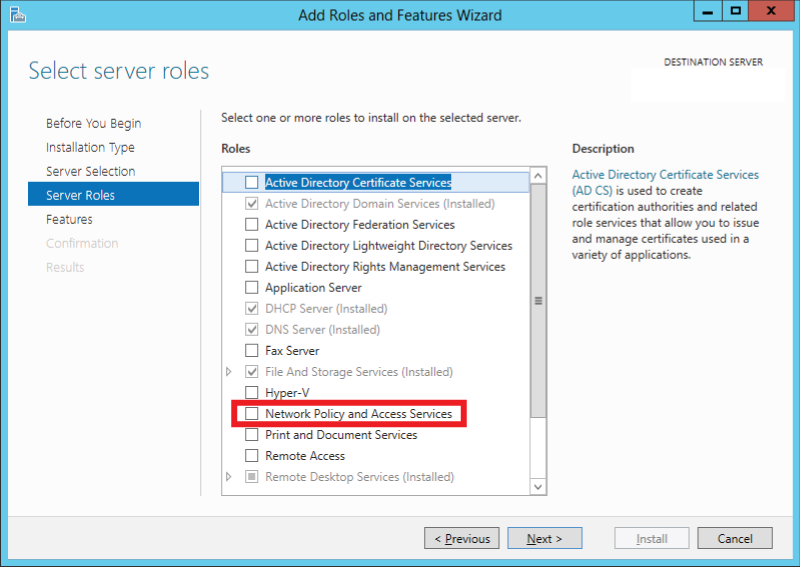
On the [Server Roles] page, select [Network Policy and Access Services]. Then click [Next].
 [Network Policy and Access Services] wizard
On the [Features] page, click [Next].
On the [Confirmation] page, click [Install].
On the [Results] page, you see if the installation has been successful.
When the RADIUS client (switch) is not configured, perform instruction 3.
In [Server Manager], click [Tools].
[Server Manager] optionsClick [Network Policy Server].
In the [NPS] console, click [NPS (Local)].
Expand the [RADIUS Clients and Servers] entries.
Double-click [RADIUS Clients].
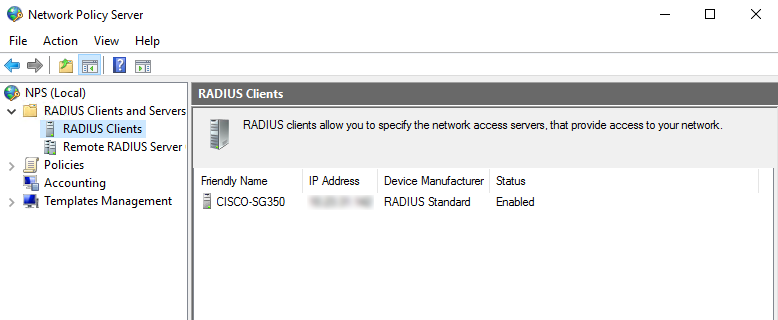 [RADIUS Clients]
Right-click the name of the RADIUS client (switch) and select [Properties].
Click the [Settings] tab. Check if the [Enable this RADIUS client] check box is selected and the [Name and Address] fields are correct.
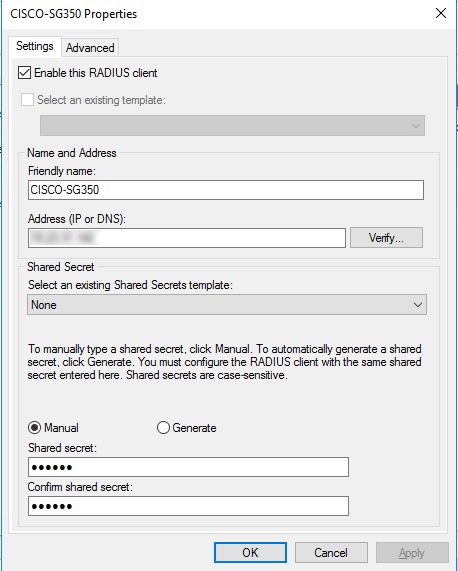 RADIUS client (switch) properties
Click the [Advanced] tab. Check if [RADIUS Standard] is selected from the [Vendor name] list.
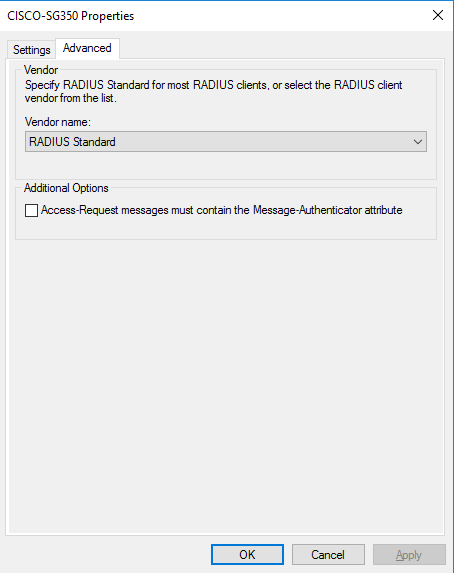 RADIUS client (switch) properties
When the switch is not configured (see instruction 2), perform this instruction.
In [Server Manager], click [Tools].
[Server Manager] optionsClick [Network Policy Server].
In the [NPS] console, click [NPS (Local)].
Expand the [RADIUS Clients and Servers] entries.
Right-click [RADIUS Clients] and select [New].
In the new [RADIUS Client] dialog box, click the [Settings] tab.
Select the [Enable this RADIUS client] check box.
Enter the display name of the switch in the [Friendly name] field.
Enter the IP address or Fully Qualified Domain Name (FQDN) of the switch in the [Address (IP or DNS)] field.
When you entered the FQDN (Fully Qualified Domain Name), click [Verify...] to verify if the name refers to a valid IP address.
In the [Shared secret] option, select [Manual].
Enter a strong text string in the [Shared secret] field. This shared secret is the text string that is used as password between RADIUS clients (switch) and the RADIUS server. You will enter the same shared secret when you configure the switch.
Re-enter the shared secret in the [Confirm shared secret] field.
On the [Advanced] tab, select [RADIUS Standard] from the [Vendor name] drop-down list.
Click [OK]. The switch appears in the list of RADIUS clients.
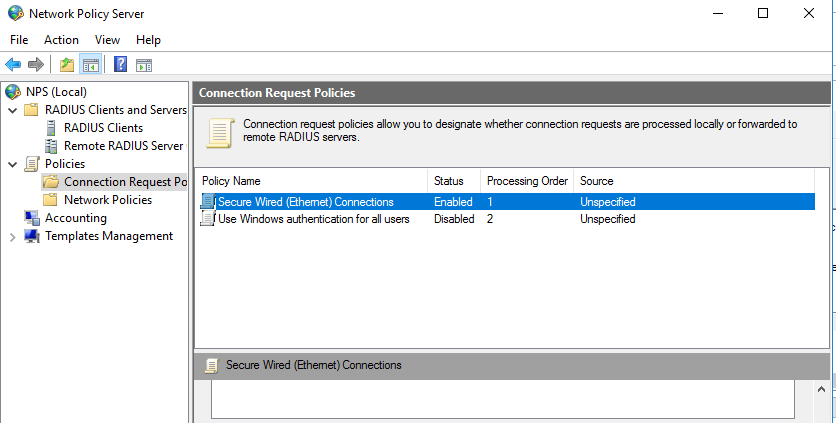
[RADIUS Clients]The connection request policy determines how the server or service acts as a RADIUS server. By default the connection request policy uses Network Policy Server (NPS) as a RADIUS server and processes all authentication requests locally.
When the [Ethernet] Connection Request Policy is not configured, perform instruction 5.
In [Server Manager], click [Tools].
[Server Manager] optionsClick [Network Policy Server].
In the [NPS] console, click [NPS (Local)].
Expand [Policies].
Right-click the connection request policy that refers to the [Ethernet] connection and select [Properties].
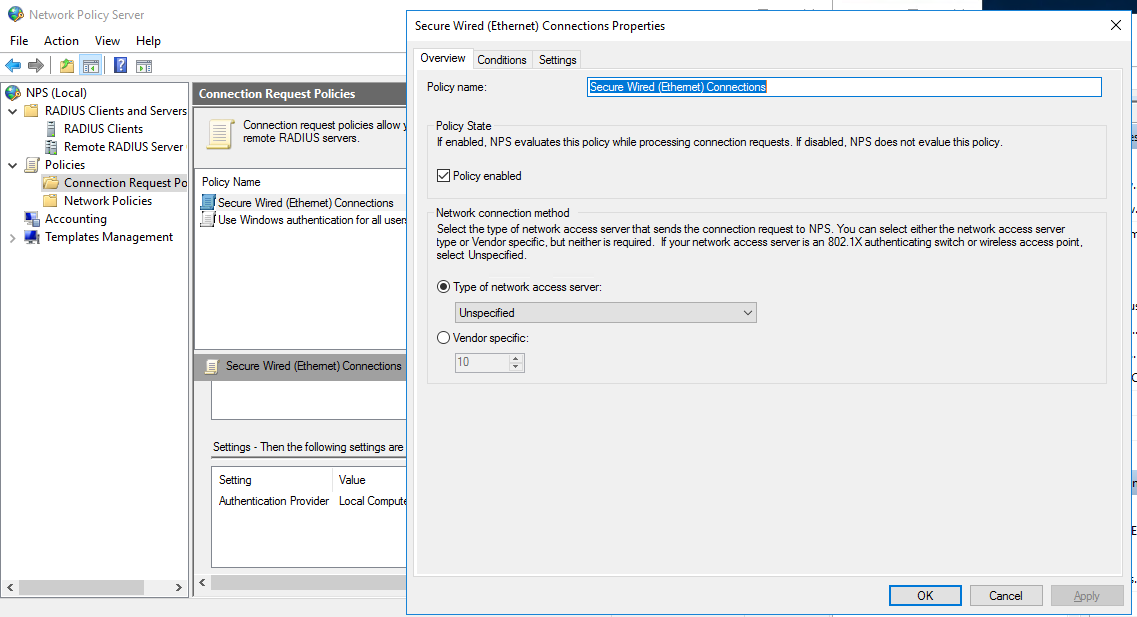
 [Ethernet] properties
Click the [Overview] tab and check if the [Policy enabled] check box is selected.
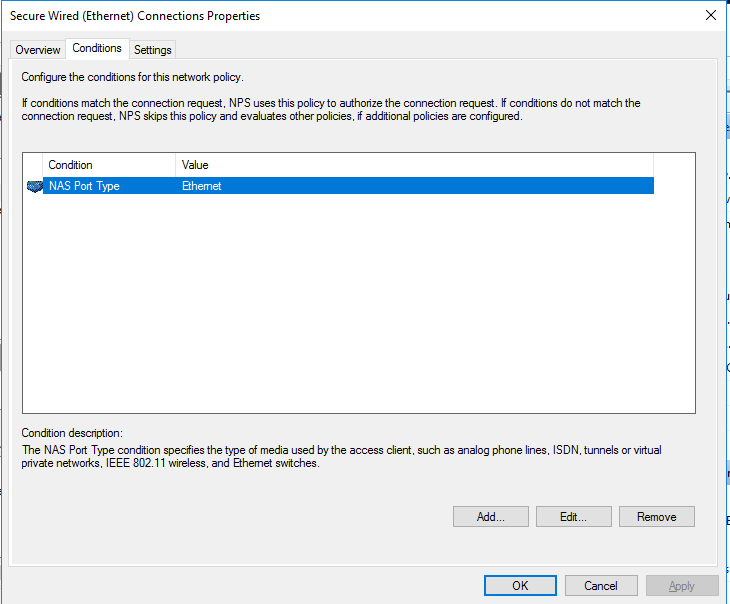
 [Ethernet] properties
Click the [Conditions] tab and check if the [NAS Port Type] has the value: [Ethernet].
 [Ethernet] properties
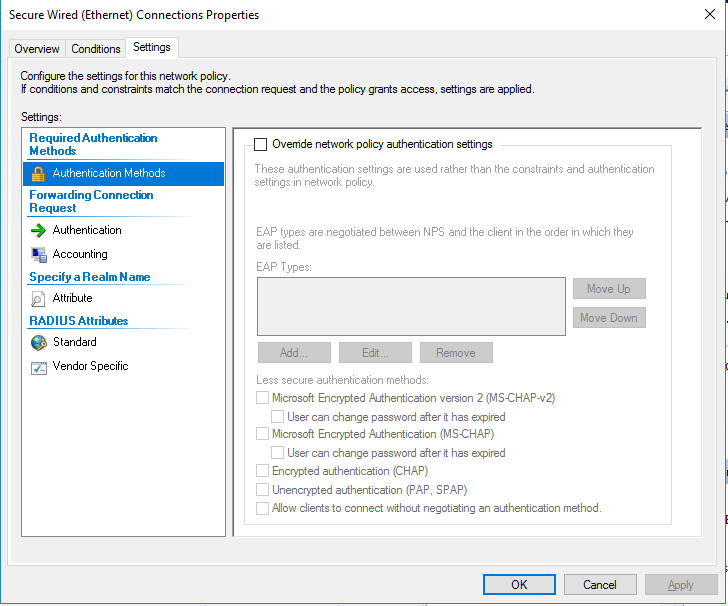
Click the [Settings] tab and check if all check boxes are cleared.
 [Ethernet] properties
Click [OK].
When the [Ethernet] Connection Request Policy is not configured (see instruction 4), perform this instruction.
In [Server Manager], click [Tools].
[Server Manager] optionsClick [Network Policy Server].
In the [NPS] console, click [NPS (Local)].
Expand the [Policies] entries.
Right-click [Connection Request Policies]. Then, click [New].
Start the [New Connection Request Policy Wizard] to configure the connection request policy.
In the [Policy name] field, enter a name to identify the policy. Then, click [Next].
On the [Specify Conditions] page, click [Add].
In the [Select condition] dialog box, select [NAS Port Type] as a condition. Then, click [Add].
In the [NAS Port Type] dialog box, select the [Ethernet] check box. This option defines which type of media is used by the supplicant (PRISMAsync Print Server).
Click [OK].
On the [Specify Connection Request Forwarding] page, select [Authenticate requests on this server]. Then, click [Next].
On the [Specify Authentication page] clear the [Override network policy authentication settings] check box. Then, click [[Next].
On the [Configure Settings] page, click [Next].
On the [Completing Connection Request Policy Wizard], click [Finish]. Now, the policy is listed in the [Network Policies] pane.