
This topic contains the following instructions.
Go to the finisher adjustments
Define the fold location
Define the staple adjustments
Adjust the trimming size of the Perfect Binder
Adjust the alignment of the stacker / stapler trays
Productivity or sheet alignment for jobs with thin paper
Define the professional puncher usage
Be aware that the printer adjustment settings affect all print jobs.
Open the Settings Editor and go to: .

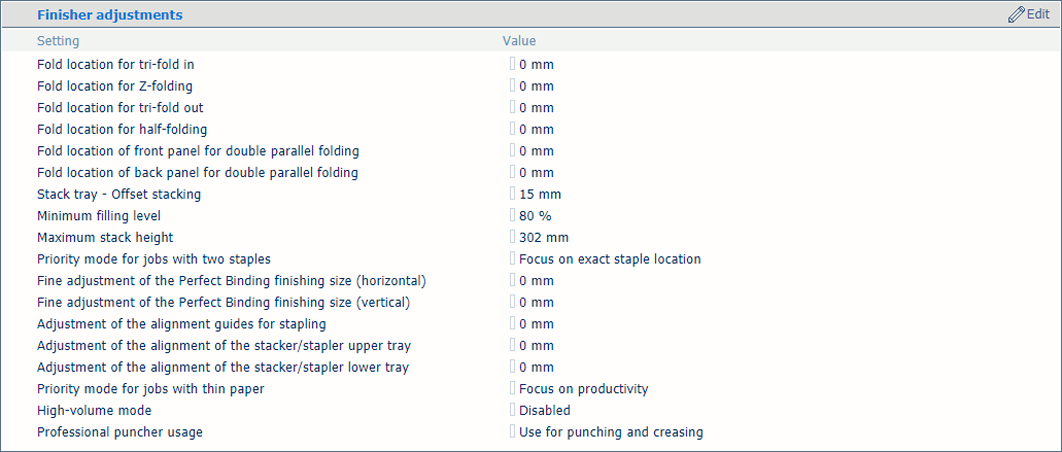 Finisher adjustment settings
Click the folding option you want to adjust:
[Fold location for tri-fold in]
[Fold location for Z-folding]
[Fold location for tri-fold out]
[Fold location for half-folding]
[Fold location of front panel for double parallel folding]
[Fold location of back panel for double parallel folding]
Define the adjustment value.
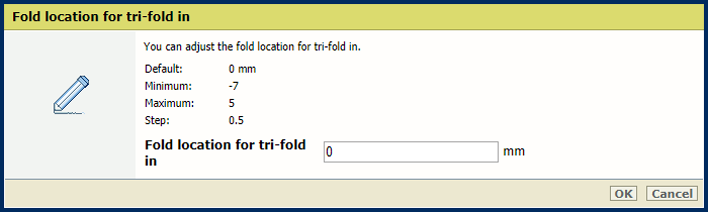
Click [OK].
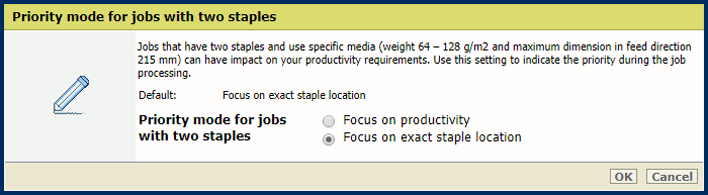
Use the [Priority mode for jobs with two staples] option to choose between productivity or exact staple location for jobs with two staples.
[Focus on productivity]: keep productivity high as high as possible.
[Focus on exact staple location]: staple exactly on the indicated location.
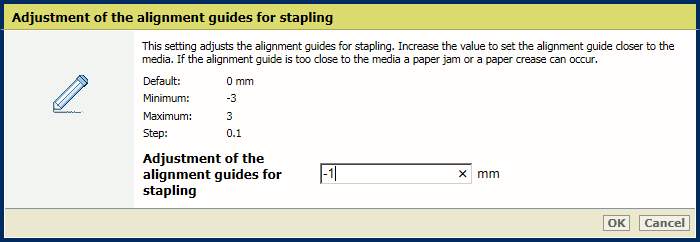
Use the [Adjustment of the alignment guides for stapling] option to set the alignment guide closer to the media.
Use the [Priority mode for saddle-stitched jobs with few pages] option to set the priority for jobs with two staples.
Click [OK].
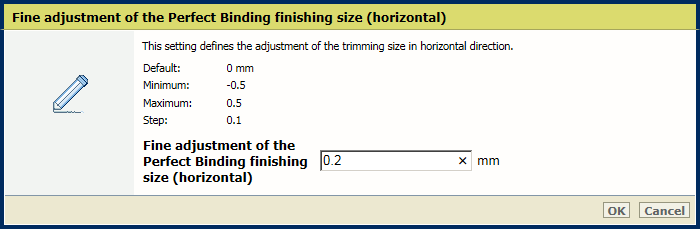
Use the [Fine adjustment of the Perfect Binding finishing size (horizontal)] to adjust the horizontal size.
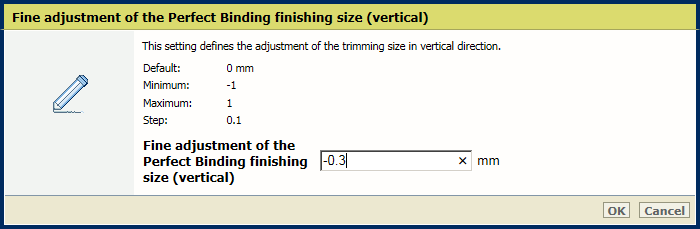
Use the [Fine adjustment of the Perfect Binding finishing size (vertical)] option to adjust the vertical size.
Click [OK].
Use the [Adjustment of the alignment of the stacker/stapler upper tray] option to adjust the alignment for the upper tray.

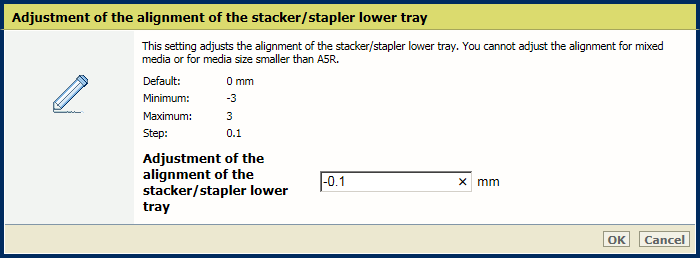
Use the [Adjustment of the alignment of the stacker/stapler lower tray] option to adjust the alignment for the lower tray.
Click [OK].
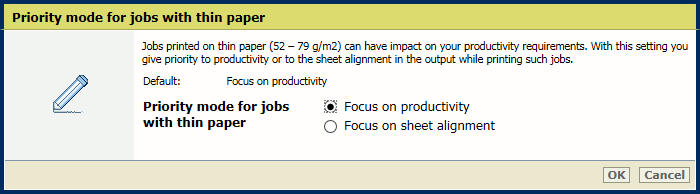
Use the [Priority mode for jobs with thin paper] option to choose between productivity or sheet alignment for jobs with thin paper.
[Focus on productivity]: keep productivity as high as possible.
[Focus on sheet alignment]: align sheets as exactly as possible.
Click [OK].
Use this setting to indicate which function of the puncher you want to allow. Then, the printer driver and the control panel show the related settings. There are two types of dies: crease dies and punch dies. Only one die can be installed. When the puncher is used for both punching and creasing, a message appears when a job needs a die that is not placed.
Use the [Professional puncher usage] option to define how to use the professional puncher.
[Use for punching]: a punch die is installed.
[Use for creasing]: a crease die is installed.
[Use for punching and creasing]: a punch die or crease die is can be installed.
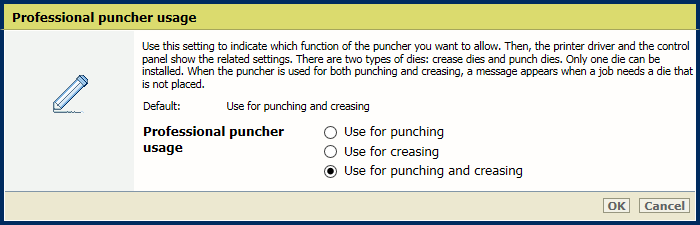
Click [OK].