A firm of architects have many big projects running and would like to be able to attribute any printing/scanning/copying to the right project and the right phase from the right department.
First thing to do is to scope out what you are trying to achieve. For this, you will need to map out what the four custom fields will be, keeping track of the relationship between Departments, Project, Phases of development and the corresponding Bill, if needed.
|
Department |
Project |
Phases |
Bill |
|---|---|---|---|
|
6401 - Architects |
|
|
|
|
6402 - Interior Designers |
|||
|
6403 - CAD technician |
|||
|
6404 - Project Manager |
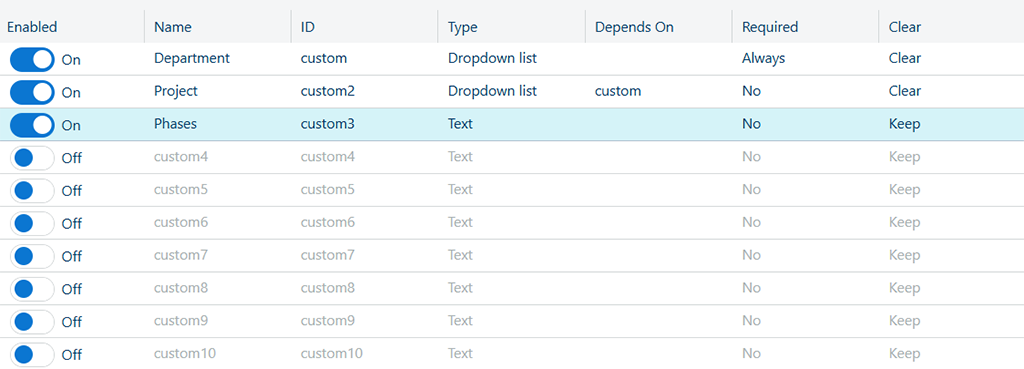
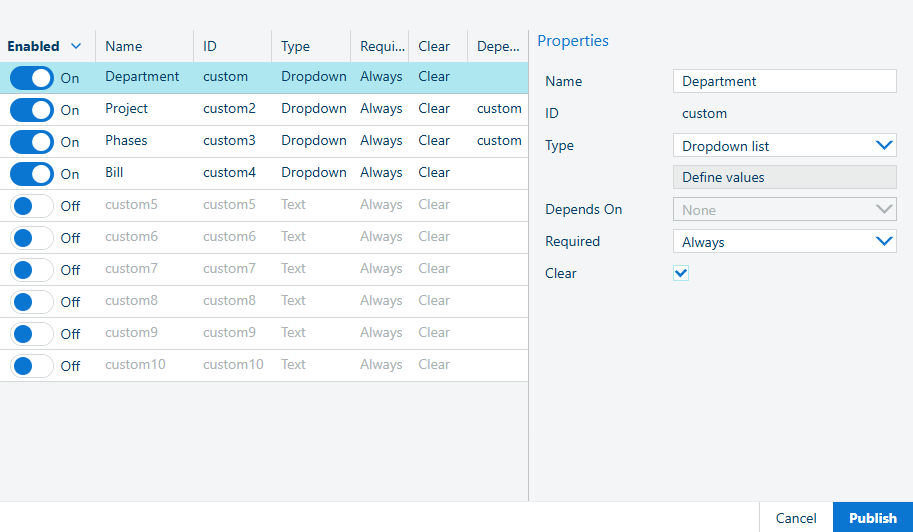
You need to configure 4 fields in the accounting dialog. When published, they will appear in a pop-up window in the driver/application or on the printer when you want to print/copy/scan.
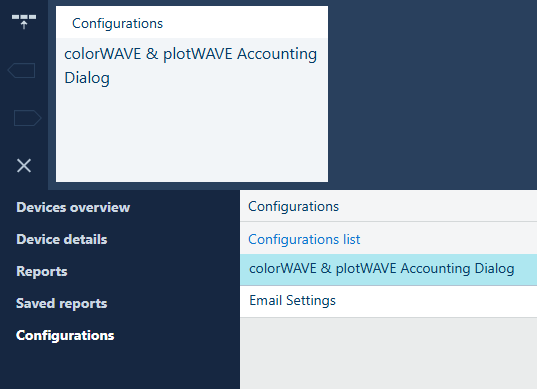
Open the [Configurations] app.
Select the [colorWAVE & plotWAVE Accounting Dialog] tab:
Field 1 ("Department")- You want to add which department the charge is to be made against.
Enable the 1st field: on the first line click on the slider below [Enabled] to change it from [Off] to [On]
In [Properties] panel, located on the right hand side of the workspace, enter the [Name] "[Department]" (you have to enter a name; this you will see in the driver/application and on the printer)
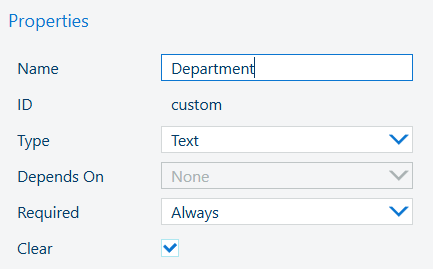
At [Type] - Select [Dropdown list] and then select [Define values]
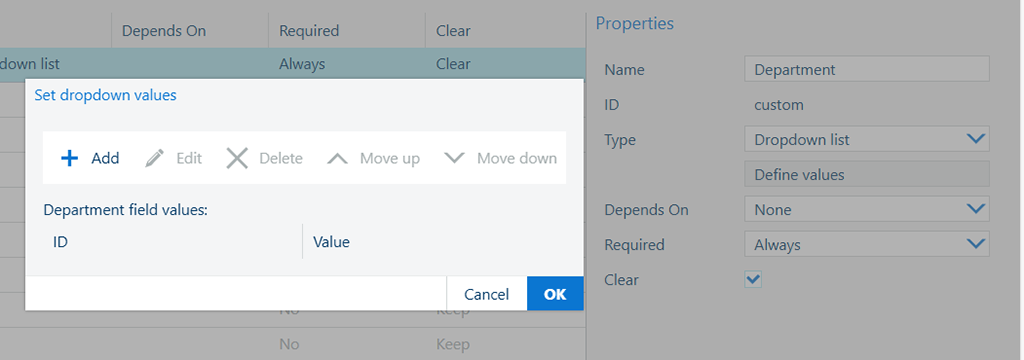
A dialog box opens - this allows you to create the project values you would like to see in the driver/application or on the printer
Select
![]() [Add]
[Add]
Input an ID number - 6401
Input the name: Architects - press [OK]
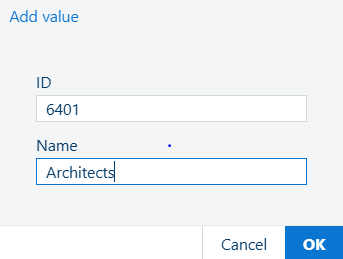
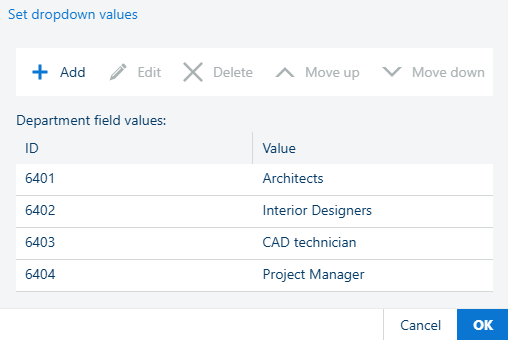
Follow the same method and add in all other departments
Once completed, select [OK] to close the dialog box
Ignore the [Depends on] - Leave [None] in the dropdown list.
This field is currently disabled, since there is no field to be made dependent on.
[Required] - Select [Always], as the customer always wants the department to be selected
[Clear] - Select the checkmark as the customer wants the department to be cleared once the value gets used
[Clear] checked means the driver/application/printer will not remember the value for the next print/copy/scan job.
[Clear] unchecked means the driver/application/printer will remember and display the value in the accounting dialog pop-up window.

Field 2 ("Project") - You want to register which project should the charge to be made against
Enable the second field: on the second line click on the slider below [Enabled] to change it from [Off] to [On]

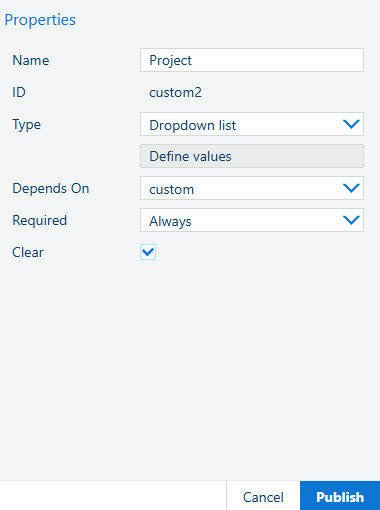
In the [Properties] pane, enter the [Name]: [Project]:
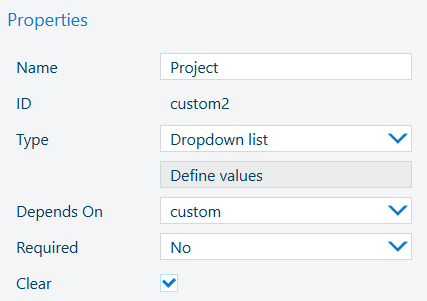
At [Type], select [Dropdown list] and then select [Depends on] and select [custom]. This means that the project name is dependent on the department being selected first.
Select [Define values]. A dialog box opens, allowing you to create the project values you would like to see in the driver, the application or in the printer
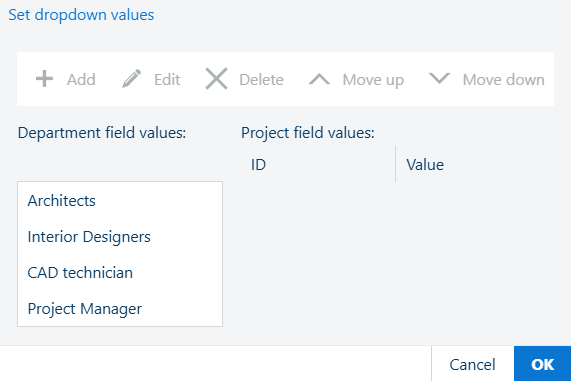
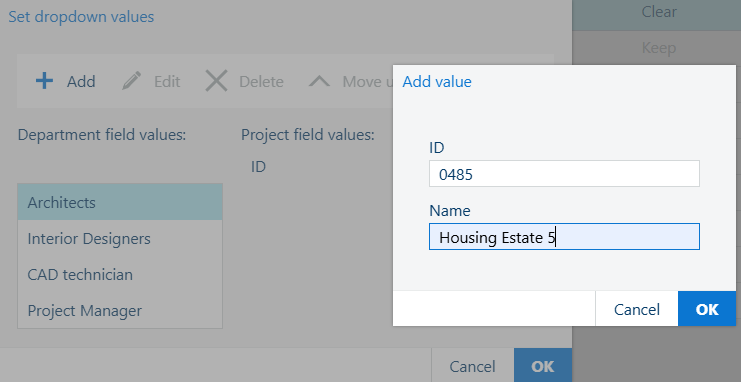
Select a department field value and select
![]() [Add]
[Add]
Input an ID number - 0485
Input the project name Housing Estate 5 - press [OK]
Follow the same method and add in all other projects
You have to do this for each Department field value. So, select the next Department field value and execute steps 5-8 until all projects are added and each Department field value has the same list of projects
Once completed, select [OK] to close the dialog box Values

[Required] - Select [Always], as the customer always wants the [Project] to be selected
[Clear] Select the checkmark as the customer wants the [Project] to be cleared once the value gets used.
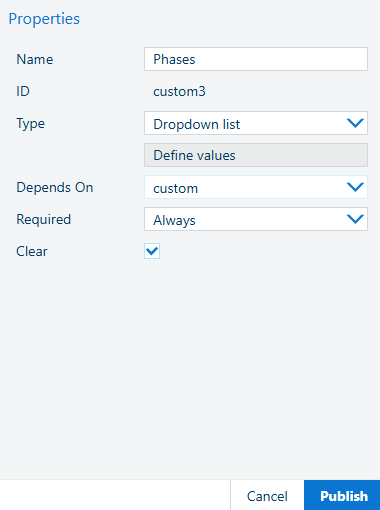
Field 3 ("Phases") - You want to register for which phase of the project the print/copy/scan is made
Enable the 3rd field: on the third line click on the slider below [Enabled] to change it from [Off] to[On]
In the [Properties] panel, located on the right hand side of the workspace, enter the [Name]: [Phases]
Select [Depends on], and in the dropdown, select [custom]. This means that the phase is dependent on the department being selected first
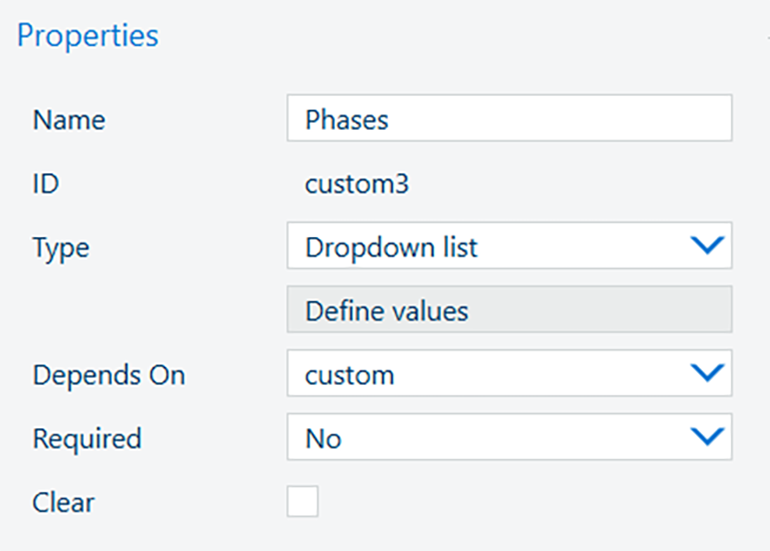
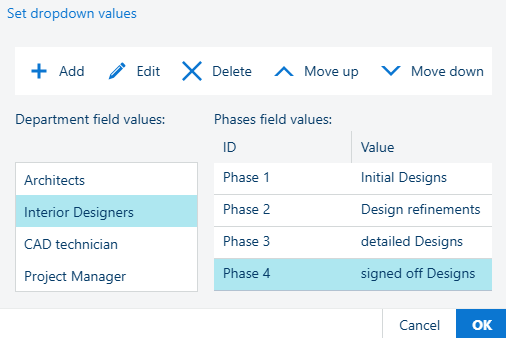
At [Type], select [Dropdown list] and then select [Define values], a dialog box opens - this allows you to create which phases the print/copy/scan is attributed to
Select a department field value and select [Add]
Input an ID in the form "text + number" - Phase 1
Input the phase the print is related to - Initial Design - press [OK]
Follow the same method and add in all other Phases for each of the departments
Once completed, select [OK] to close the dialog

[Required] - select [Required], as you always want the phase to be selected
[Clear] Select the checkmark as you want the phase to be cleared once you have used it.
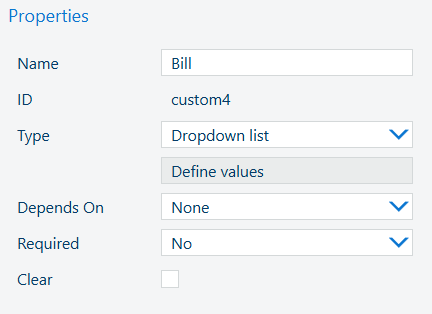
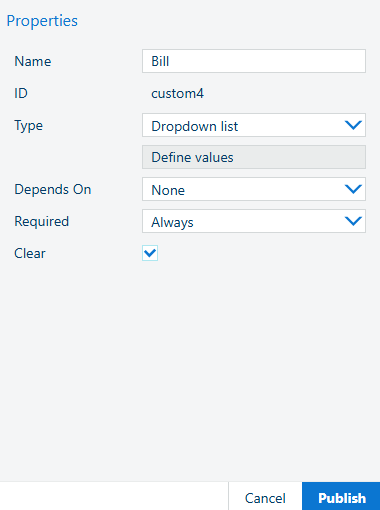
Field 4 ("Bill") - You want to select whether this print/copy/scan is chargeable or not
Enable the 4th field: on the fourth line click on the slider below [Enabled] to change it from [Off] to [On]
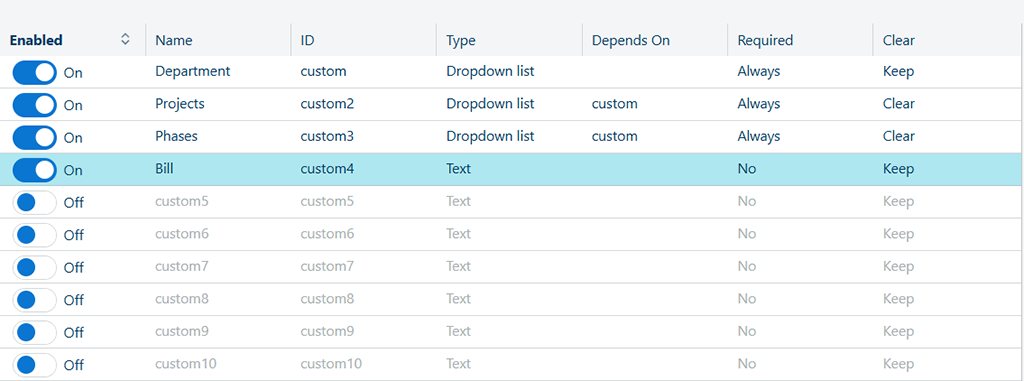
In the [Properties] panel, located on the right hand side of the workspace, enter the name Bill
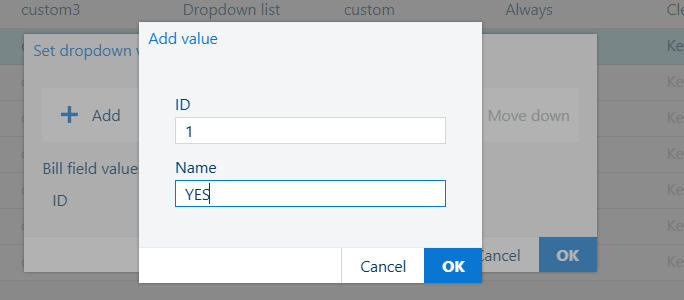
At Type, select[Dropdown list] and then select [Define values] a dialog box opens - this allows you to create the values for Bill
Select [Add]
Input an ID number - 1
Input the YES as the value for Bill - press [OK]
Select [Add]
Input an ID number - 2
Input the NO as the value for billing - press [OK]
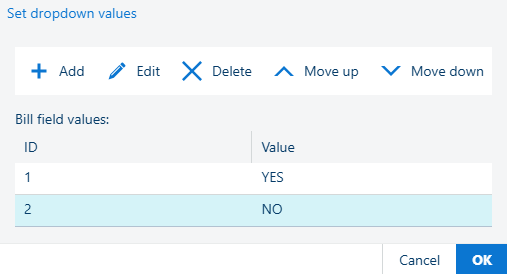
Press [OK] to close the dialog
[Depends on] - Select [None] in the dropdown list.
[Required] - Select [Always], as the customer wants Bill to be selected.
[Clear] - Select the checkmark as the customer wants Bill to be cleared once the value gets used.
Click the [Publish] button.
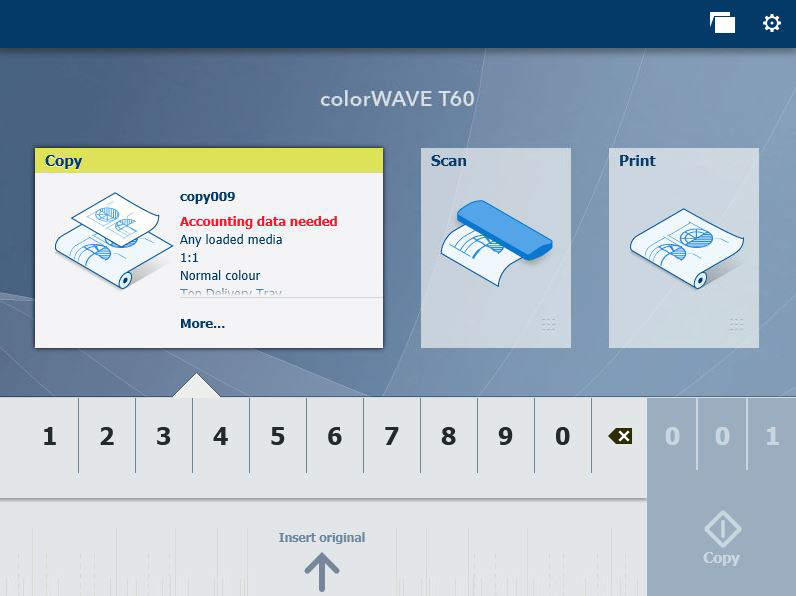
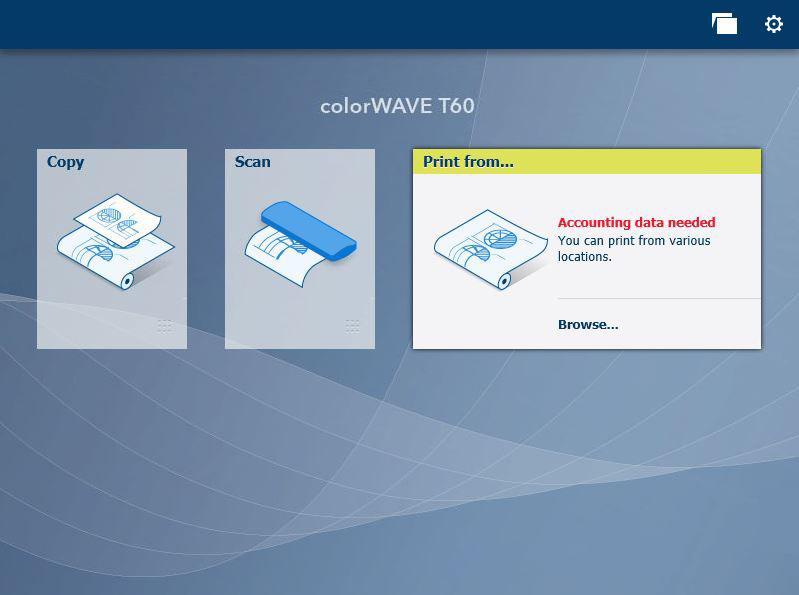
Open the registered colorWAVE & plotWAVE device, and prepare a new printjob.
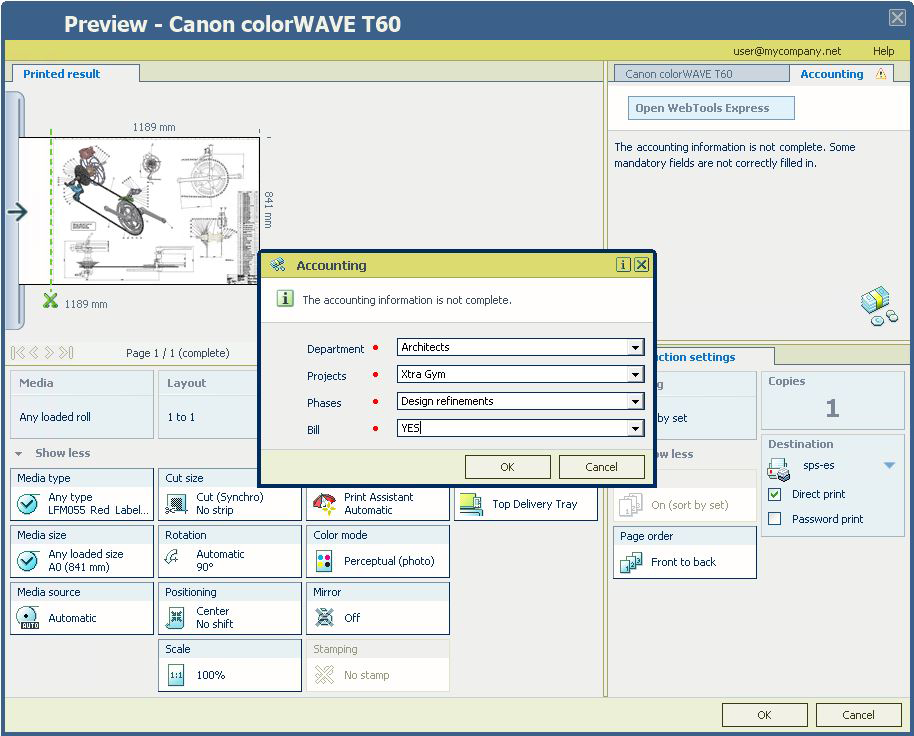
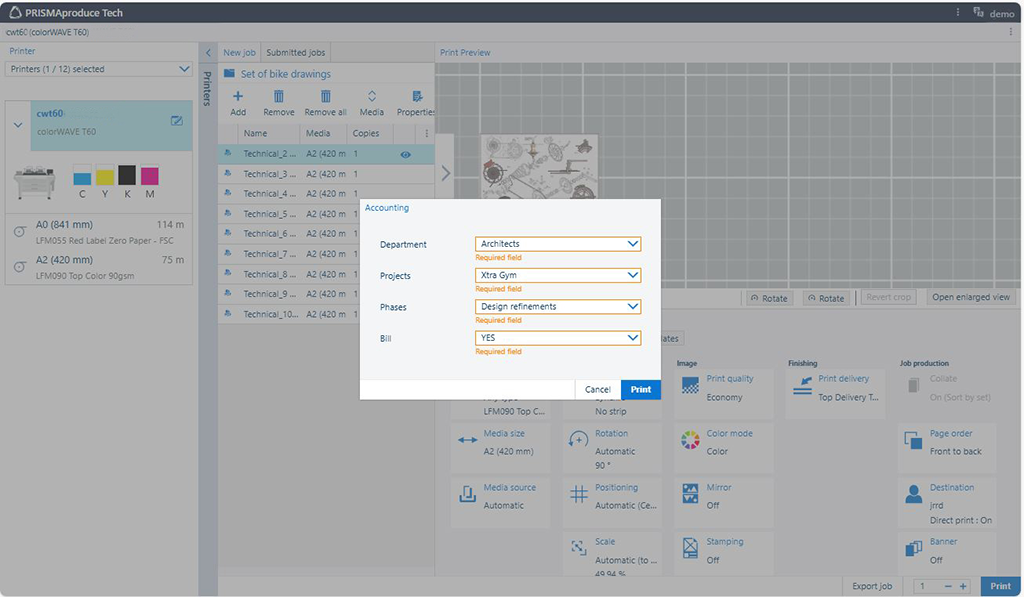
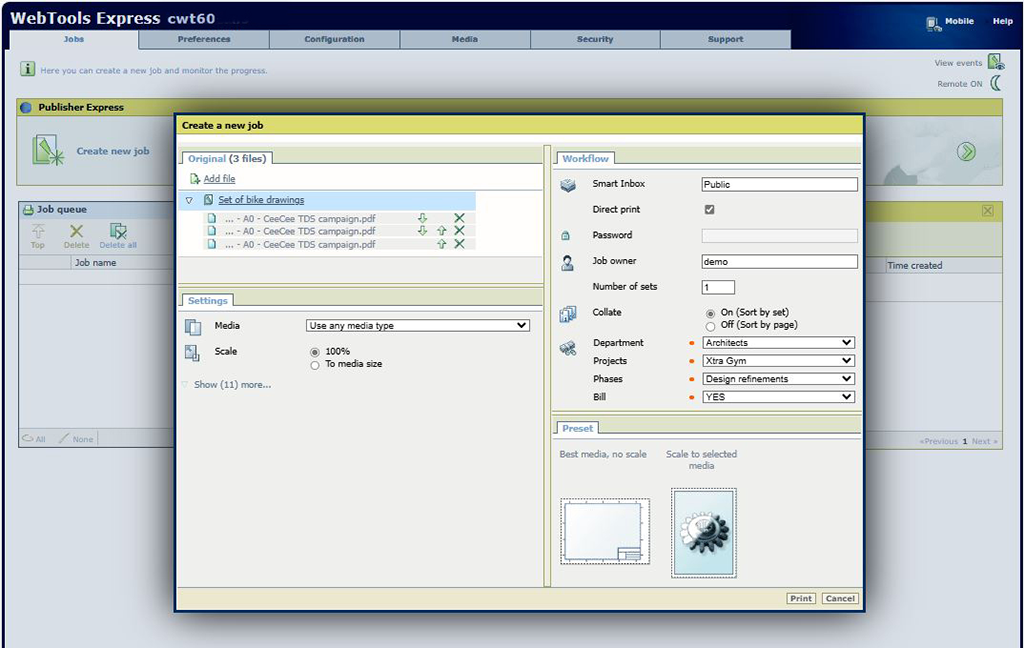
You should see all the 4 custom fields and you need to select a value for each field before you can print the job.
Open the registered colorWAVE/plotWAVE device, and prepare a new printjob. Select the desired operation from the Printer Operator Panel:
|
COPY |
|
Scan |
|---|---|---|
 |
 |
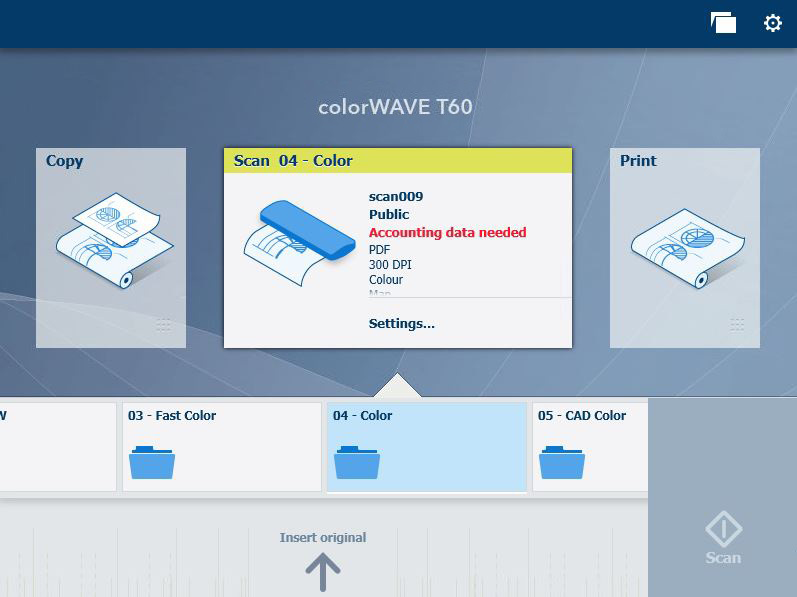 |
You should see all the 4 custom fields with their appropriate values:
Please notice how the custom fields we prepared are marked as [Required] in the user interface with text or the red dot.