
The control panel is the location on the print system to manage print jobs, copy jobs, and scan jobs. The control panel provides you full system control.
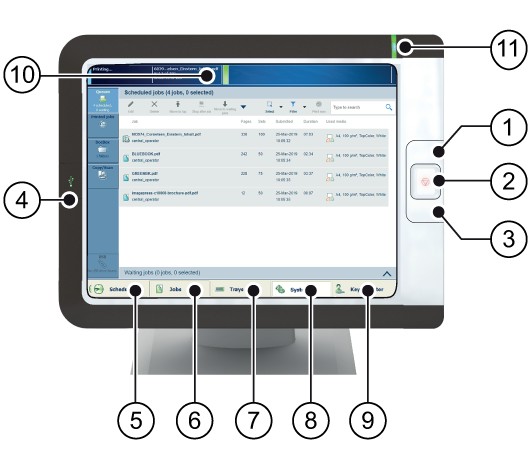
The following table describes the main parts of the control panel and their functions.
|
Component |
Function |
|
|---|---|---|
|
1 |
Sleep button |
Put the system into the sleep mode or wake up the system. |
|
2 |
Stop button |
Stop the printing process after a set or as soon as possible. |
|
3 |
Paper tray button |
Get immediate access to the [Trays] section on the control panel to do the following (for example):
|
|
4 |
USB port |
Insert a USB drive into the USB port to print any documents on the USB drive. You can disable the USB port. |
|
5 |
[Schedule] button (optional) |
Access the [Schedule] view to manage the jobs in the schedule. |
|
6 |
[Jobs] button |
Manage and print the jobs in the lists of [Waiting jobs], [Scheduled jobs] and [Printed jobs], or in a DocBox (optional). |
|
7 |
[Trays] button |
Access the [Trays] section on the control panel to do the following, for example:
|
|
8 |
[System] button |
Access the [System] section to do the following, for example:
|
|
9 |
Username |
The username of the user that is currently logged in. When you want to log in as another user, log out or change your password, use this button. |
|
10 |
Dashboard |
The dashboard displays information about the system status such as:
|
|
11 |
Status LED |
The status LED displays the status of the system:
|
Access to the control panel
The access to the control panel can be secured to protect the contents of the documents and print quality settings. When the access to the control panel is secured, you need to log in to the print system.
The system administrator is responsible for user authorization and for providing your credentials.
For more information, see Users of the print system.
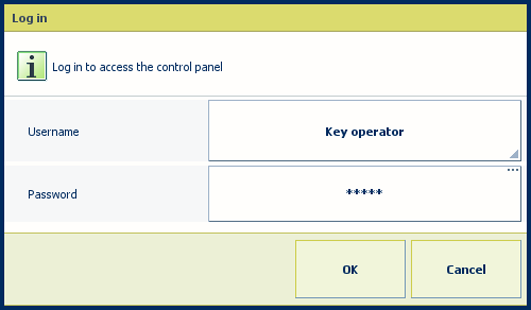 Login screen
 Username is displayed at the bottom of the screen

