Note that the print quality adjustments affect all print jobs.
Open the Settings Editor and go to: .
 [System adjustments] tab
Go to the [Print quality adjustments] section.
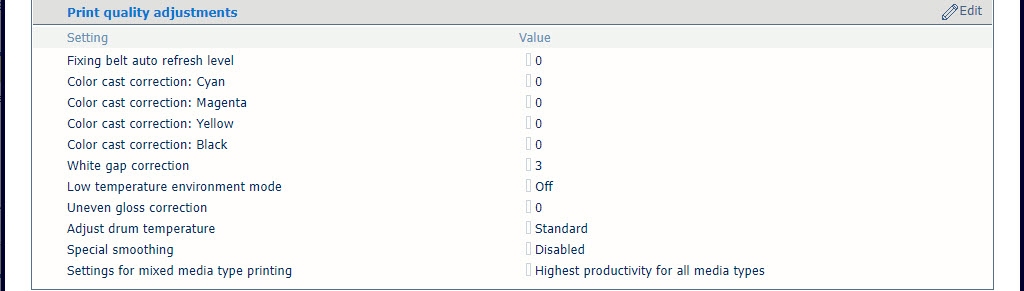 Settings for print quality adjustments
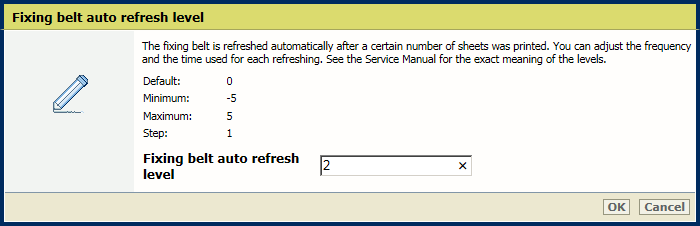
Use the [Fixing belt auto refresh level] setting to adjust the frequency and time used for refreshing of the fixing belt.
 [Fixing belt auto refresh level] setting
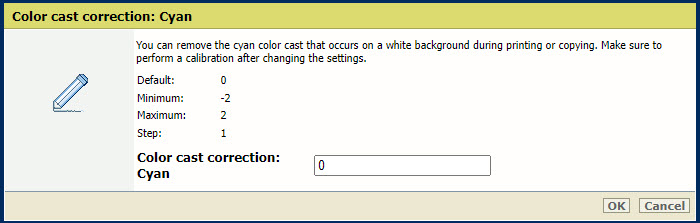
Use the [Color cast correction: Cyan], [Color cast correction: Magenta], [Color cast correction: Yellow] and [Color cast correction: Black] settings to adjust the default correction level per color.
 [Color cast correction: Cyan] setting
Perform a printer and media family calibration after changing these settings.
Use the [White gap correction] setting to adjust the default level of the white gap correction.
 [White gap correction] setting
Perform an automatic gradation adjustment after changing this setting.
Enable the [Low temperature environment mode] setting to increase print quality for jobs on heavy paper but with loss of print speed.
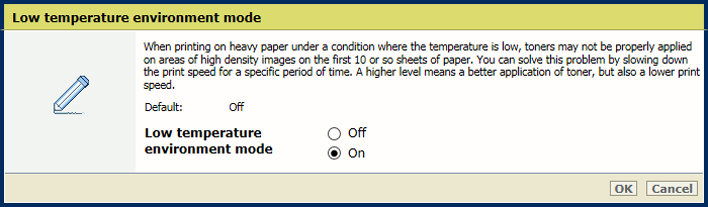 [Low temperature environment mode] setting
Use the [Uneven gloss correction] setting to decrease the level of uneven gloss correction to reduce the uneven gloss.
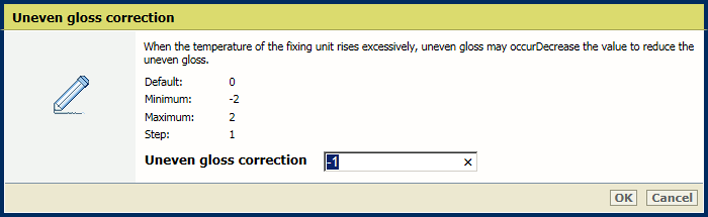 [Uneven gloss correction] setting
Use the [Adjust drum temperature] setting to adjust the drum temperature. Increase the drum temperature to remove partial distortions or thin white lines due in an environment with high temperature or high humidity.
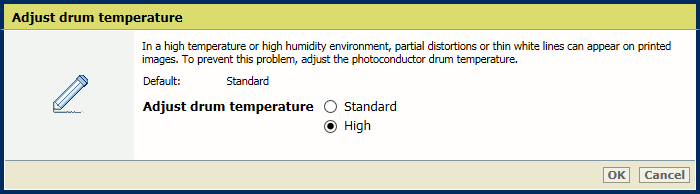 [Adjust drum temperature] setting
Use the [Special smoothing] setting to smoothen jagged outlines.
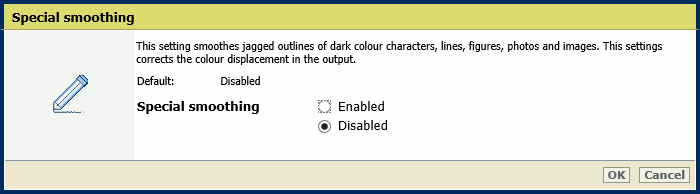 [Special smoothing] setting
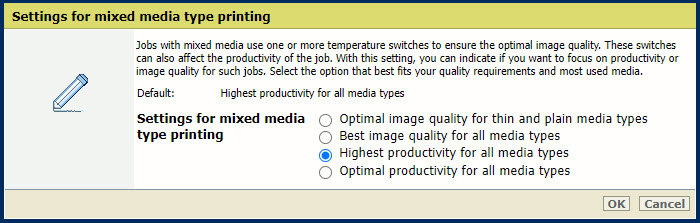
Jobs with mixed media use one or more temperature switches to ensure the optimal image quality. These switches can also affect the productivity of the job. With this setting, you can indicate if you want to focus on productivity or image quality for such jobs. Select the option that best fits your quality requirements and most used media.