

The bulk paper module XL can hold up to 3,500 sheets of paper, 80 g/m² (22 lb bond). The paper tray feeds the media face up.
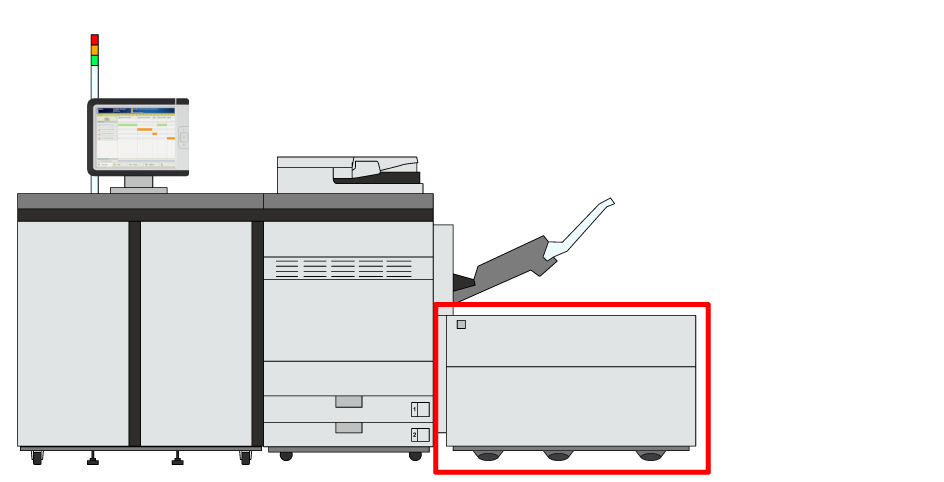 Location of the bulk paper module XL
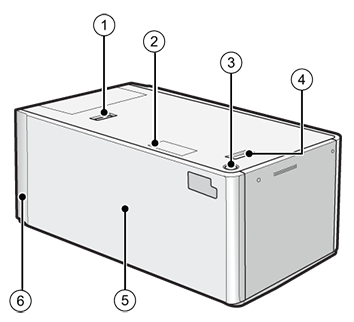 Bulk paper module XL
|
Description bulk paper module |
|
|---|---|
|
1 |
Release button to move the bulk paper module XL |
|
2 |
Paper size switch indicator to indicate that the paper size is changed to use long sheets |
|
3 |
Button to open the paper tray |
|
4 |
Release handle to move the bulk paper module XL away from the printer |
|
5 |
Paper tray to hold the media |
|
6 |
POD Deck Lite Attachment Kit-C to attach the bulk paper module XL to the printer |
Make sure to ground the bulk paper module XL before you connect its power plug to the power source.
Make sure you remove the power plug from the power source before you disconnect the ground connection of the bulk paper module XL.
When you handle paper, be careful not to cut your hands on the edges of the paper.
When you lift the inside lifter of the paper tray, for example because you dropped something, do not lift the lifter more than 50 mm (2 inch) or diagonally. This can cause a malfunction or machine damage.
Do not lift the inside lifter of the paper tray if the printer is on. This can cause a malfunction or machine damage. If you need to lift the inside lifter of the paper tray, for example, because you dropped something, turn off the printer with the paper trays open.
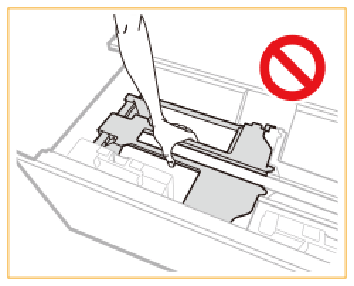
Do not hit the right-hand paper guide when you load the media. This can cause a malfunction or machine damage.
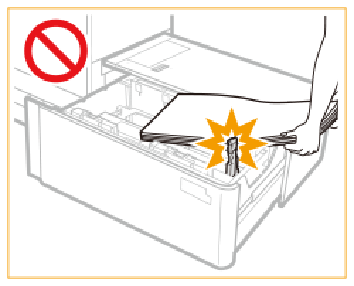
Check and prepare the media.
Awake the print system from sleep mode, if applicable.
|
Action |
||
|---|---|---|
|
1 |
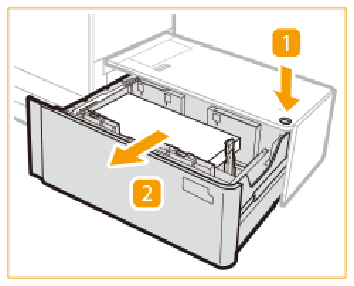
Press the button (1) to open the bulk paper tray (2). |
|
|
When the media size does not change continue with step 6, otherwise go to step 2. |
||
|
2 |
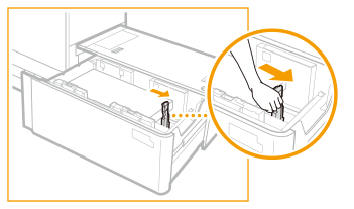
Slide the right-hand paper guide to the right-hand side of the paper tray so that there is enough space to load the media. The paper size indicator flashes or illuminates. |
|
|
3 |
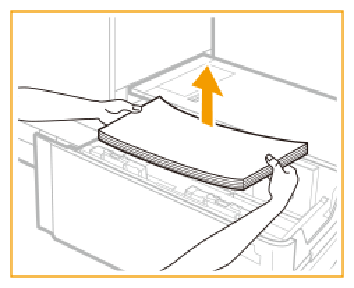
Remove all media. |
|
|
If the paper switch lamp flashes, continue with step 6. Otherwise, if the paper switch lamp illuminates, go to step 4. |
||
|
4 |
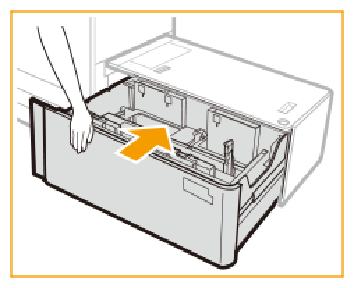
Close the bulk paper tray and wait until both the paper switch lamp and open button illuminate. Do not open the bulk paper tray while both the paper switch lamp and open button are flashing. |
|
|
5 |
Press the button (1) to open the bulk paper tray (2). |

|
|
6 |
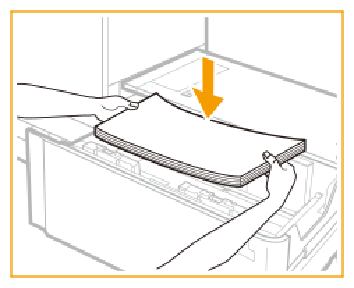
Load a media stack of approximately 10 mm (0.4 inch). |
|
|
7 |
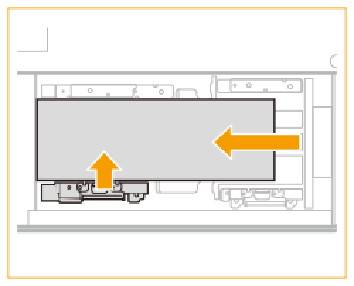
Keep the media against the left-hand wall and squeeze the left-hand paper guide to slide the paper guide against the media stack.
|
|

|
||
|
8 |
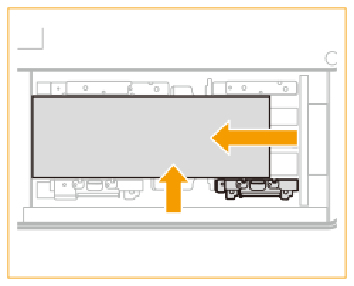
Push the media stack against the left-hand wall and right-hand paper guide. |
|
|
9 |
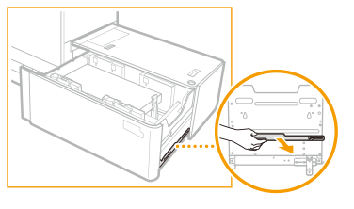
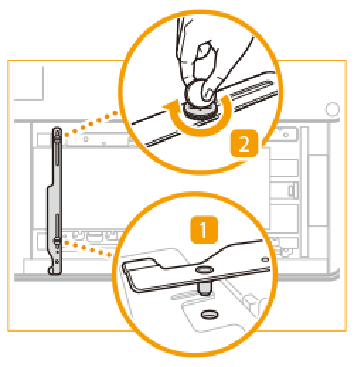
Take the fixing bracket for long sheets from the right-hand side of the bulk paper tray. |
|
|
10 |
Place the fixing bracket with the fixing pin in the indicated hole (1) and tighten the rear screw (2). |
|
|
11 |
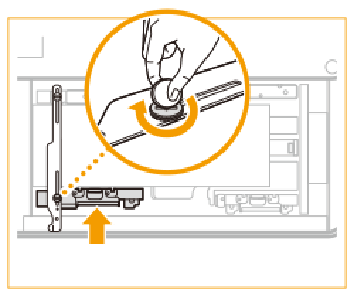
Hold the left-hand paper guide against the media stack and tighten the front screw. |
|
|
12 |
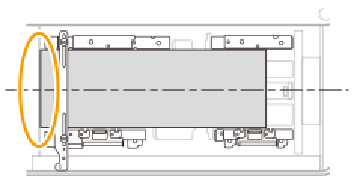
Make sure that both corners on the left-hand side of the media stack touch the left-hand wall. |
|
|
13 |
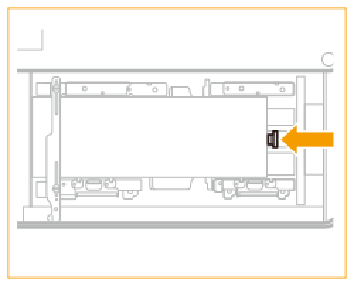
Slide the paper guide against the media stack. Use the paper size marks to place the paper guide properly. |
|
|
14 |
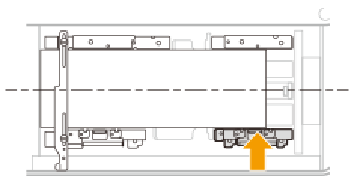
Slide the right-hand paper guide to the media stack. |
|
|
15 |
Make sure that the media stack is flush against the left-hand wall. |

|
|
16 |
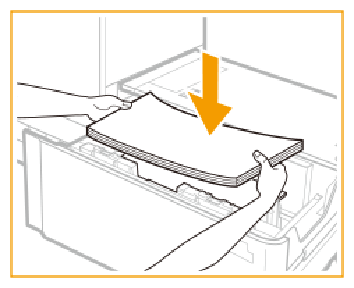
Continue to load the next media stacks of approximately 20 mm (0.8 inch).
|
|
|
17 |
Gently close the paper tray and make sure it clicks into place. When you close the bulk paper module, be careful not to get your fingers caught. This can cause personal injury. |
|
When a paper jam occurs or you notice poor image quality, turn over the media stack and reload the media stack. Do not reload textured, single-sided coated, or already printed paper to avoid a paper jam. For these media, take a new stack.
Tightly rewrap the remaining media in the original package, and store the package in a dry place, away from direct sunlight or high temperatures.