Loading

Refill the chiller

Introduction

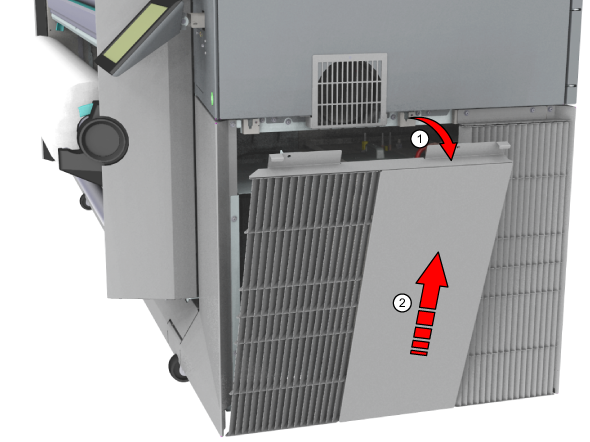
You can refill the chiller without service assistance.

About this task

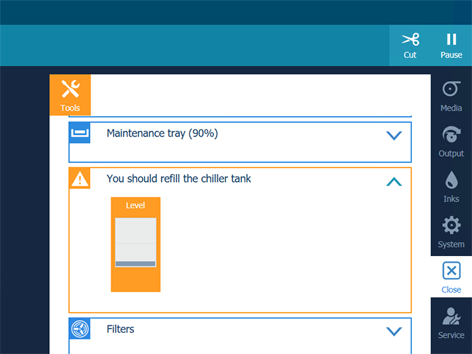
  • The operator panel gives an orange warning when you can refill the chiller.

  • The operator panel gives a red warning when you must refill the chiller. The printing process is stopped until you have refilled the chiller.

Before you begin

Use Océ Colorado 1640 prescribed:

  • Cooling liquid

  • Nitrile gloves for handling chemical liquids

  • Pouring can

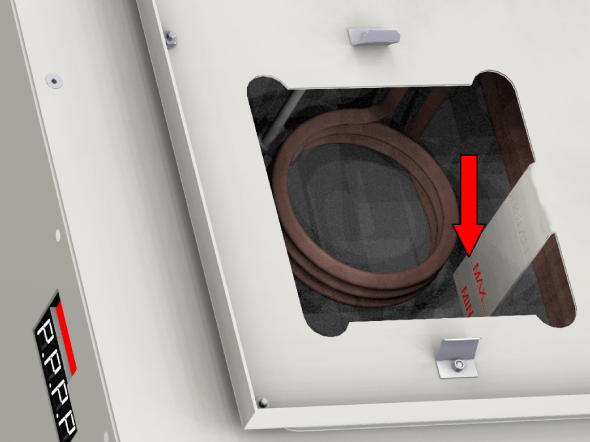
  • Screwdriver (Torx-20)

NOTE

For information on the prescribed maintenance materials, see List of Océ Colorado 1640 maintenance materials.

CAUTION

Wear nitrile gloves when you refill the chiller to protect your skin.

IMPORTANT

Only refill one liter of cooling liquid when you get a warning, when you use more the liquid can spill and damage the machine.

Procedure

  1. On the operator panel, tap on the [System] icon on the right.
  2. Tap on [Power management].
  3. Tap on [Power off].

    The system shuts down.

  4. When the system has shut down, pull to open the cover under the roll winder.
  5. Switch the power switch to the 'off' position.
  6. Pull out the two power supply plugs from the sockets.
  7. Go to the chiller side and locate the cover under the fan.
  8. Unscrew the left and right screws on top of the cover.
  9. Lift the cover a little up and towards you (1), then lift it up fully and take it out (2)
  10. Locate the lid on top of the chiller.
  11. Put on the gloves.
  12. Pull to remove the lid.
  13. Pour the cooling liquid from the bottle in the pouring can.
    IMPORTANT

    Use the prescribed cooling liquid. Do not use any other.

  14. Place the pouring can on the chiller and fill the tank with the cooling liquid.
    NOTE

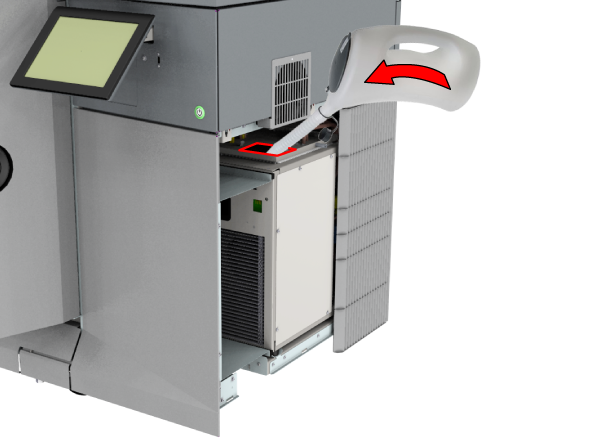
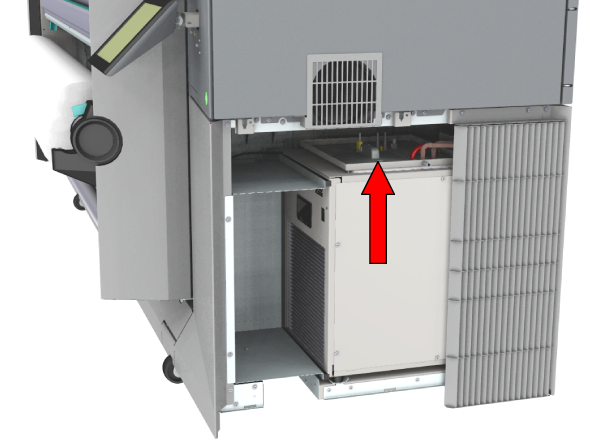
    When the operator panel displays the level is low, you can fill one bottle of one liter. The level indicator inside the chiller shows the maximum level of cooling liquid.

  15. Close the lid, press it firmly.
  16. Dispose the gloves.
  17. Place the cover back into position.
  18. Fasten the left and right screws on top of the cover.
  19. Plug the two power supply plugs back into the sockets.
  20. Switch the power switch back to the 'on' position, and close the cover.