
PRISMAelevate XL Extensions is an easy-to-use Adobe Photoshop and Adobe Illustrator plugin that allows highly accurate 3D design of elevated print projects without any need for extensive training.
The plugin allows the designer to do the following:
Create a print-ready PDF of the design of the elevated artwork.
Examine the design of the elevated artwork by creating a preview.
Identify artefacts in the design of the elevated artwork.
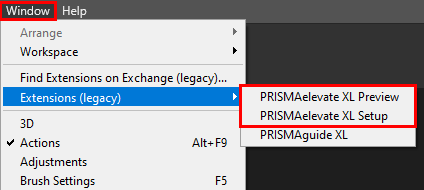
You can access the PRISMAelevate XL Extensions in Adobe Photoshop or Adobe Illustrator via [Window] -> [Extensions (legacy)]
[PRISMAelevate XL Preview]
[PRISMAelevate XL Setup].
For easy access to the extensions you can also minimize the panels and drag-and-drop them on the side bar.
To learn about the functionalities of the PRISMAelevate XL Extensions open the online help via the menu button in the upper right corner.

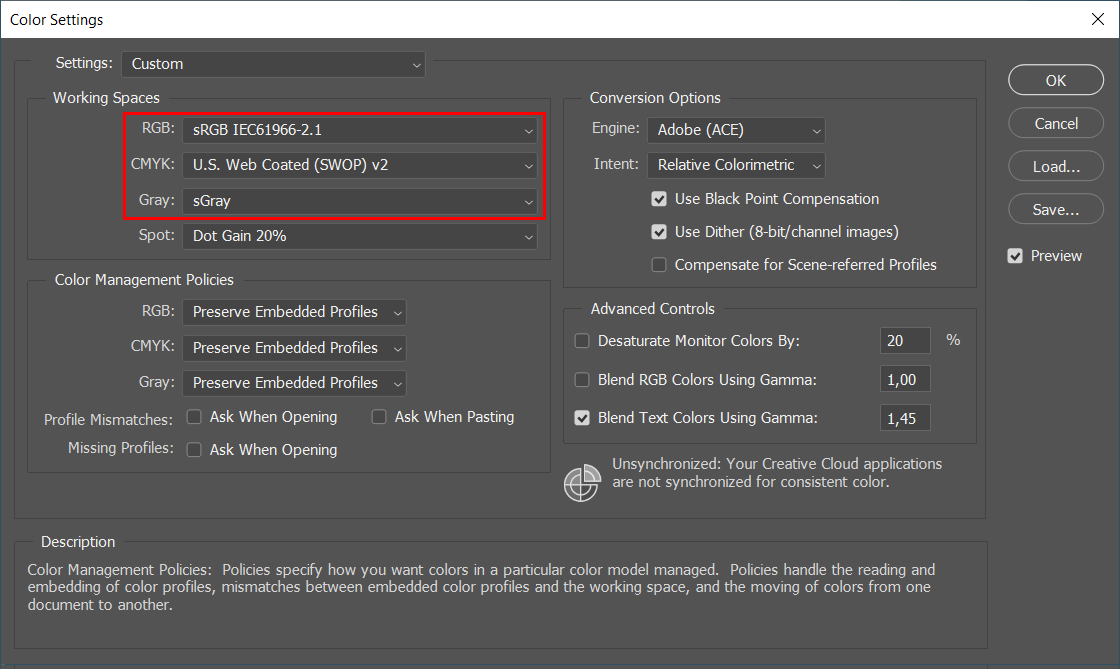
Make sure you define the correct color management settings before you start to work on the design. Use matching color and gray profiles (i.e. sRGB and sGray) in order to properly translate the color values to the expected gray levels. That way you can be sure that RGB (128:128:128) corresponds with 50 percent of the maximum elevation.
When you create your design using multiple computers, make sure you always use the same color management settings (working spaces, color management policies, et cetera) on all computers.
Do not change the color management settings anymore after you have finalized the elevation map. Changing the color management settings affects the gray levels and thus the geometry of the elevation.
Go to [Edit]-[Color settings] and change the color settings if necessary.
|
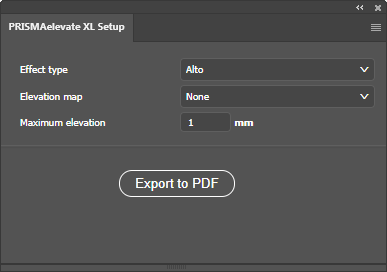
[Effect type] |
Select the [Effect type]. Alto
To print the default or the White option, the corresponding media profile must be selected in ONYX. Alto-Plus
To print the default or the Mold option, the corresponding media profile must be selected in ONYX. Brila
|
|
[Elevation map] |
Select the name of the Group / Layer that defines the elevation map. The elevation map is a grayscale map, where white areas correspond with no elevation and black areas correspond with maximum elevation. |
|
[Maximum elevation] |
Select the maximum elevation of your design. You can set the maximum lower, not higher. The color black in the elevation map represents the maximum elevation that is set in this panel. |
|
[White undercoat] (Optional) (For Brila only) |
Select the name of the layer that defines the white undercoat. The white undercoat is a layer of white ink which isolates the media from the color layer. For Alto and Alto-Plus a white isolation layer is printed automatically between the elevation and the color layer. Only the areas in your design that have both fully transparent colors and fully transparent elevation will have no white isolation layer. |
|
1. |
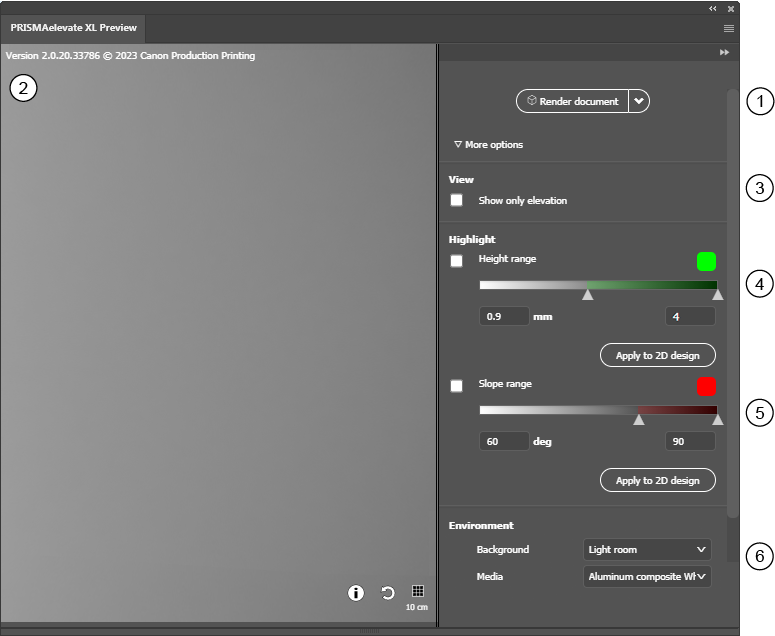
[Render document] |
To generate or update the 3D preview of your elevated artwork you can select one of the following options:
|
|
|
2. |
Preview window |
A 3D preview of your elevated artwork. You can rotate, shift, or zoom in and out on the preview as follows.
|
|
|
3. |
[Show only elevation] |
Tick the checkbox to show only the elevation in your design. |
|
|
4. |
[Highlight] [Height range] |
Tick the checkbox to highlight areas with a specific height range tick the checkbox. |
|
|
5. |
[Highlight] [Slope range] |
Tick the checkbox to highlight areas with a specific height. To change the height range you can adjust the range values or drag the ruler in the correct position. This feature is particularly useful to identify isolated high pixels that can result in unnecessary extra print time. Also the (grey) elevation layer can be visible on the edges when slopes are to steep. |
|
|
[Apply to 2D design] |
When you click on [Apply to 2D design], a separate group /layer with the highlighted information is added to your design. This layer group will not become a part of your final design. 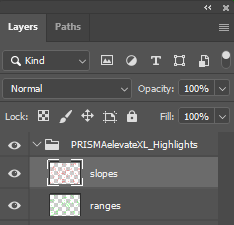
|
||
|
6. |
[Environment] |
The environment section allows you to choose a different background for your artwork and to select a specific media type.
|
|

|
Refresh button |
||

|
Click on the info button for information on the elevation in your design. 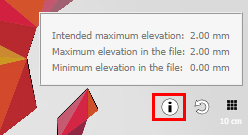
|
||