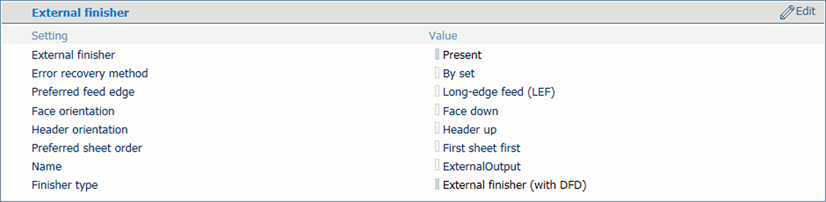
An external finisher is made by an external company and is supported by the printer.
|
When you want to |
Solution |
|---|---|
|
Go to the external finisher settings |
|
|
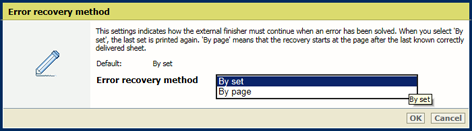
Define how to continue when an error in the finisher was solved |
|
|
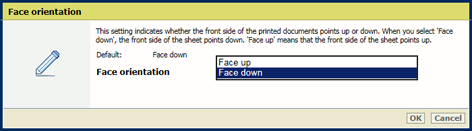
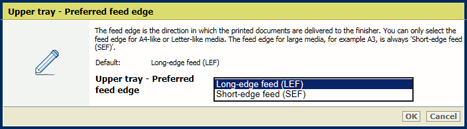
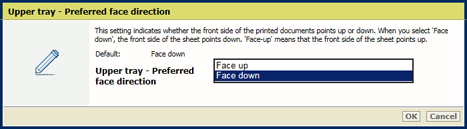
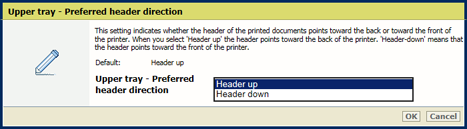
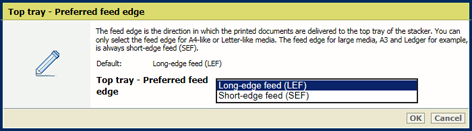
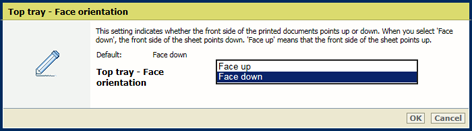
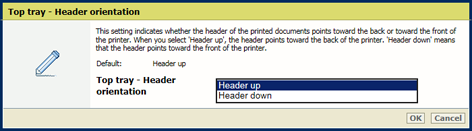
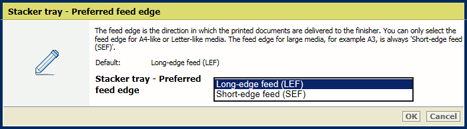
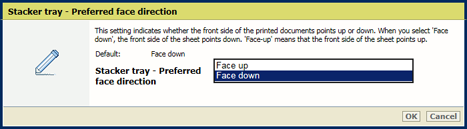
Define the default sheet orientation in the available output trays |
|
|
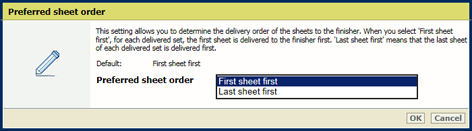
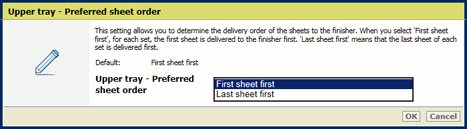
Define the default sheet order in the available output trays |
|
|
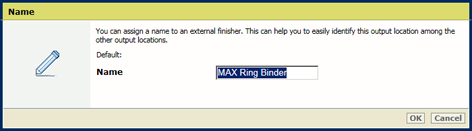
Define a meaningful name for the external finisher |
The name of the external finisher is visible in the job properties. Open the job properties and go to: . |
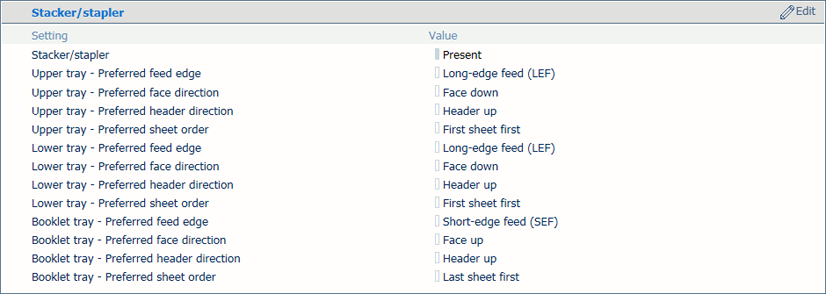 Stacker / stapler settings
|
When you want to |
Solution |
|---|---|
|
Go to the stacker / stapler settings |
|
|
Define the default sheet orientation in the available output trays |
|
|
Define the default sheet order in the available output trays |
|
There can be one or two high capacity stackers.
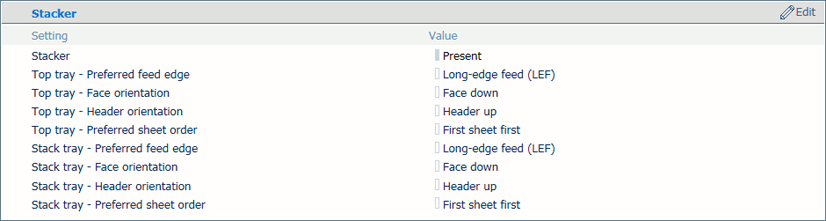 High capacity stacker settings
|
When you want to |
Solution |
|---|---|
|
Go to the high capacity stacker settings |
|
|
Define the default sheet orientation in the available output trays |
|
|
Define the default sheet order in the available output trays |
|
|
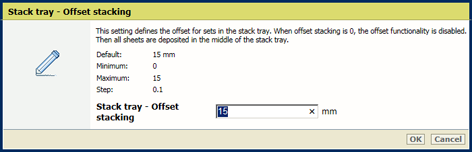
Define default offset stacking in the stack tray |
|
 Perfect Binder settings
|
When you want to |
Solution |
|---|---|
|
Go to the Perfect Binder settings |
|
|
Define the default sheet orientation in the available output trays |
|
|
Define the default sheet order in the available output trays |
|