
This topic contains the following instructions.
Go to the IPDS setting
Define the IPDS settings
Define the default image shift settings
Define the colour management settings
Define the PDF settings
Define the tray-to-tray mapping
Define the tray-to-media mapping
Define the paper tray linking
Define the colour stations
Open the Settings Editor and go to: .

 IPDS settings
|
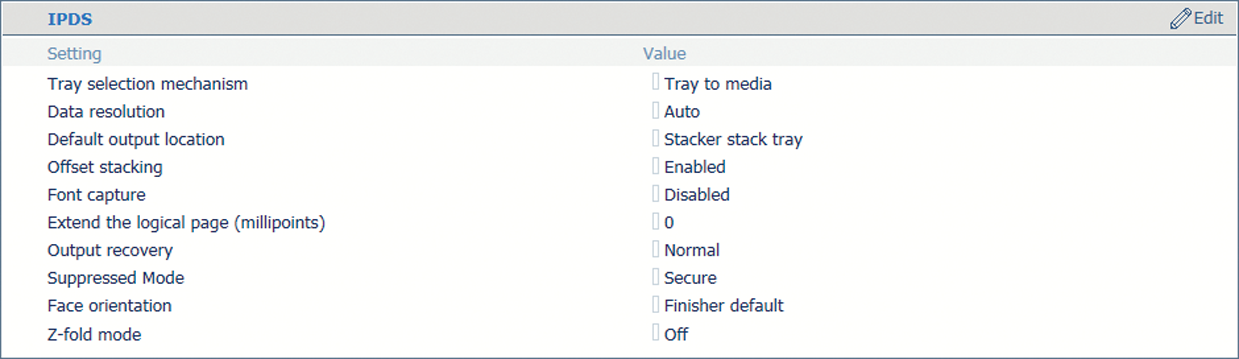
[IPDS] attributes |
Description |
|---|---|
|
[Tray selection mechanism] |
There are two modes: [Tray to tray] and [Tray to media] Below this table the two modes are described. |
|
[Data resolution] |
Specify the resolution of the bitmaps the printer can accept. |
|
[Default output tray] |
When the output location is not indicated in the data stream, the printer uses this default value. |
|
[Offset stacking] |
Indicate if you want to use offset stacking for the jobs that use this setup. |
|
[Font capture] |
Indicate if fonts can be captured from jobs for later reference. This setting also defines if captured or installed resources can be selected at a later moment. |
|
[Extend the logical page (millipoints)] |
When you want to print with a slightly larger page size, you can increase the logical page size with the entered number of millipoints (unit of angle measurement). |
|
[Output recovery] [Suppressed Mode] |
Adjust the error recovery method to keep the printed output according to the original source. First select [Suppressed], and then use the [Suppressed Mode] mode to select [Secure].
|
|
[Face orientation] |
Define the default delivery orientation in the output location: [Face up] or [Face down]. |
|
[Z-fold mode] |
When a mixed-size set must both be Z-folded and stapled. |
 Image shift settings
|
Setup attributes |
Description |
|---|---|
|
[Image shift in feed direction of side 1] [Image shift in cross-feed direction of side 1] |
Use these attributes to define the image shift. When you use pre-printed media with marked areas for specific text, misalignments can occur. Also use this attribute to better align variable data on pages, such as names or addresses. There are attributes for the feed direction and the cross-feed direction in combination with the sheet side. You can also adjust the image shift on the control panel. |
 Colour management settings
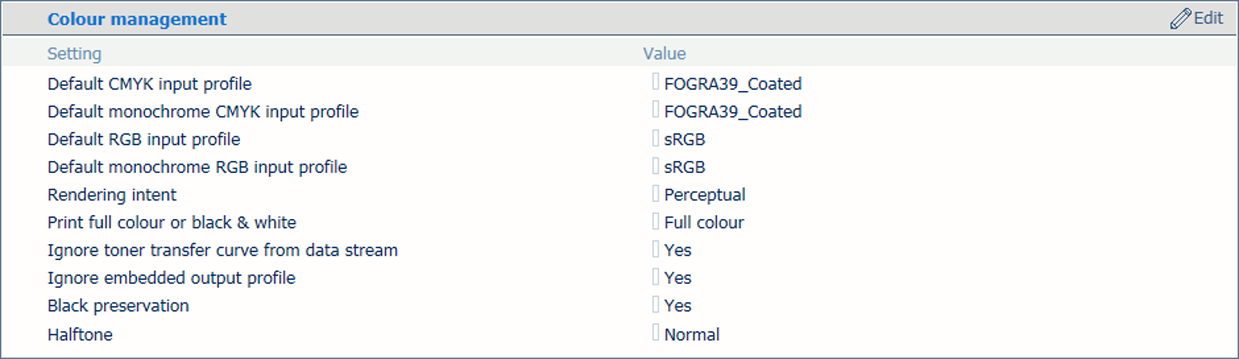
|
Setup attributes |
Description |
|---|---|
|
[Default CMYK input profile] [Default monochrome CMYK input profile] [Default RGB input profile] [Default monochrome RGB input profile] |
Select one of the configured input profiles per colour space. |
|
[Rendering intent] |
The selected default rendering intent is only used for jobs where no rendering intents and input profiles are specified. |
|
[Print full colour or black & white] |
Indicate if printing occurs in black & white or full colour. |
|
[Ignore toner transfer curve from data stream] |
The standard behaviour is to interpret and use the data from the data stream. Indicate if you want that the printer ignores the tone transfer curves which are included in the data stream. |
|
[Ignore embedded output profile] |
The standard behaviour is to overrule the embedded output profile. Indicate if you want to use the embedded output profile. |
|
[Black preservation] |
Indicate if you want to apply pure black preservation when possible. Pure black preservation means that the colour black is composed of 100% K ink or toner. When pure black preservation is not possible or disabled, the colour black is composed of a mixture of C, M, Y and K toner or ink. This option only affects IPDS, PDF text and PDF lines. It has no effect upon RGB images. |
|
[Halftone] |
Indicate the halftone. |
 PDF settings
|
PDF attributes |
Description |
|---|---|
|
[PDF spot colour 'All'] |
PDF data have a number of pre-defined spot colour names. The colour name 'All' means that the RIP uses a 100% coverage of all the available colours. The colour 'All' is intended for alignment marks. You can force the RIP to only use 100% black. Note that if the printer supports a separate MICR station, the colour name 'All' implies that MICR pixels are used as well. |
|
[PDF enable cache] |
Indicate if you want to use the PDF cache to automatically identify and store objects that are used more than once in the job. |
|
[PDF overprint simulation] |
Indicate if simulation of overprinting of all colours must be applied. If this setting is disabled, the colours on top will knock out all underlying colours. |
You link logical trays to physical paper trays. The printer uses media that are assigned to these physical paper trays. The schedule shows the media the job uses.
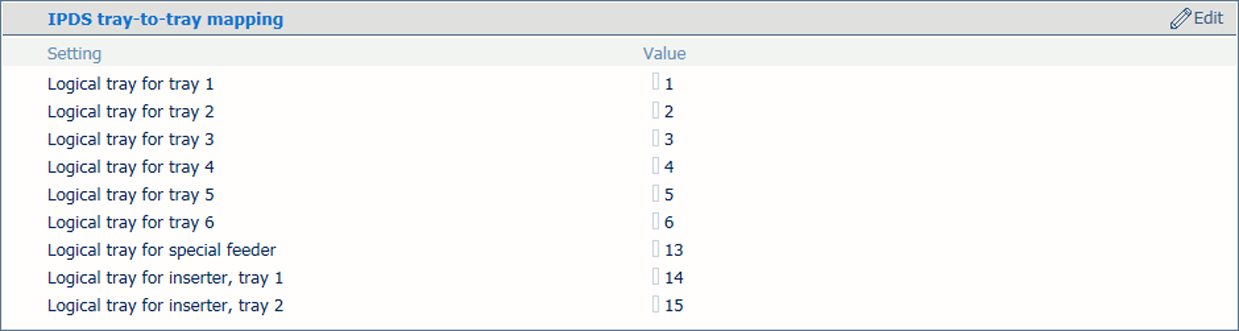 Tray selection for tray-to-tray mode
You link logical trays (indicated by a number from 1 to 36) to media of the media catalogue. The printer maps the logical tray to the physical paper trays that hold these media. The schedule shows the media the job uses.
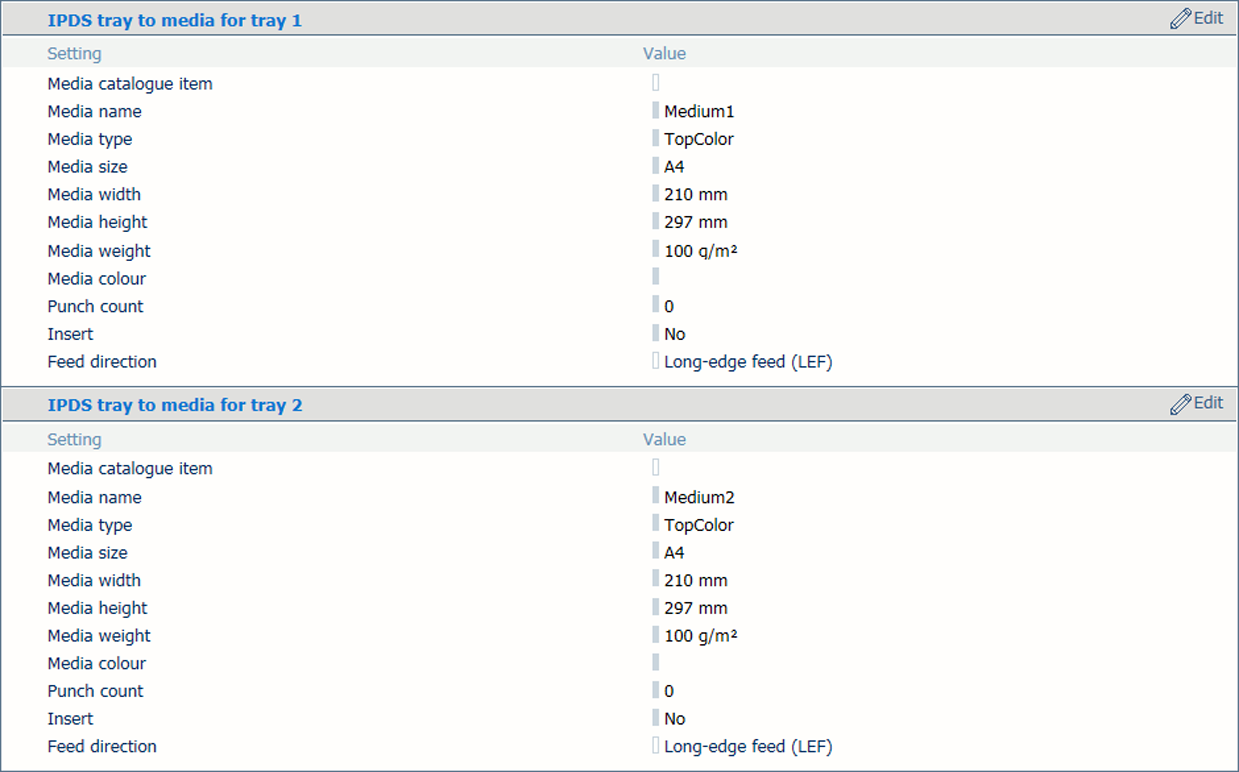 Media selection for tray-to-media mode
Use the [Media catalogue item] attribute to select media from the media catalogue.
Use the [Feed direction] attribute to select the feed direction of the media.
For both tray mapping modes physical trays that contain the same media are automatically linked. This means that when the referred tray is empty, printing continues from an other tray that holds the same media.
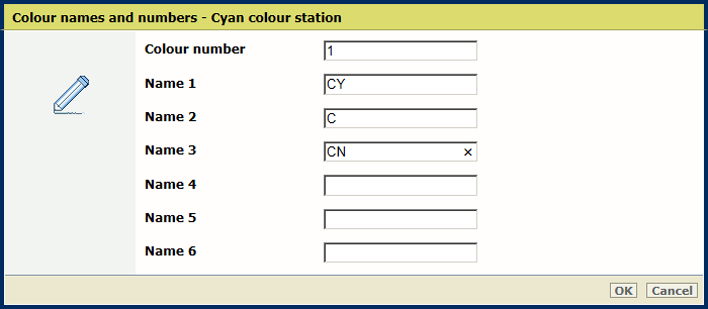
If required you can define your own simple names for the colours in your application or names from one of the colour naming schemes used in the graphics industry.
|
Colour station definition |
Description |
|---|---|
|
[Colour number] |
Enter a unique value (1-254) to specify every colour station except the K station, to enable a colour selection by a number. The Black colour station has the value of zero and cannot be edited. The other default colour numbers are:
|
|
Colour station name |
Names are encoded by UTF-16 Unicode. For every colour station six names can be specified, to enable a colour selection by a name. For Cyan, Magenta and Yellow station, the default list of colour names is empty. For the MICR colour station, the default list of colour names is not empty, but contains the names 'MICR', 'micr' and 'Micr'. The names 'Gray', 'Cyan', 'Magenta ', 'Yellow ', 'Black ', 'All ', 'None' are reserved for PDF and are not allowed. |