
Printheads are automatically cleaned with wet tissue ribbon according to a cleaning scheme. A roll of tissue ribbon is enclosed in a cassette. For each ink color and the ColorGrip liquid two cassettes with ribbon are available. The cassettes for the ColorGrip are smaller than the cassettes for the ink color. (Learn about printhead maintenance)
When one or more tissue ribbons are nearly used up, the dashboard indicates that the tissue cassettes must be replaced. (Replace the tissue cassettes)
Replace the used tissue ribbons soon after you replace the tissue cassettes, so that you keep a stock of cassettes with new tissue ribbons.
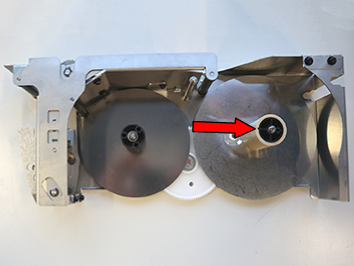
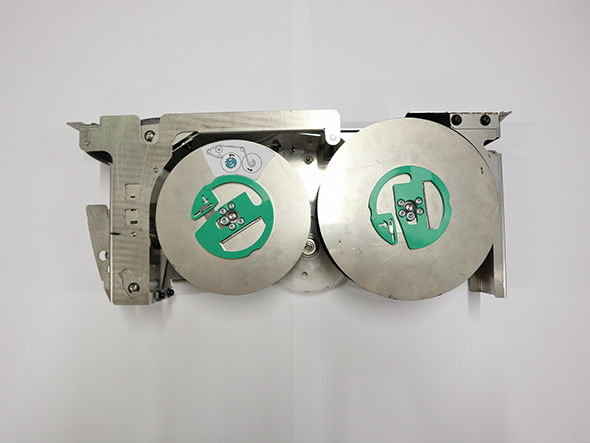 Tissue cassette D4
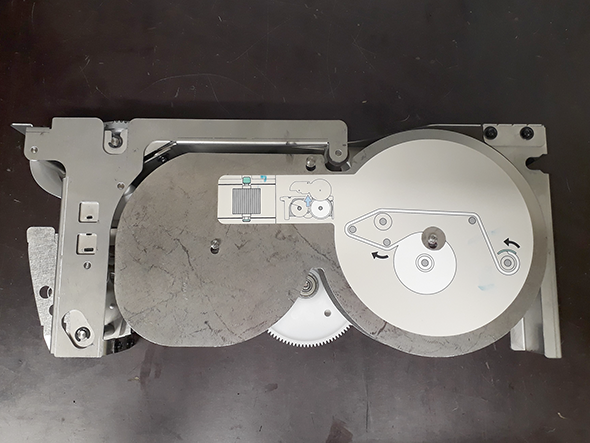 Tissue cassette D3
In order to keep your hands clean, it is advised to use nitrile gloves when you work with ink, ColorGrip, PML, or SU70. For details see the related material safety data sheets. (Learn about printer maintenance)
Inks, ColorGrip PML and/or SU70 contain 1,2-Benzisothiazol-3(2H)-one. From the point of view of occupational health and safety, it is not recommended that people who are sensitive to chemicals (e.g., people with asthma) work with ink or chemicals.
You need new tissue ribbons
You need cleaning cloths (Alphawipe pads Texwipe TX1004).
You need a bottle with process maintenance liquid (PML).
You need a large sheet of paper.
Take the cardboard box with tissue cassettes with tissue ribbons that are used up.
The instruction video for this maintenance action is available, see Replace a tissue ribbon.
|
Action |
Tissue cassette D4 |
Tissue cassette D3 |
|
|---|---|---|---|
|
1 |
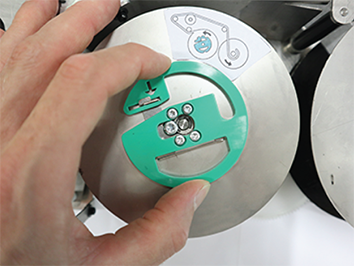
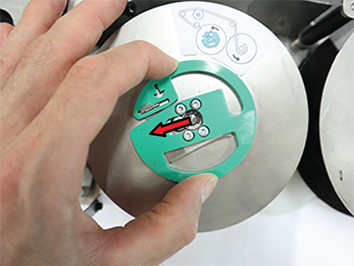
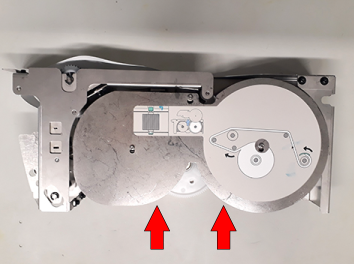
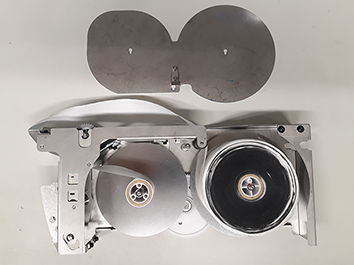
Tissue cassette D4 Remove the two iron covers on the cassette.
Tissue cassette D3 Dismantle the iron plate on the flat side of the cassette.
|
|
|
|
2 |
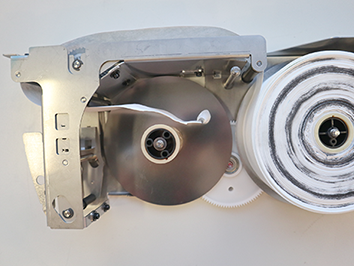
Remove the left-over tissue ribbon from the left side tissue ribbon holder, leave the left tissue ribbon core on the holder. |
|
|
|
3 |
Remove the used up tissue ribbon. Do not throw away the empty core on the left-hand tissue ribbon holder. |

|
|
|
4 |
Take off the empty core of the tissue ribbon from the tissue ribbon holder on the left-hand side and place it on the right-hand side tissue ribbon holder (mind the keying). |
|
|
|
5 |
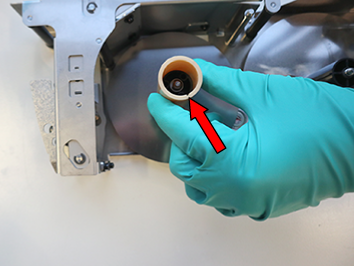
Clean the cassette. Moisten a cleaning cloth with PML and clean the entire cassette and the top roller thoroughly. Pay special attention to the areas in between the teeth of the top roller. |
||
|
6 |
Take a new tissue ribbon and open it (do not completely remove the sticker, leave it attached to the end of the tissue ribbon) |
||
|
7 |
Place the new tissue ribbon onto the tissue ribbon holder on the left-hand side of the cassette (mind the keying). |
||
|
8 |
Attach the end of the new tissue ribbon to the empty core of the tissue ribbon holder on the right-hand side of the cassette with the original sticker.
|

|
|
|
9 |
Rotate the core 2 revolutions. |
||
|
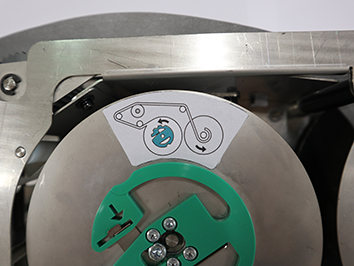
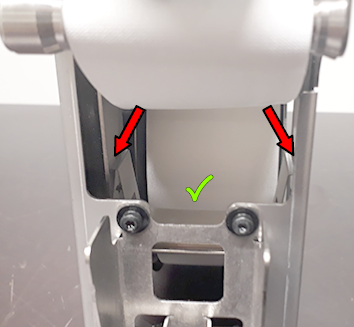
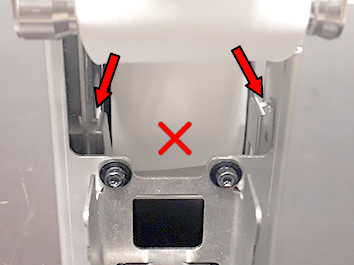
While you guide the tissue ribbon underneath and over the top roller, make sure to keep the spring leaf (see picture for location) in the correct position. If it gets loose, return it to the correct position. |
|
||
|
10 |
Rotate the empty holder one revolution to tighten the tissue ribbon. |

|
|
|
Tissue cassette D4 |
Tissue cassette D3 |
||
|
11 |
Tissue cassette D4 Return the two iron covers to the cassette.
Tissue cassette D3 Return the iron cover to the cassette.
|
|
|
|
12 |
Repeat step 1 to 11 to replace the other used tissue ribbons. |
||
Dispose of the used tissue ribbons.