
You have to enable the JDF print path on the Fiery Print Server and configure its paper catalog as JDF based. Then, PRISMAprepare can send PDF files with a JDF ticket to the Fiery Print Server using the JMF network protocol.
Now, PRISMAprepare can also download the media catalogue from the printer. PRISMAprepare compares the media used in the document with the media catalogue from the printer. When possible, the media in the document is mapped automatically to media from the printer catalogue. You have to map the media manually if the automatic media mapping is not correct or not possible. See Map the media manually in PRISMAprepare or on the Fiery Print Server.
To solve any problems connecting to the Fiery Print Server, see How to troubleshoot the communication between PRISMAprepare and the Fiery Print Server.
JDF settings
Connect to the Fiery Print Server and log in as administrator.
Click tab "Device Center", then click tab "General".
Click button "Server Configuration"
Click "Job Submission - JDF Settings".
Enable setting "Enable JDF". You can find this setting in the top of the dialogue.
Disable setting "Override JDF job with the above settings".
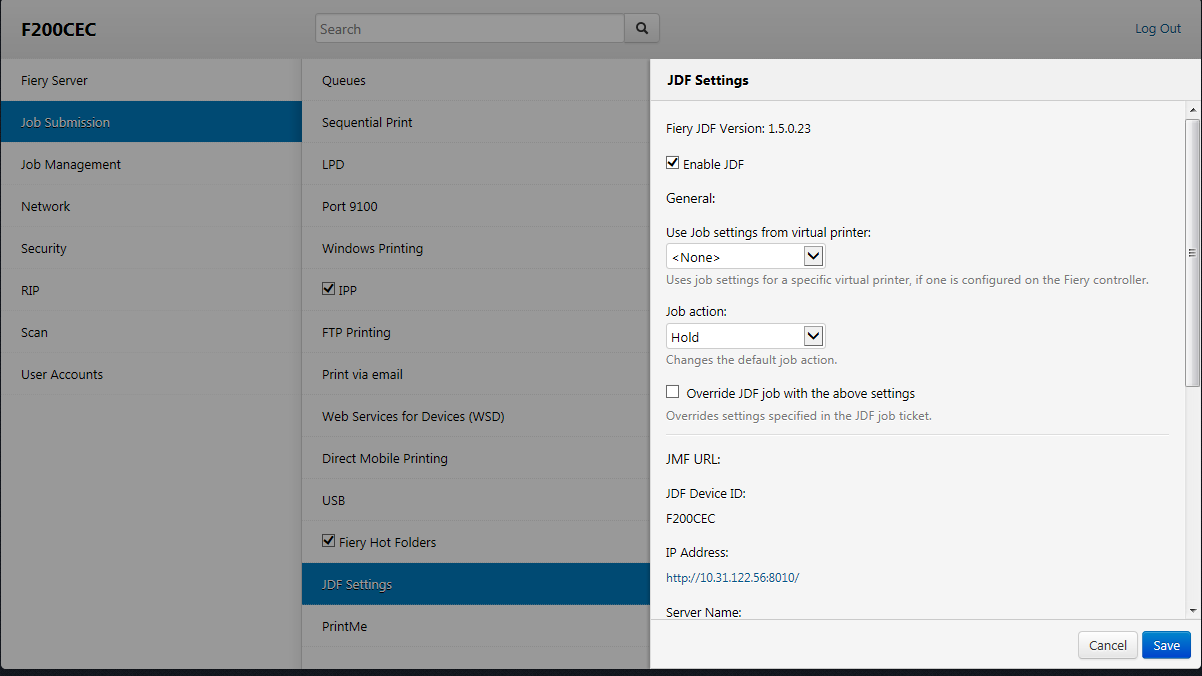
Click "Save".
Paper catalog
Click tab "Job Center", then click "Paper Catalog".

Click button "Settings...".
Select value "JDF based" for option "Specifications to use".
Click "Close".
You have enabled JDF/JMF on the Fiery Print Server and configured the paper catalogue as JDF based. PRISMAprepare can now import the media catalogue of the printer for automatic media mapping.