
Click the arrow at the right of the [Mark on] button and select [Mark colour].
The function is also available in the menu at .
The [Mark pages] dialogue opens and closes. In the preview and in the structure view, all pages that contain colour have a mark. The mark is an icon of a blue sticky note:
 .
.
A [Mark colour advanced...] is also available in the [Pages] workspace. This option allows you for instance to automatically exclude pages that display only blue hyperlinks, exclude pages that contain almost gray images or exclude a particular area on the page, when searching for colour.
From the menu, select .
From the menu select . In all colour pages the bleed tabs disappear, so there is no interference with the images.
Go to the [Production] workspace.
In the [Media] tab, two media types are displayed. The sheets with the colour pages marked with the blue sticky note icon and the sheets with the B&W pages. Both are selected for printing.
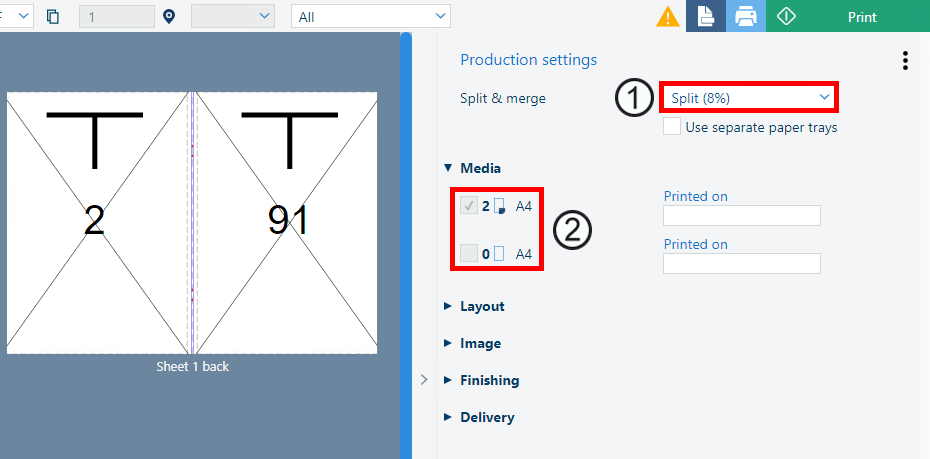
For option [Split & merge], select [Split]. In the [Media] tab, the sheets with the colour pages stay selected; the sheets with the B&W pages are not selected.
Select split.
The two marked colour sheets are printed on a colour machine
Select a colour printer. Click [Print]. The colour pages are sent to the printer.
For option [Split & merge], select [Merge]. In the [Media] tab, all sheets are selected, but the sheets with the colour pages are defined as inserts for the B&W printer.
Select a B&W printer. Click [Print]. The document is sent to the printer.
In this case, all colour sheets will be inserted from one insert tray as cyclic media. With the [Use separate paper trays] option a separate tray for each colour sheet can be defined.
Save the file in the 'Participants' folder on the desktop with the name Scenario_23.pdf.