
Creating a PDF file with a JDF ticket is the best option if you want to:
Have the best color reproduction on a PRISMAsync driven color engine
Avoid unnecessary PostScript to PDF conversions on the PRISMAsync Print Server
Have more media flexibility (no need to change PPD files)
Use an optimized way of printing a high amount of records (PDF-VT)
If you want to know more about JDF please go to the CIP4 website (https://cip4.org/)
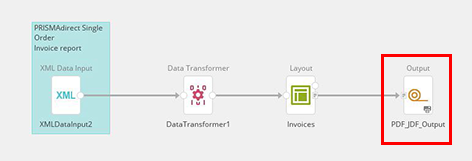 Create an output module for PDF
Open the module and fill the sheet names from the layout

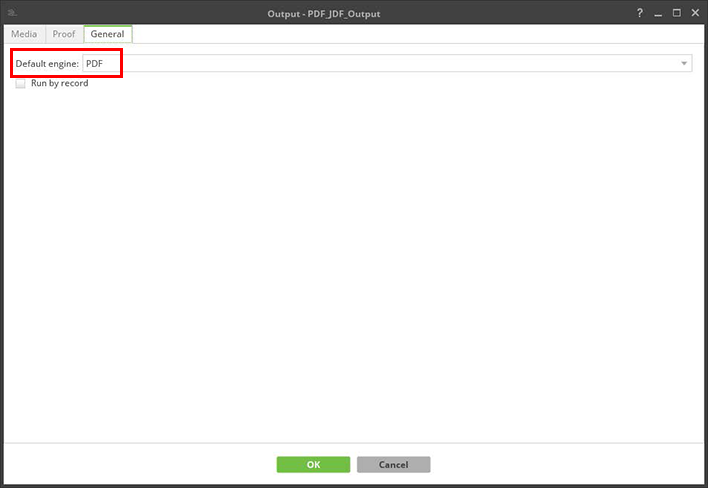
Create a new device profile and leave the settings untouched. Set the default engine in the "General" tab to PDF.
The PDF creation part is now ready. The JDF creation is part of the production settings.
In order to create a JDF job ticket you need to configure the production settings.
By pressing F5 within the Inspire application the production settings will be opened.
See below the settings within the production environment
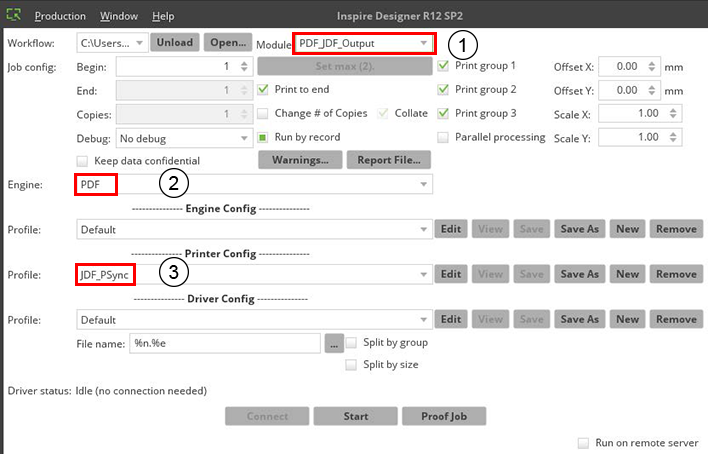
The PDF output module.
The PDF engine to generate the content.
The JDF configuration profile.
Select the correct output module you want to define the production settings for.
In this example choose the PDF output module. Set the Engine to PDF.
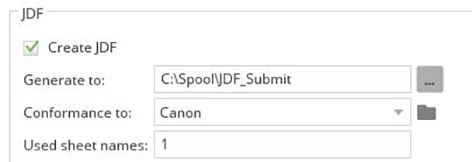
In the "Printer Config" click the "New" button for creating a new profile.
Give the profile a name and click the "Edit" button. The following screen will appear:
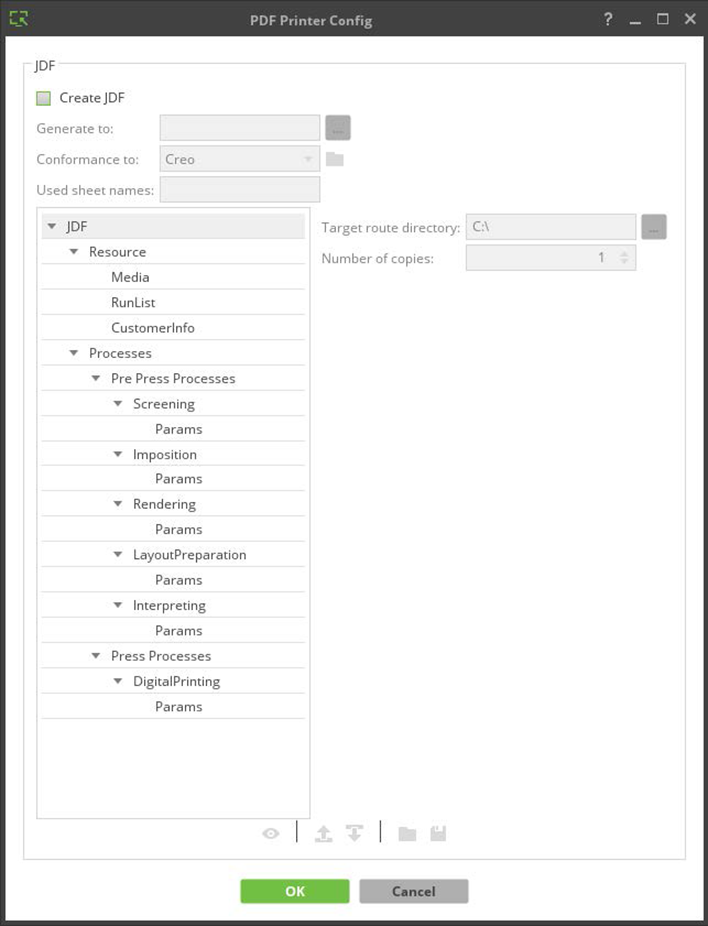
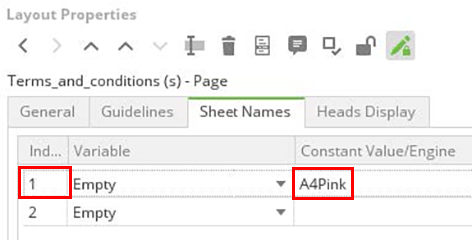
Select "Create JDF" and set the conformance to Canon. In our example the "Used sheet names" level is 1.
The sheet name level is defined in the "layout properties" of the workflow.
For testing purposes you can fill a path where the result is written to after running the production.
This is how the basic settings could look like:
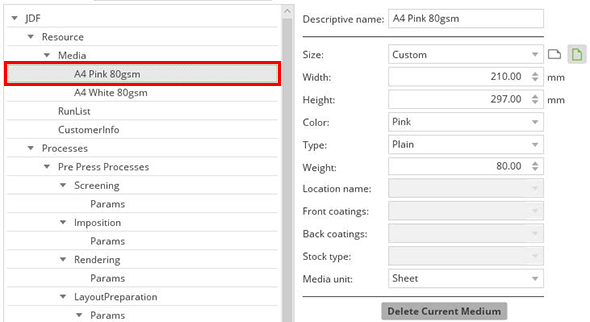
After setting these basic settings we need to add the media in several parts of the JDF ticket.
First we have to add media in the resource part of the JDF tree structure.
Adding the Pink A4 media:
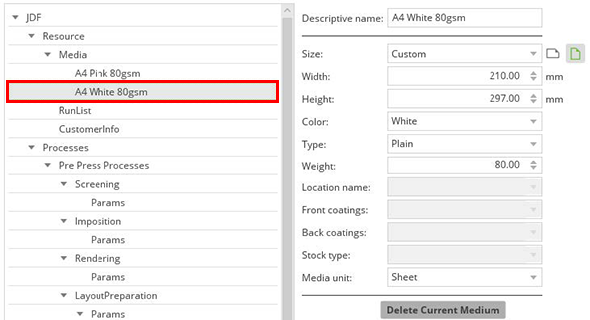
Adding the White A4 media:
We need to create a link from the sheet names to the media definitions. We will have to do this for layout settings and printing settings.
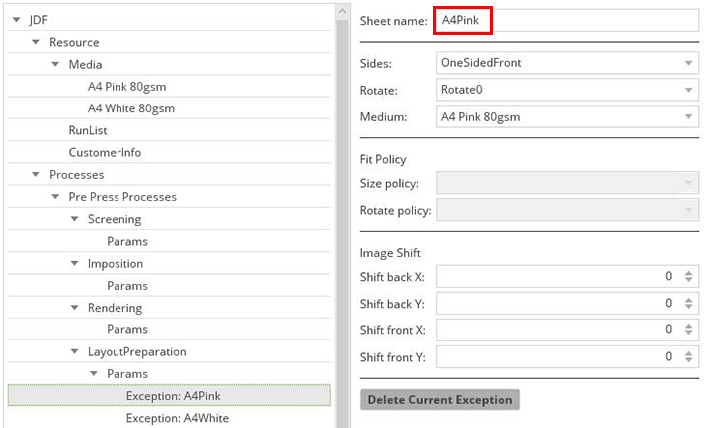
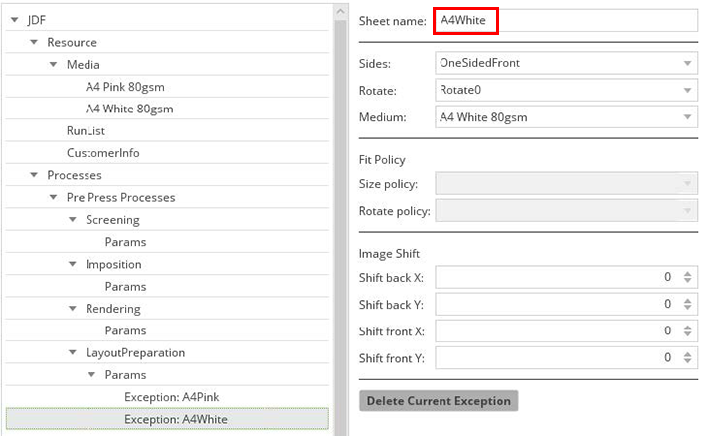
First we start with creating exceptions for the LayoutPreparation parameters.
We must add an exception for both sheet names and set the appropriate layout settings.
In this example we will print simplex and use the medium we created earlier.
The A4Pink sheet name:
The A4White sheet name:
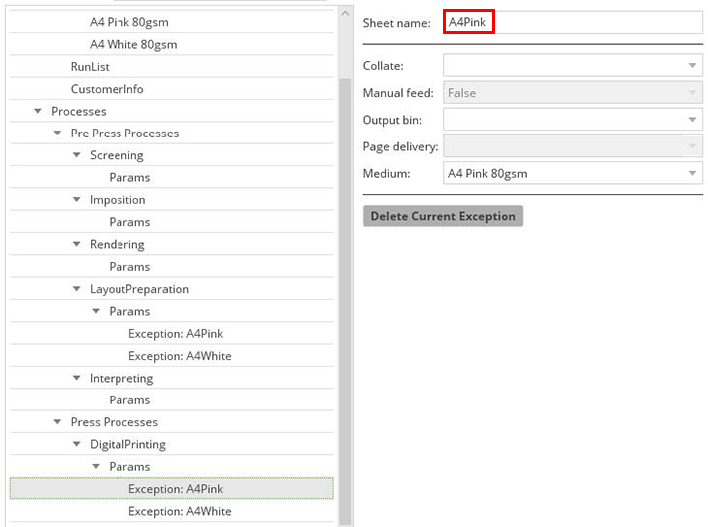
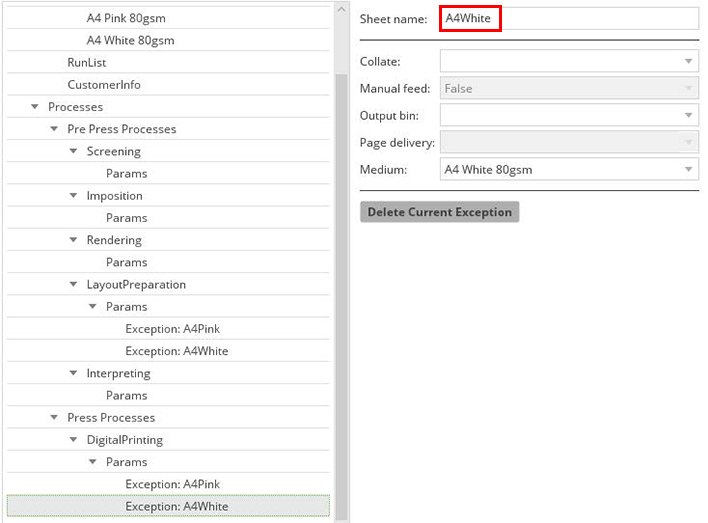
For the DigitalPrinting parameters we must do the same. In the example we only link to the medium we already created.
Save the PDF "Printer config" after creating all the right settings for the JDF creation.
Click "Start" in the production window to create the output file to the folder specified in the JDF profile.
The PDF engine can be setup to generate PDF-VT
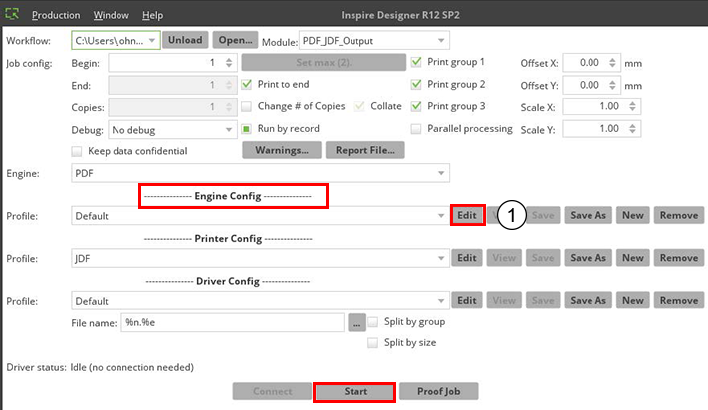
Please note that the PDF engine by default creates a standard PDF.
If you want to create a PDF with a different conformance level you need to edit the "Engine Config" (see the image below).

After running the production stage within the Inspire application one output file is created.
This output file is a concatenation of the JDF ticket and the PDF content.
This method is similar to the output of the printer drivers of the PRISMAsync driven products.
The concatenated output file can directly be printed via LPR or Socket.
When using the JDF ticket within Inspire not all print options are available like with the PostScript method described in chapter 7.
The PPD is offering more printing and finishing options than the JDF ticket method.
However it is possible to add an optional Automated Workflow when sending jobs via LPD to a certain queue.
Within an Automated Workflow a lot of settings can be used to optimize a certain print application.
It is also possible to use XSLT to transform the JDF ticket coming from Inspire.