
The sensing unit can automatically perform image position (media registration) and color density adjustments during printing. This reduces registration errors and color drift in long-run-jobs, which results in high-quality prints. The adjustments can be done in two modes: continuous or interrupt mode. In continuous mode, the printer prints patterns in the trim areas of every sheet of the print job. The sensing unit automatically scans and measures the patterns, any deviations are corrected automatically by the system to ensure consistency in the print quality. In interrupt mode, measurement charts are printed at an interval. The measurement charts are purged in the sensing unit tray. The sensing unit automatically scans and measures the measurement charts, any deviations are corrected automatically by the system to ensure consistency in the print quality.
In interrupt mode, when the sensing unit tray is full, the user job continues, but measurement charts are not printed any more and the operator does not get feedback.
Cyclic and colored media are not supported by the sensing unit.
The default settings are installed in the Settings Editor. The sensing unit adjustment settings can also be changed on the control panel and in PRISMAsync Remote Manager at the job settings and Automated Workflow.
Open the Settings Editor and go to: .

Go to the [Basic] section.
Use the [Sensing unit adjustments] setting to select which automatic adjustments the sensing unit performs.
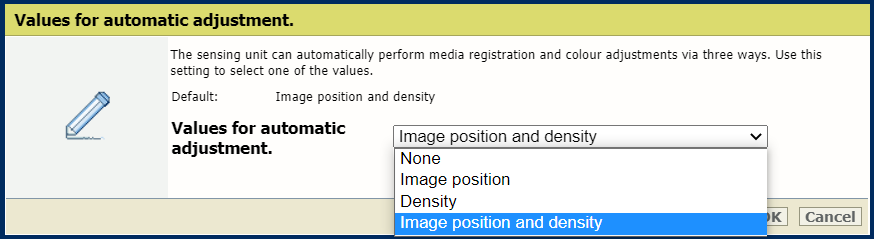
Click [OK].
Use the [Modes for automatic adjustment] to select the mode for the automatic adjustments.
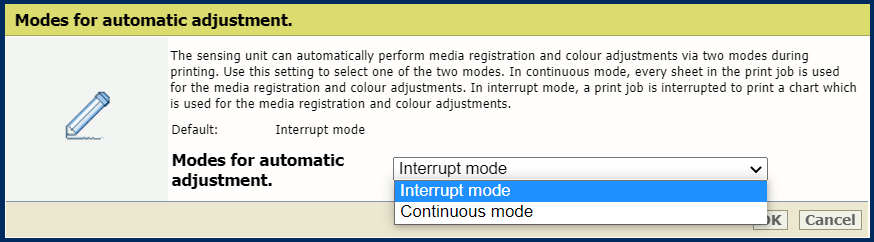
Click [OK].
In case you use interrupt mode, indicate the interval. Use the [Interval between automatic adjustments] setting to set the preferred interval (this setting is only available in the Setting Editor).
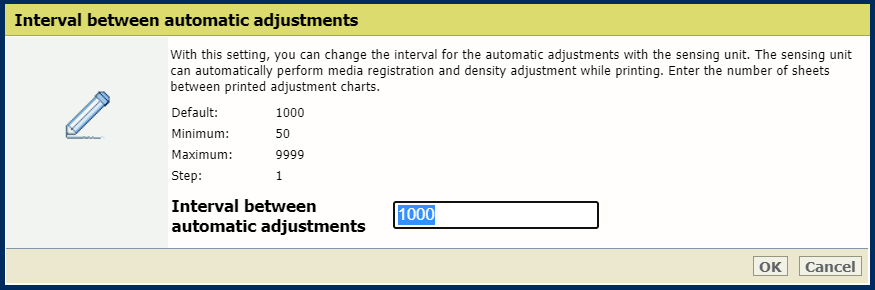
Click [OK].