In order to print white applications, the media profile needs to be a CMYKSS profile with white print modes. These media profiles can be downloaded from graphiPLAZA and Mediaguide.cpp.canon.
A media profile with white print modes can also be duplicated from a generic media, or created from scratch using the profiling documentation from the Colorado M-series. This documentation can be found on graphiPLAZA and on the downloads website https://downloads.cpp.canon under the product name.
Check the media profile and print mode at the following location:
Go to the media manager, select the media profile and the information regarding spot colors will be provided on the right. If the media is set up correctly, it will show CMYKSS at ink configuration and 2 defined spots.

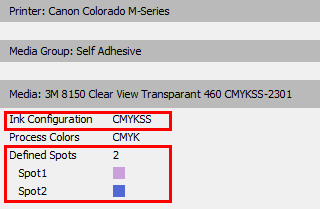
It is possible that different colors for Spot1/ White and Spot2/ FLXfinish+ are used per media profile. The media profile is set properly as long as there are two spots defined. The colors used for Spot1/ White and Spot2/FLXfinish+ is a matter of preference.
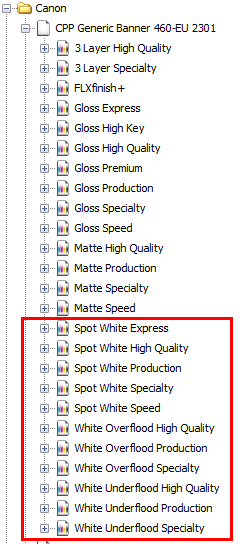
To check if the white print modes are available, click on + on the left-hand side of your media profile to expand the list and view the print modes.
In order to verify if the PDF file is prepared correctly, you need to check the output and format settings.
Open the PDF file in Job Editor.
Select the correct media profile and print mode.
When the file has been made up for White ink:
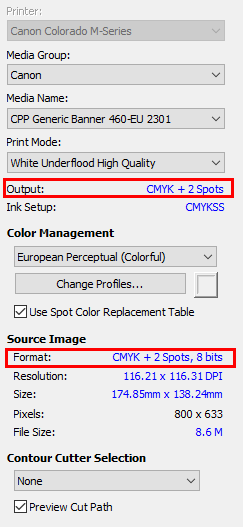
[Output] should equal [CMYK + 2 spots].
[Format] in the [Source Image] section should equal [CMYK + 2 spots].
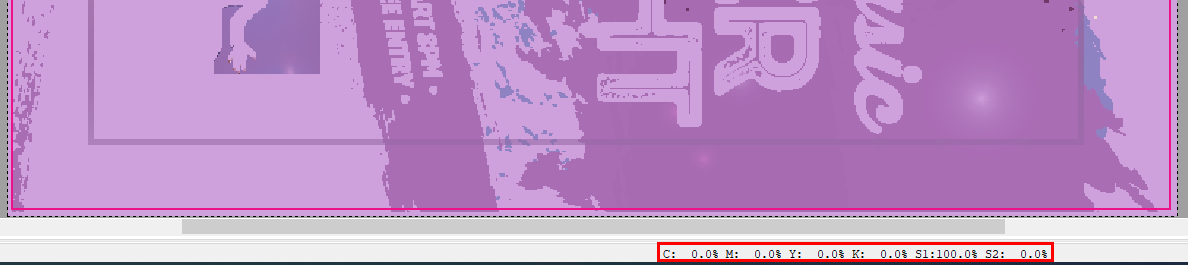
To check that the White part will be printed, hover the mouse over an area in the image that should be printed in White. Check at the bottom of the Job Editor whether there is a CMYK value and Spot1 value. If that is the case, the PDF file is made up correctly and will be printed in white when using the white print modes.
You can add a white layer to a print file that only contains CMYK data:
Open the file in Job Editor and go to the [Color Correction] tab.
Select .

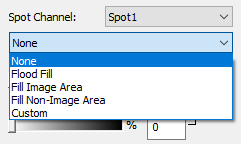
Set [Spot Channel] to Spot1 and select one of the following options from the drop-down menu:
[Flood fill] adds white to the entire print.
[Fill Image Area] adds white to all areas in the print file that have CMYK data.
[Fill Non-Image Area] adds white to all areas in the print file that have no CMYK data.