
Click the [Add files] button.
 [Add files] button
Browse to the file you want to upload.
You can also drag-and-drop one or more files on top of the [Add files] button.
The following file types are accepted for upload.
PostScript
PCL
PRN
SPL
XPIF
ZIP (must contain a PPML file type)
While files are being uploaded, the progress is displayed in the job table under the [Add files] button. You can also see the following information in the job table:
the order in which files are submitted and arrive at a print queue;
file name;
file size.
 Job table
You can find the filter field above the table at the right-hand side.
 Filter button
In the table, the name of the added file can be changed. When the file is submitted, a job with the changed name will be added to a print queue.
 Change the file name
 When you hover over a file in the table, the
 button appears at the right-hand side. When you click this button, the file will be removed from the table.
Remove added fileYou can define a number of job properties.
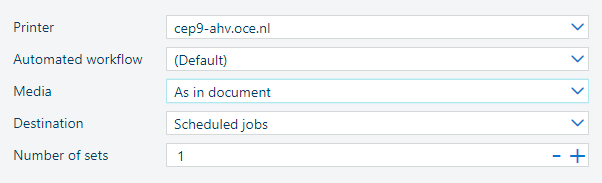 Default job properties
Use the [Printer] drop-down list to select the printer.
Use the [Automated workflow] drop-down list to select an automated workflow or to keep the (Default) automated workflow.
Select the job destination.
Click [Number of sets] to define the number of sets.
The default properties are displayed in the picture above.
Click the
 button to submit the files that you added to the table. The files will arrive as jobs to the selected printer.
While the files are being submitted, the submit button is disabled. You cannot add any files, select another printer or adjust the settings.
After all files are successfully submitted, a pop-up message is displayed.
 Successful submission
When you click the [Reset] button, all printer settings are set to default and added files are removed.
 [Reset] button
If the temporary [File submit] app is open, the [Cancel] button is displayed instead of the [Reset] button. If you click the [Cancel] button, the temporary [File submit] app is closed and no jobs are submitted.
 [Cancel] button