The printer area is located at the left side of the screen. Click on the vertical grey printer bar (4) to expand or collapse the printer area.
The printer area contains the following information:
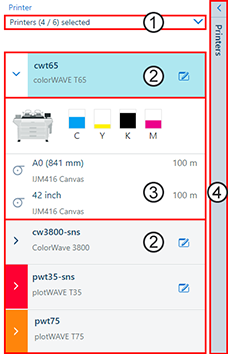
The printer drop-down list with all printers that are available for connection
The connected printers
The ink/toner and media information of the printers
Printer bar to expand or collapse the printer area
Open the printer drop-down list to display all printers that are available for connection.
Select the printers you want to connect to, deselect a printer to disconnect. When a printer is connected or disconnected by the user, a message is displayed momentarily on the bottom right-hand side of the window.
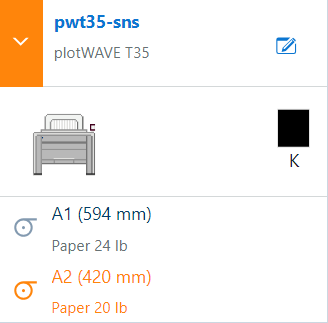
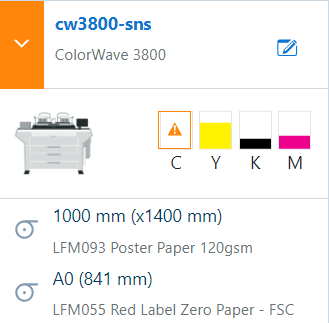
All connected printers are displayed with the printer name or IP address, the printer model, and the status.
A lock icon in front of the printer name indicates a secure HTTPS connection to that printer.
When a printer is in error, the arrow icon at the left side of the printer will be displayed in the corresponding color.
Click on a printer to make it the active printer. The active printer has a blue background color.
Drag and drop a printer into the desired position to change the order of the connected printers.
Click on the icon behind the printer name to [Open WebTools Express] or [Open Remote UI], depending on the printer model.
When a printer is in sleep mode, open WebTools Express to wake it up remotely. See Remote ON function
Default the ink/toner and media information is not displayed in the printer area.
Click on the arrow icon at the left side of the printer to open the ink/toner and media information:
the level of ink or toner available in the printer
for plotWAVE printers only the levels 'empty', 'low', and 'high' are displayed. Level 'high' is always displayed when not 'empty' or 'low'.
all loaded media
remaining media length on media rolls (depending on the printer type)
if there is an error in the ink/toner or media, the item will be displayed in the corresponding color