

The media loading procedure is the same for both the internal paper tray and paper trays of the paper module.
The internal paper tray can hold up to 1000 sheets, 80 g/m² (22 lb bond).
Each paper module can hold up to 4000 sheets, 80 g/m² (22 lb bond): 1000 sheets per tray in the two upper trays and 2000 sheets in the lower tray. The paper trays feed the media face down.
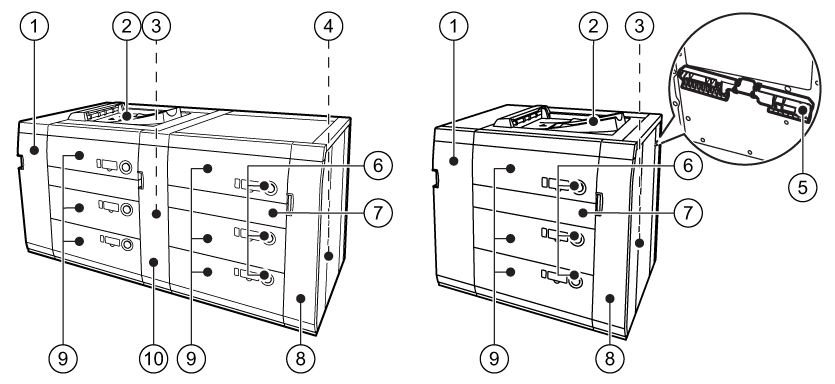 Paper modules (POD Deck-E and
Secondary POD Deck-E )
Paper modules (POD Deck-E and
Secondary POD Deck-E )|
Description paper module |
|
|---|---|
|
1 |
Cover to access the paper path when a paper jam occurs |
|
2 |
Escape tray to collect jammed media |
|
3 |
Power switch (back side) to turn on the paper module; only use once at installation. |
|
4 |
Power switch (back side) to turn on the paper module; only use once at installation. |
|
5 |
Tab paper guide (Tab Feeding Attachment-E1 ) to align tab paper in the paper trays |
|
6 |
Tray buttons to open a paper tray |
|
7 |
Cover to access the paper path when a paper jam occurs |
|
8 |
Cover to access the paper path when a paper jam occurs |
|
9 |
Paper trays to hold the media |
|
10 |
Cover to access the paper path when a paper jam occurs |
There is no sensor in the paper trays that can detect the media. After you open and close a paper tray, the printer does not change the media settings.
The lifter inside the paper trays rises and descends automatically. When you load paper, be careful not to get your fingers caught. This can cause personal injury.
When you handle paper, take care not to cut your hands at the edges of the paper.
Before you lift the inside lifter of the paper tray, for example, because you dropped something, first turn OFF the main power switch. Otherwise, this can cause a malfunction or machine damage.
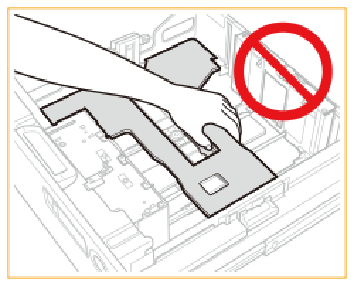
Do not hit to the left-hand paper guide when you load the media. This can cause a malfunction or machine damage.
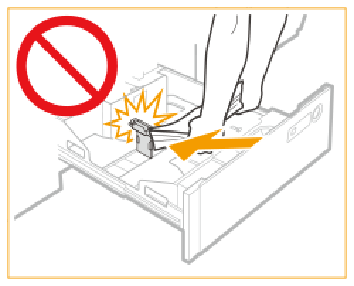
Never place paper or other objects in the empty parts of a paper tray. This can cause a paper jam.
Make sure you follow the instructions carefully. When you do not load the media correctly, a paper jam, dirty machine parts, or poor print quality can occur.
Check and prepare the media. (Check and prepare media before loading)
Awaken the printer from sleep mode if applicable.
|
Action |
||
|---|---|---|
|
1 |
There are two ways to open the paper tray.
The inside lifter automatically descends to the loading position. |
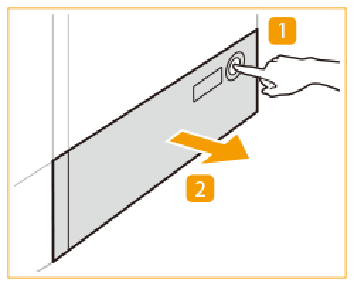
|
|
2 |
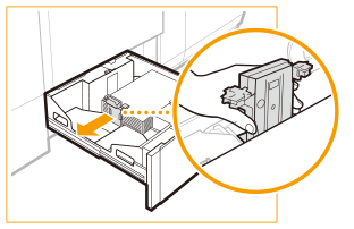
Slide the left-hand paper guide so that there is enough space to unload the media. |
|
|
3 |
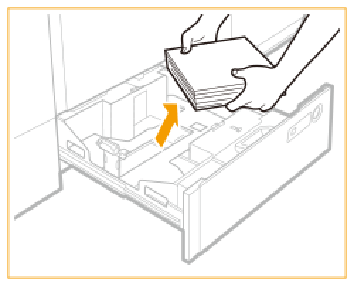
Remove the media. |
|
|
When the media size does not change, continue with step 8. Otherwise, go to step 4. |
||
|
4 |
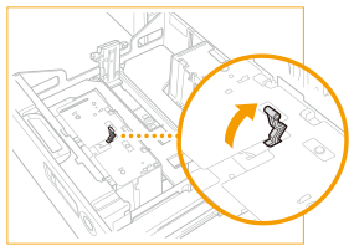
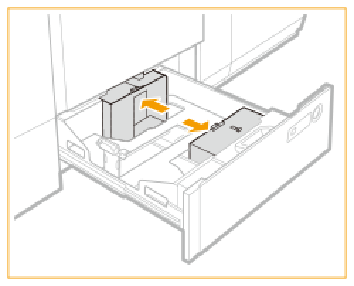
Unlock the lever and slide the front and rear paper guides so that there is enough space to load the media. |
|
|
5 |
Load a media stack of approximately 10 mm (0.4 inch). (Media specifications) |
|
|
6 |
Slide the front and rear paper guide against the media stack and lock the lever. Check the size mark for the exact alignment. (Media specifications) Adjust the paper guides precisely. This prevents a paper jam, poor print quality and dirty machine parts. |
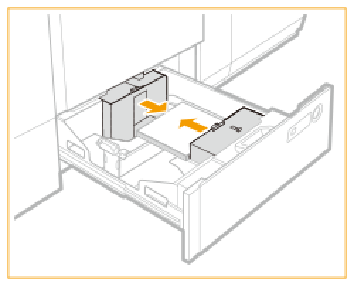
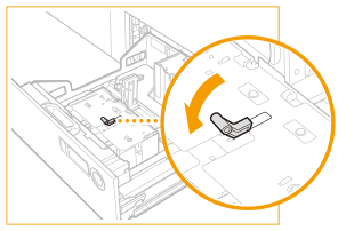
|
|
7 |
Slide the left-hand paper guide towards the media stack. |
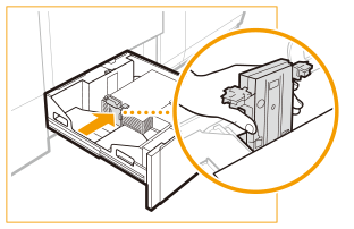
|
|
8 |
Place the media stack against the right site of the paper tray. |
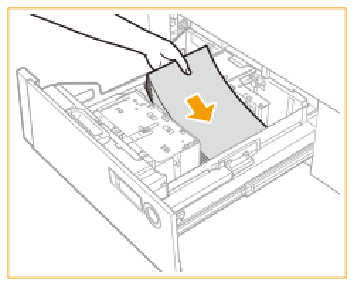
|
|
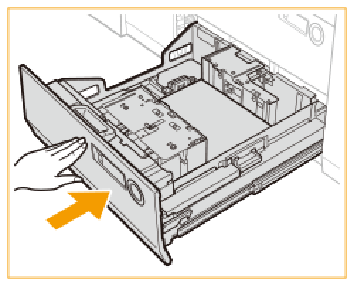
9 |
Gently close the paper tray and make sure it clicks into place. The inside lifter automatically rises and prepares the paper tray for printing. When you close the paper tray, be careful not to get your fingers caught. This can cause personal injury. |
|
|
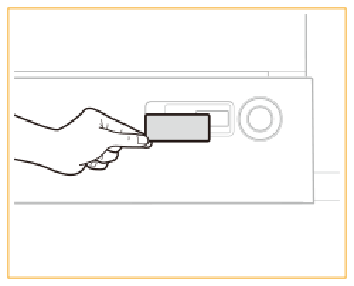
10 |
Change the size plate of the paper tray to match the new paper size. |
|
When a paper jam occurs or you notice poor image quality, turn over the media stack and reload the media stack. Do not reload textured, single-sided coated, or already printed paper to avoid a next paper jam. Take a new stack for these media.
Tightly rewrap the remaining media in the original package, and store the package in a dry place, away from direct sunlight or high temperatures.