
In the [Errors] screen you see maintenance operations.
The table with the modifications is organized as in a tree-like structure, and displays the following information:
1st column has no header.
It contains a check-box for selecting more than one issue, in case you need to [Delete manual error]
[Action] (can be one of [Done], [Postpone] or [No action needed] ) .
[Type]:
Lifetime
Counter
Time
Single
Condition
Manual
[Error code]
[Reason]
(optional) [Description]
This field contains free text
[MRI]
The [MRI] (short for "Machine Resource Identifier") indicates the specific hardware that underwent modification. In this particular case, the entities involved are the printer and the controller.
[Quantity]
The toolbar offers a quick way of reaching the following functions:
![]() [Add manual error]
[Add manual error]
Lets you add a new manual error.
![]() [Delete manual error]
[Delete manual error]
Lets you delete one of the manual error items.
This action is only available when the selected item in the worklist is a manual error.
The left-hand-side panel shows some extra details for the selected modification in the main list. The title is taken from the [Name], followed by read-only information like the [Type], the , the date (and overdue status). Down below, the initially collapsed section offers same details from the table.
You can:
(if available)
![]() [Add to worklist]
[Add to worklist]
Open the TSM page with relevant details.
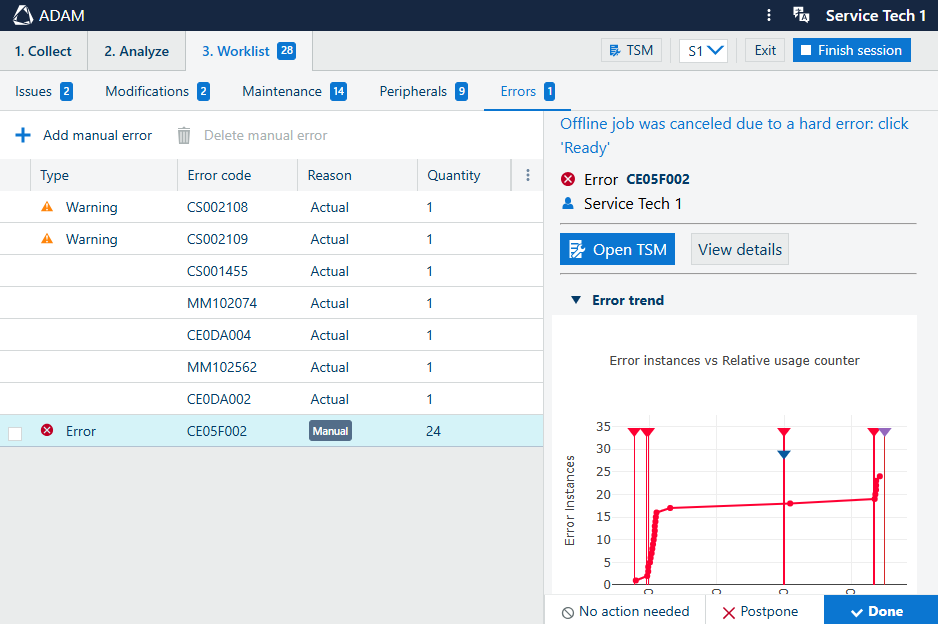
The [More details] button, which open the pop-up with [Error instances].
[Error trend]
Add an optional [Remark]
To the bottom of this panel, you can use the default actions
![]() [No action needed],
[No action needed],
![]() [Postpone] and
[Postpone] and
![]() [Done] to close the error item.
[Done] to close the error item.