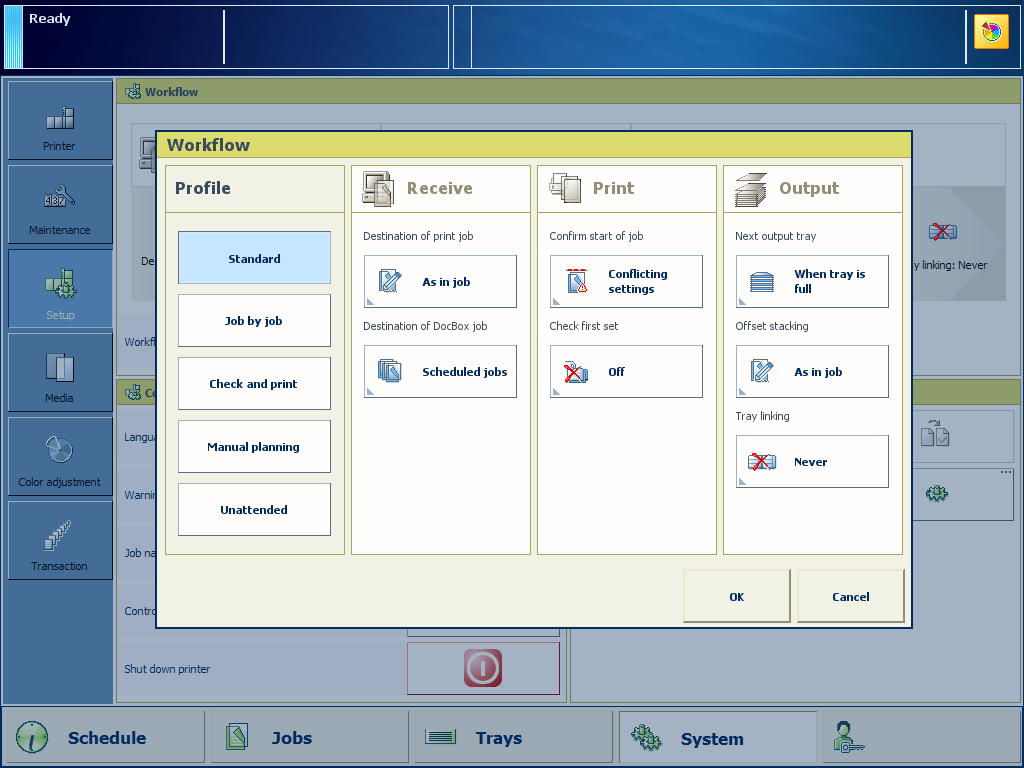

The printer provides workflow profiles to manage your workload from the control panel.
You select one of the available standard workflow profiles and, if required, change one or more attributes so it fits the print production requirements. Only one custom workflow profile can be active at the same time.
Touch .
Touch the name of the [Workflow profile].
 Attributes of a standard workflow profile
Touch one of the workflow profiles.
Touch [OK].
When you change an attribute of an automated workflow the name changes into [Custom].
Select the workflow profile.
Adjust one or more attributes.
Touch [OK].
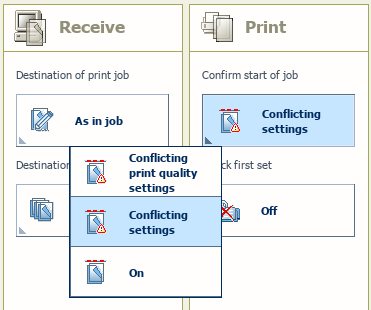
You can indicate when the printer shows a dialogue to confirm the start of a job.
 Confirm start of job
Select the workflow profile.
Use the [Confirm start of job] function to select the one of the following values.
[On]: Confirm that a job can start.
[Confirm start of job: In case of conflicting settings]: Confirm that a job can start with default settings in case the job has conflicting settings.
[Confirm start of job: In case of conflicting print quality settings]: Confirm that a job can start with default settings in case the job has conflicting print quality settings. The requested media print mode is unknown. The job will be printed with the default media print mode instead of the requested media print mode.
You can decide to cancel the job and first create the required media print mode in the Settings Editor.
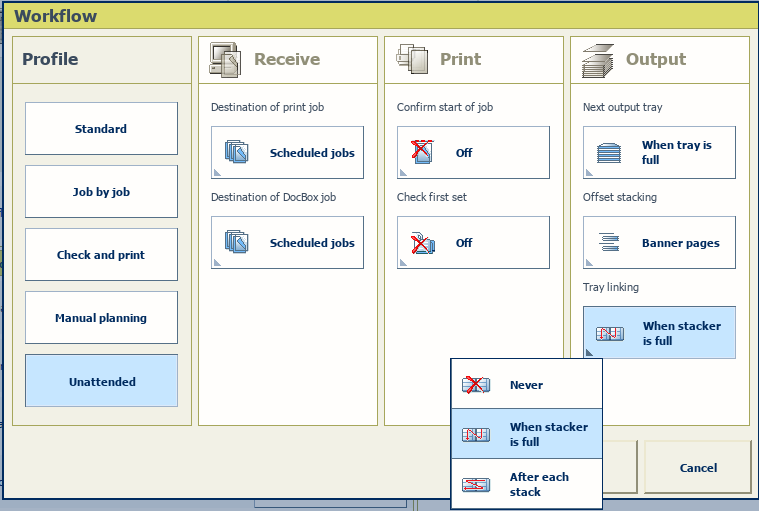
You can enable or disable the linking of output trays, when there are two high capacity stackers.
Tray linking means that the prints delivery automatically switches to the other high capacity stacker.
 Attributes of a workflow profile
Select the workflow profile.
Use the [Tray linking] function to indicate if tray linking can occur.
[Never]: there is no tray linking.
[When stacker is full]: tray linking occurs when the first high capacity stacker tray is full.
[After each stack]: tray linking occurs by switching to the other high capacity after the delivery of a stack.
Touch [OK].