
Perform a manual shading correction when you want to correct the uniformity of the color panes in the direction perpendicular to the feed direction or the color panes close to the edges of the sheet.
i1 spectrophotometer.
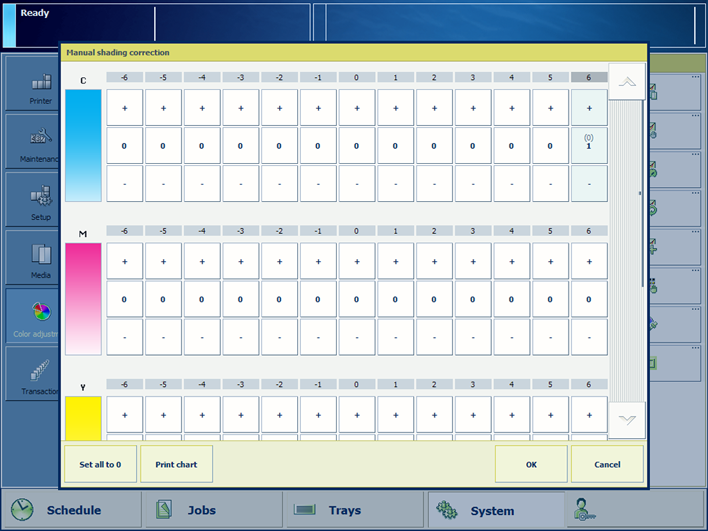 Manual shading correction options
Calibrate the printer. (Calibrate the printer)
You must always perform a printer calibration before you continue with this procedure.
Check the print quality to decide if you want to proceed.
Perform an automatic shading correction. (Perform a shading correction)
Check the print quality to decide if you want to proceed.
Load the largest size uncoated media you use, for example SRA3.
Touch .
Touch [Print chart] to print the gradation chart.
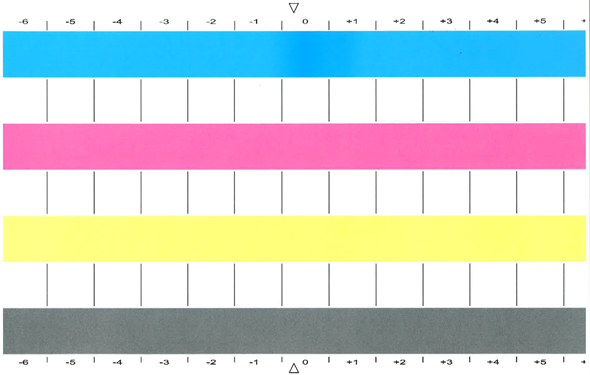 Gradation chart
Check each color bar on uneven color densities.
Make the corrections on the locations where you see deviations.
The locations are indicated per color with a number from -6 to 6.
The initial values are displayed between brackets.
Repeat step 7 - 9 until each color bar has a uniform color.
Touch [OK].
In the exceptional case where the manual shading correction does not deliver the required color quality, do the following:
Touch .
Touch [Set all to 0].
Perform an automatic shading correction.
Continue with the manual shading correction.