
You can use Onyx as the RIP software to manage media profiles. You can:
Install a downloaded media profile
Copy and edit an existing media profile
Create a new media profile
In order to get the best results it is strongly advised to use the Océ Colorado 1640 media profiles.
You have to download a Océ Colorado 1640 media profile before, saved in a media library file (*.OML) for Onyx. For more information, see Download an Océ Colorado 1640 media profile.
|
Step |
Action |
|
|---|---|---|
|
1 |
Open the Onyx RIP queue. |
|
|
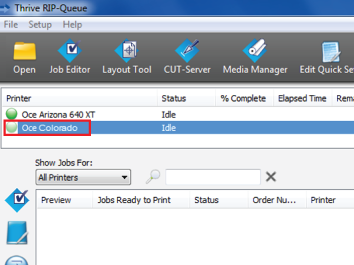
2 |
Select the Océ Colorado 1640 printer name. |
 |
|
3 |
Click on [Configure printer]. The [Configure printer] menu opens. |
 |
|
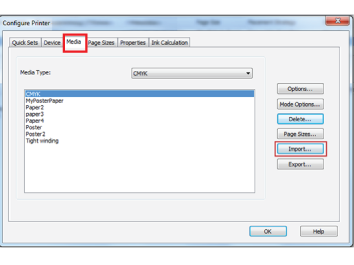
4 |
Select the [Media] tab and click on [Import]. A window opens. |
 |
|
5 |
Under [Files and Type] select Media Library Files (*.OML). |
 |
|
6 |
Click on [Open] and browse to find your media library files (*.OML). |
|
|
7 |
Click on [Ok]. The window closes. |
|
|
8 |
In the RIP queue you can see that the media profiles are installed and can be used. |
|
Step |
Action |
|
|---|---|---|
|
1 |
Open the Onyx RIP queue. |
|
|
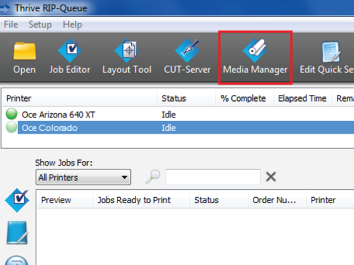
2 |
Click on [Media Manager]. The Media Manager application opens. |
 |
|
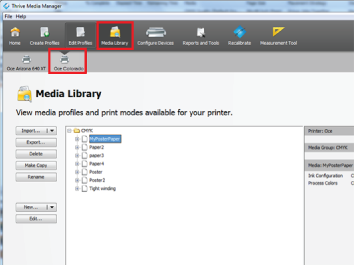
3 |
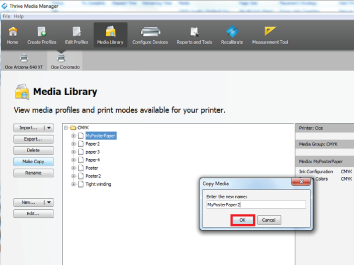
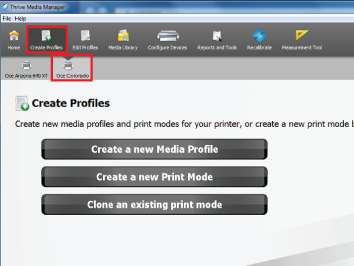
Click on the Océ Colorado 1640 printer icon and click on [Media library] above. |
 |
|
4 |
Select the media profile from the list and click on [Make Copy]. A new window opens. |
 |
|
5 |
Fill in the new media profile name and click on [Ok] for the new ICC workflow. A new window opens. |
 |
|
6 |
Follow all the steps. For more information on the general steps use the Onyx documentation. |
|
|
7 |
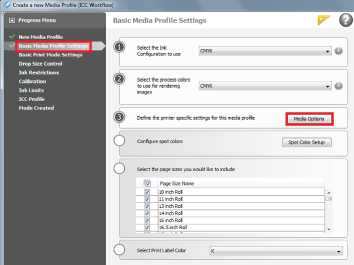
You can change the Océ Colorado 1640 specific media category and media settings under [Basic Media Profile Settings]. Click on [Media options]. |
 |
|
8 |
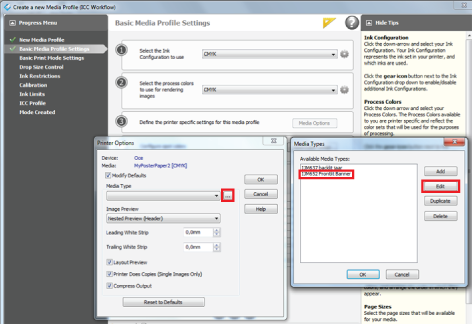
Click on the three dots. In the new window, select a media type and click on [Edit]. |
 |
|
9 |
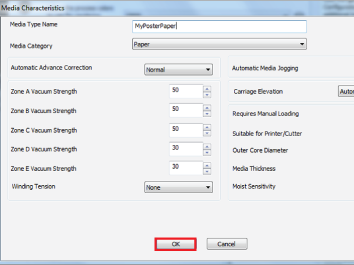
A new window opens. You can choose a new media category and or change the media settings. For more information, see Choose a media category, Change the media settings.
|
 |
|
10 |
Click on [Ok] the window closes. |
|
|
11 |
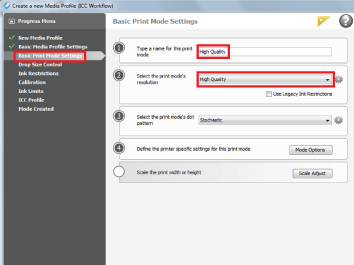
Follow the steps. You can change the Océ Colorado 1640 specific print mode settings under [Basic Print Mode Settings]. You can change the print mode and fill in the print mode. For more information, see Select a print mode. Fill in the same name as the selected print mode to avoid confusion. |
 |
|
12 |
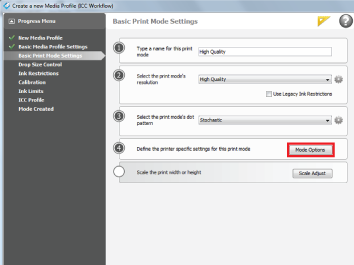
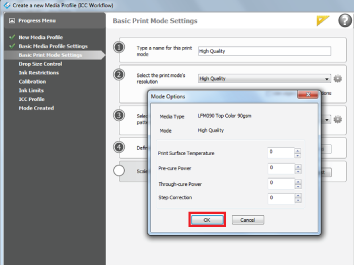
Click on [Mode options] and change the mode options. For more information, see Change the media settings. |
 |
|
13 |
Click on [Ok] the window closes. |
 |
|
14 |
Finish all the steps to create the media profile. |
Only experienced users or colour experts can create a new media profile.
|
Step |
Action |
|
|---|---|---|
|
1 |
Open the Onyx RIP queue. |
|
|
2 |
Click on [Media Manager]. The Media Manager application opens. |
|
|
3 |
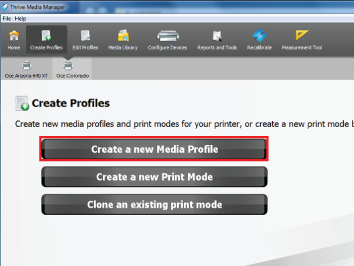
Click on the Océ Colorado 1640 printer icon and click on [Create profiles] above. |
 |
|
4 |
Click on [Create a new media profile]. A new window opens. |
 |
|
5 |
Click on [Ok] for the new ICC workflow. A new window opens. |
|
|
6 |
Fill in the new media profile name. |
 |
|
7 |
Follow all the steps. For more information on the general steps use the Onyx documentation. |
|
|
8 |
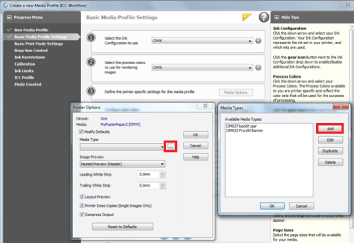
Change the Océ Colorado 1640 specific media category and media settings under [Basic Media Profile Settings]. Click on [Media options]. |
|
|
9 |
Click on the three dots and click on [Add ] in the new window. |
 |
|
10 |
A new window opens: Choose a media category and Change the media settings. |
|
|
11 |
Click on [Ok] the window closes. |
|
|
12 |
Follow the steps. Change the Océ Colorado 1640 specific print mode settings under [ Basic Print Mode Settings]. Fill in the print mode name and Select a print mode. Fill in the same name as the selected print mode to avoid confusion. |
|
|
13 |
Click on [Mode options] and change the mode options. For more information, see Change the media settings. |
|
|
14 |
Click on [Ok] the window closes. |
|
|
15 |
Finish all the steps to create the media profile. |