
When the vacuum plate is polluted you must clean the vacuum plate. It is advised to clean the vacuum plate every day at the end of the day (after printing, so the ink is still fresh and easy to clean). If the printer prints several shifts a day, it is advised to clean the vacuum plate every eight hours (e.g., at the end of each shift).
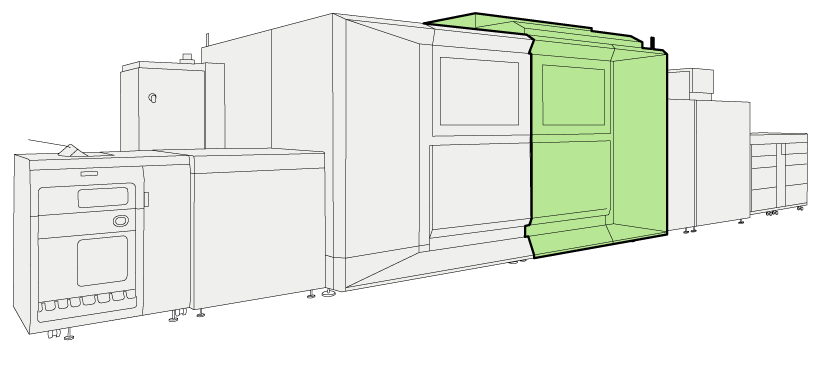 Location of the print belt
You need to have the rights to access the maintenance tasks and the configuration settings.
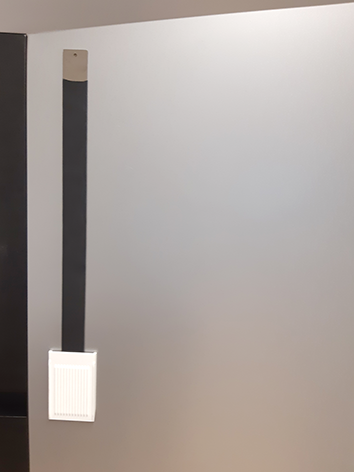
You need the vacuum plate cleaning tool.
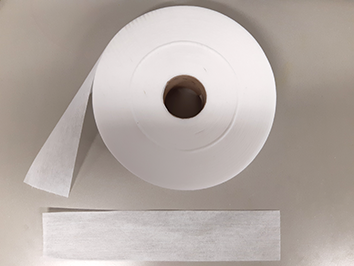
You need the roll with cleaning cloths.
You need a bottle of cleaning liquid SU70
The instruction video for this maintenance action is available, see Clean the vacuum plate.
In order to keep your hands clean, it is advised to use nitrile gloves when you work with ink, ColorGrip, PML, or SU70. For details see the related material safety data sheets. (Learn about printer maintenance)
Inks, ColorGrip, PML and/or SU70 contain 1,2-Benzisothiazol-3(2H)-one. From the point of view of occupational health and safety, it is not recommended that people who are sensitive to chemicals (e.g., people with asthma) work with ink or chemicals.
When you spill any liquid, wipe up the drops with disposable towels and transfer the used towels to a sealable container appropriate for disposal.
|
Action |
||
|---|---|---|
|
1 |
Touch . |
|
|
2 |
Open the right door, left upper and lower door and the right inner door of the print module. |
|
|
3 |
Take the cleaning tool. The cleaning tool has built in magnets. Therefore it sticks anywhere on the printer. Store the cleaning tool in a visible spot so you will be reminded to do the clean procedure. |
|
|
4 |
Tear off one piece of new cloth from the roll. |
|
|
5 |
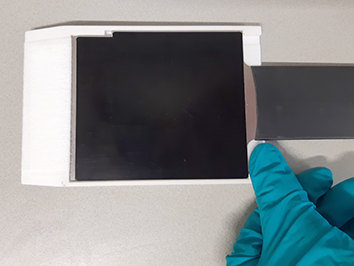
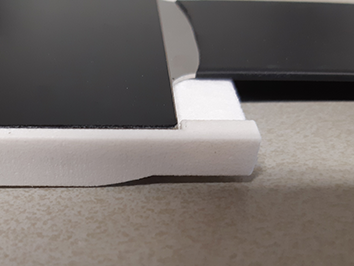
Separate the white part from the black part of the cleaning tool. Hold your thumb on the white part indicated on the picture and lift up the cleaning tool. |
|
|
6 |
Make sure that both ends of the cloth cover the notch, see illustrations. |
|
|
7 |
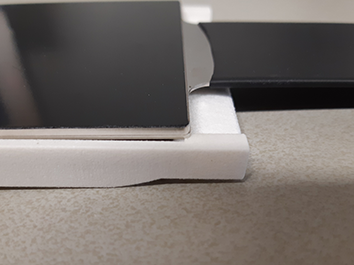
Assemble the white part with cloth to the black part of the cleaning tool.
|
|
|
Tool correctly assembled |
|
|
|
Tool incorrectly assembled |
|
|
|
8 |
Make sure the cloth is moistened, but the cleaning liquid should not drip from the cleaning tool / cloth. |

|
|
9 |
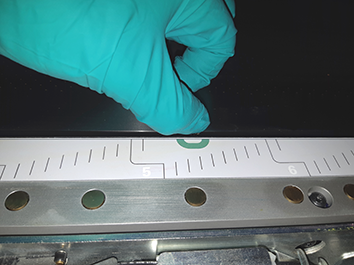
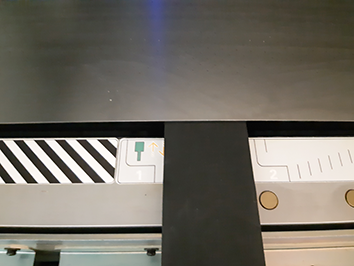
Lift the print belt at the notch in the vacuum plate at the location indicated by the green symbol, see illustration. |
|
|
10 |
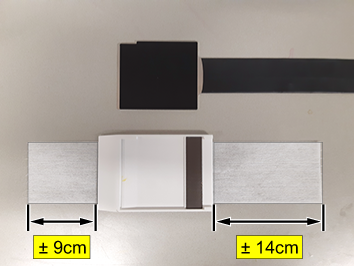
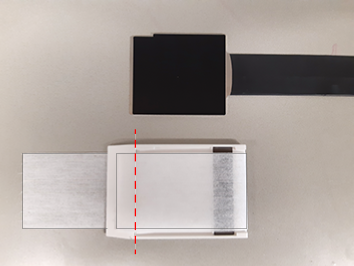
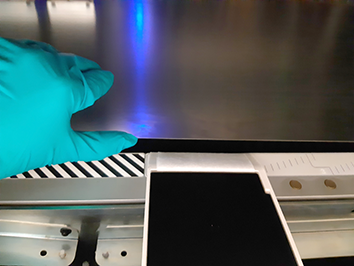
Align the cleaning tool with the side with the grooves facing downwards on the first marked spot indicated on the sticker (left-hand side) along the vacuum plate. |
|
|
11 |
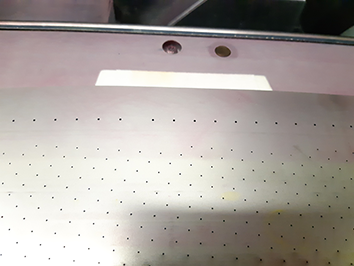
Insert the cleaning tool. The vacuum plate also has grooves; one can feel the grooves of the cleaning tool sink into the corresponding grooves on the vacuum plate. |
|
|
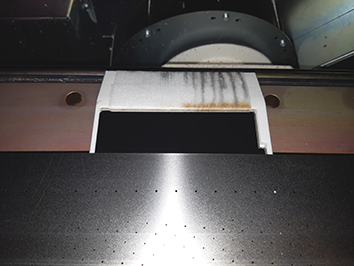
12 |
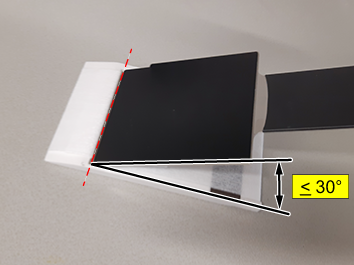
Slide the cleaning tool forward until it appears at the opposite side of the print belt (if you see the top of the tool it is okay, see illustration) and slide back. Do this 4 or 5 times. If the cloth comes out clean, reuse the cloth for the next spot. If after 4 or 5 times the cloth is too dirty to reuse, replace it with a new cloth and slide 4 or 5 times at the same spot again. It is not necessary to use more than two cloths per spot. In case the cloth still comes out too dirty, replace the cloth and continue to the next spot. |
|
|
Tool appears too much, do not slide this far. See previous illustration for correct appearance. |
|
|
|
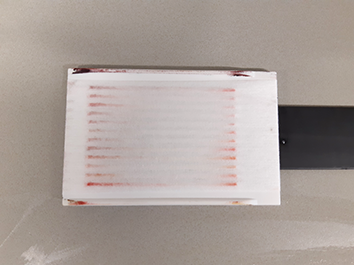
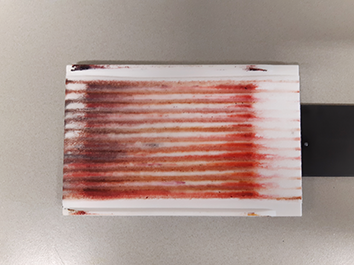
Cloth okay to reuse. |
|
|
|
Cloth too dirty to reuse. |
|
|
|
13 |
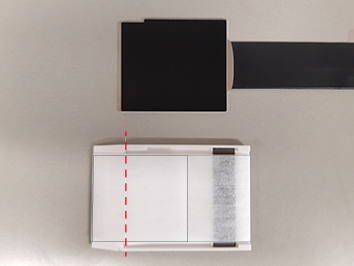
Repeat step 4 to 12 for all marked spots indicated on the sticker. |
|
|
14 |
Dry the vacuum plate
The vacuum plate should not be very wet. One new (dry) cloth should be sufficient to dry the entire vacuum plate. If the cloth comes out very wet after one or two slides, replace the cloth and dry the plate again. Keep in mind to use less cleaning liquid SU70 to clean the vacuum plate the next time. |
|
|
15 |
Close the upper and lower doors of the print module. |
|