
This topic contains the following instructions.
Select the main printer or the first printer of a cluster
Select the next printers of the cluster
Change the cluster printers
The printers that are in the list:
Are registered in the cloud service administration portal.
Are enabled to use PRISMAsync Remote Match.
Are licensed. Your Service organisation makes the PRISMAsync Remote Match licence available in On Remote Server (ORS). This licence is based on the serial number of the printer.
When you have defined the first cluster printer, the list is refreshed. Printers that have the same printer series and printer software version as the first printer are now visible. They can be selected as next printers in the cluster.
 List of printers
Cloud service administrator that is also listed as PRISMAsync Remote Match user in the cloud service administration portal.
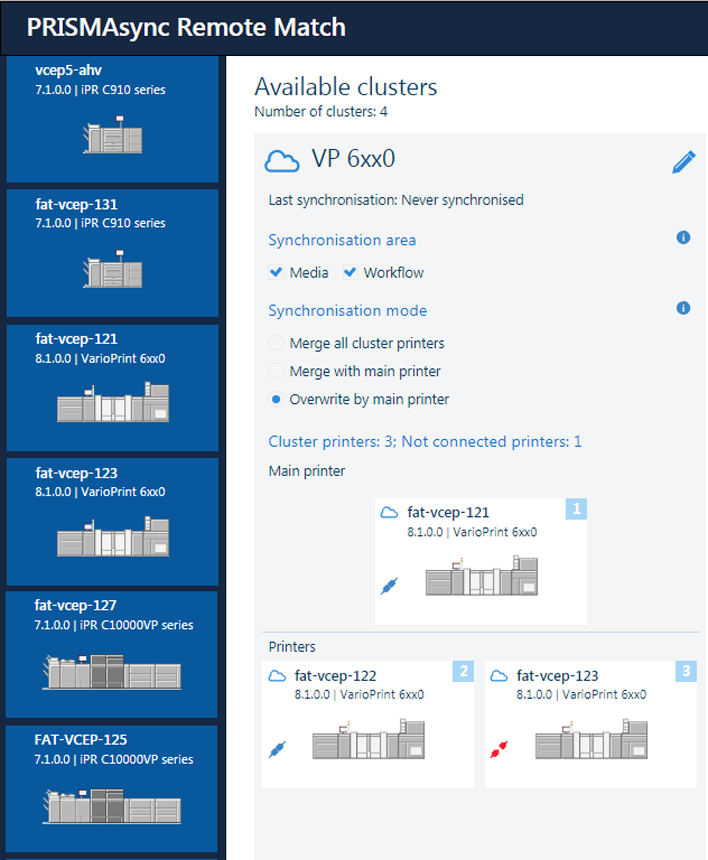
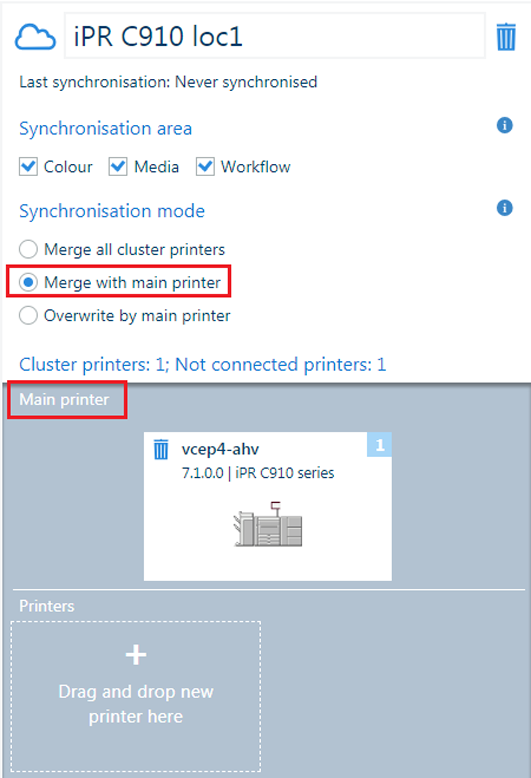
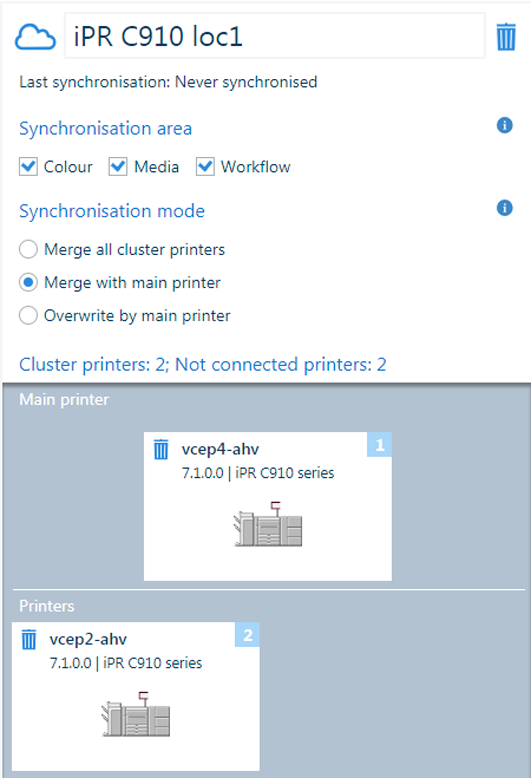
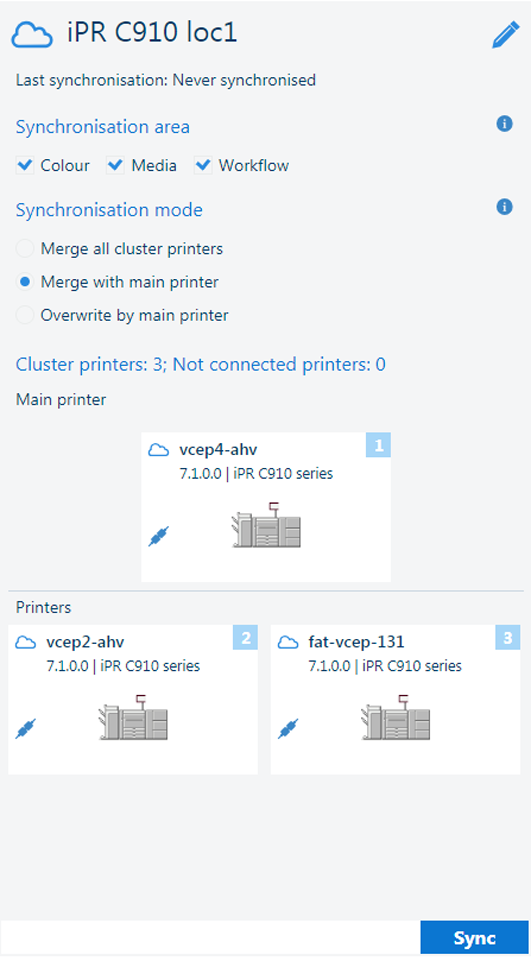
The following synchronisation modes use a main printer.
[Merge with main printer ]: The resource entries of cluster printers 2 and higher are extended with the resource entries of the main printer.
[Overwrite by main printer]: The resources of the printers 2 and higher are overwritten by the resources of the main printer.
For the [Merge all cluster printers] mode are the resource entries of each cluster printer extended with the resource entries of all other cluster printers. So, this mode does not know a main printer.
For an already created cluster, click
 next to the cluster name.
 Edit a cluster
Drag and drop a printer from the printer list to the empty [Main printer] field or [Printers] field.
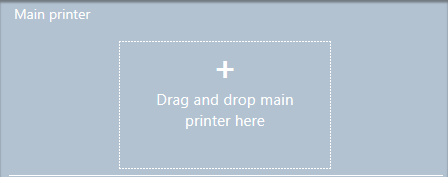 Main printer field
 |
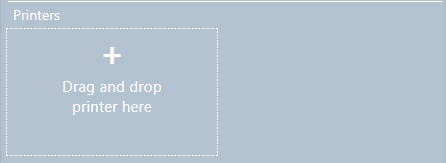 Printers field
 |
 Select main printer
 |
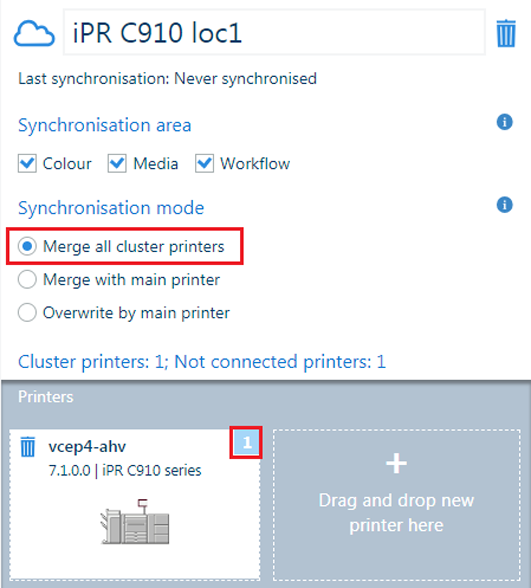 Select first printer
 |
When a printer is already part of another cluster, the synchronisation areas cannot overlap.
The printer list now only contains printers that have the same printer series and printer software version as the main printer or the first printer.
Drag and drop a new printer from the list to the empty [Printers] field.
 Second printer added
Repeat step 1 until all required cluster printers are added.
Click [Save].
 Third printer added
You can change the cluster as long as it is not busy with synchronising. You can add printers, remove printers or change the synchronisation priority by moving printers.
Click
next to the cluster name.
Edit a clusterTo remove a printer from the cluster, click the trash symbol
 next to the printer name. All printers that have a lower priority (and higher number) are automatically moved.
 Delete printers from cluster
To change the priority of a printer, drag and drop the printer to another position.
To add a new printer to a cluster, drag and drop a printer from the printer list.
Click [Save].
When you change the cluster definition of a cluster that had been synchronised before, the [Last synchronisation:] field shows: [Never synchronised].