Loading

Configure the media catalog

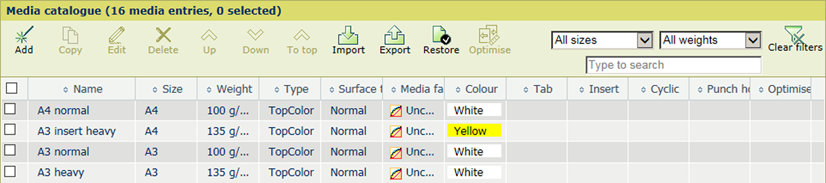
The PRISMAsync Print Server media catalog lists all media that can be selected for jobs. You can change several media attributes.

The media catalog in the Settings Editor

When you want to

Solution

Go to the media catalog

  1. Open the Settings Editor and go to: [Media]  → [Media].

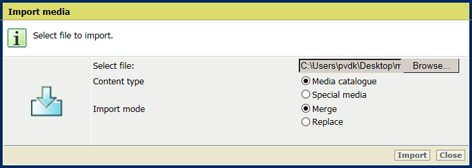
Import a media catalog or special media definitions

Special media is the media for banner and trailer pages, separator sheets, tickets, covers, and auto gradation adjustment.

  1. Click [Import].

  2. Indicate if you want to import the media catalog or the special media definitions.

  3. Indicate if you want to replace or expand the media catalog or special media definitions.

  4. Browse to the file.

  5. Confirm the selection.

  6. Click [Import].

  7. Check the media family and surface type when you import a media catalog from a printer that runs a software version lower than 4.1.

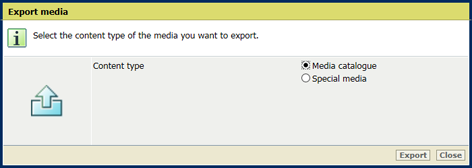
Export the media catalog and special media definitions

  1. Click [Export].

  2. Indicate if you want to export the media catalog or the special media definitions.

  3. Click [Export].

Restore the media catalog.

  1. Click [Restore].

    Please note you cannot undo this action.

  2. Click [OK].

Show warnings when media miss attributes

The system administrator can change this setting.

  1. Open the Settings Editor and go to: [Media]  → [Configuration].

  2. Enable the setting [Warnings on missing media attributes].

  3. Click [OK].

Do media management from the control panel

The system administrator can change this setting.

  1. Open the Settings Editor and go to: [Media]  → [Configuration].

  2. Enable the setting [Media management via control panel].

  3. Enable the setting [Media optimization via control panel].