
The described functionality is available if:
the printer has a software version Mark 8.3.6 or higher;
you have the Advanced color management licence.
Note that you need to have administrative rights to be able to successfully perform this configuration procedure.
Similarly to PRISMAcolor Manager, PRISMAsync offers the color validation functionality. After each color validation test, the validation results can automatically be stored as CGATS file on an SMB share.
PRISMAcolor Manager is tightly integrated with PRISMAsync. This raises a possibility to automatically import the validation results from this SMB share. Imported validation results become available as a validation result entry in the [Validation results] app, similarly to the validation results of the colour tests that are initiated from PRISMAcolor Manager.
The printer which the color test was conducted on must be known in PRISMAcolor Manager. Matching is based on the serial number of the printer. If no match is found, the import fails.
If PRISMAcolor Manager has no test specification that matches the imported validation result, PRISMAcolor Manager generates a matching test specification. If PRISMAcolor Manager does not already have a corresponding reference value set or metric tolerance set, they will be created as well.
To configure the automatic import of color validation results from PRISMAsync, use the workstation on which cloud proxy is installed. Do the following:
Open the Settings Editor of the printer and go to: .
 [SMB shares] tab
Check whether you have a configured SMB share for storing the calibration results. If you do not have a configured SMB share, click [Add] to configure it.
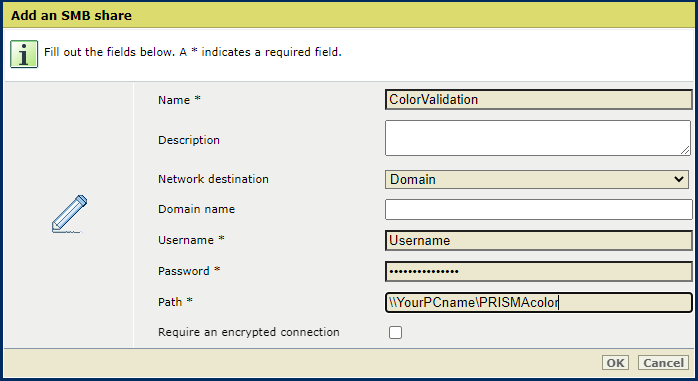 New SMB share
Only the system administrator can configure [SMB shares].
Go to:
 [Color validation & verification] tab
Click [Configure].
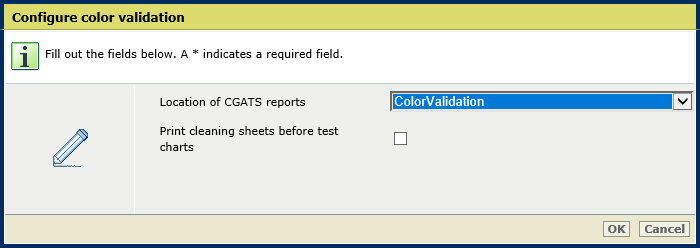 [Location of CGATS reports] setting
Use the [Location of CGATS reports] setting to select the location of the CGATS reports. CGATS reports will then be stored on an SMB share.
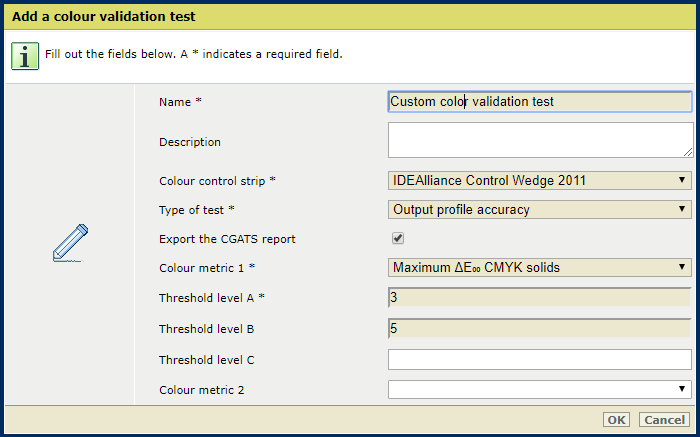
Select a color validation test for which you want to save the CGATS reports.
Click [Edit].
Verify that the [Export the CGATS report] setting is checked.
 Checked [Export the CGATS report] setting
Open the cloud proxy and go to: .
Replace the data folder path with a path to an SMB share.
 Data folder path
Click [Save].