
Spot colours are used to define colours, so that output colours always match a specific colour value. Spot colours allow to print unique brand colours for logos or business graphics.
The Settings Editor has functions to import spot colour libraries, define colour mappings, create and edit spot colours, and print patch charts. (Configure spot colours and spot colour libraries)
On the control panel you can define spot colours, measure spot colours, and print patch charts to check and adjust the spot colours. New spot colours are stored in the custom spot colour library.
This topics describes how to:
Define a spot colour
Measure a spot colour
Check and adjust a spot colour
First check if the printer calibration delivers the required colour quality before you perform this procedure. (Learn about calibration)
The definition of your spot colours is usually done through Lab values. You can enter CMYK values, for example when you need saturated colours.
 Spot colour definition with colour indicator on the control panel
Touch .
Touch [Edit spot colours].
Touch [Add].
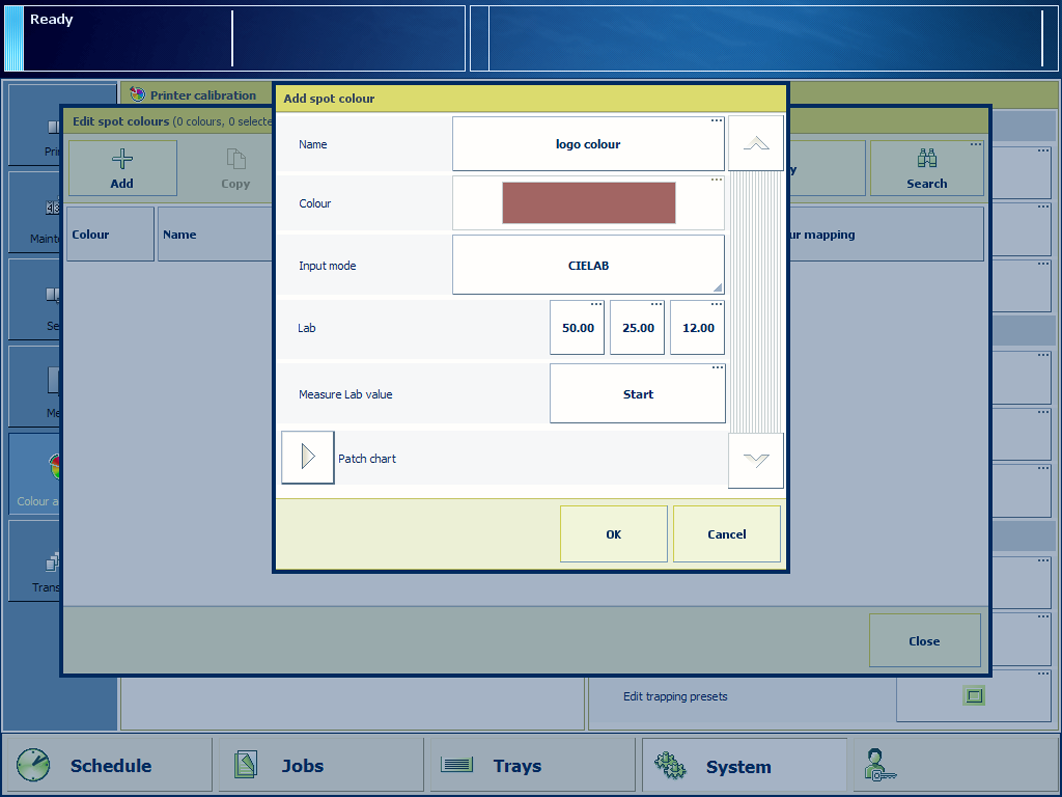
Enter the spot colour name.
At [Input mode], select [CIELAB].
Enter the Lab values.
Touch [OK].
Touch to find the new spot colour.
With the spot colour measurement procedure, you measure three locations of a sample of the spot colour. The system calculates and returns the average Lab value and reports a ∆E. The reported ∆E value is the largest (delta-E 2000) difference between each individual measured value and the average of all measured values. A ∆E larger than 3 indicates that a large deviation is measured. In that case you are advised to measure the spot colour again.
An i1 spectrophotometer is required for the measurement of a spot colour.
 Spot colour measurement is done via CIELAB values
Touch .
Touch [Edit spot colours].
Touch [Add].
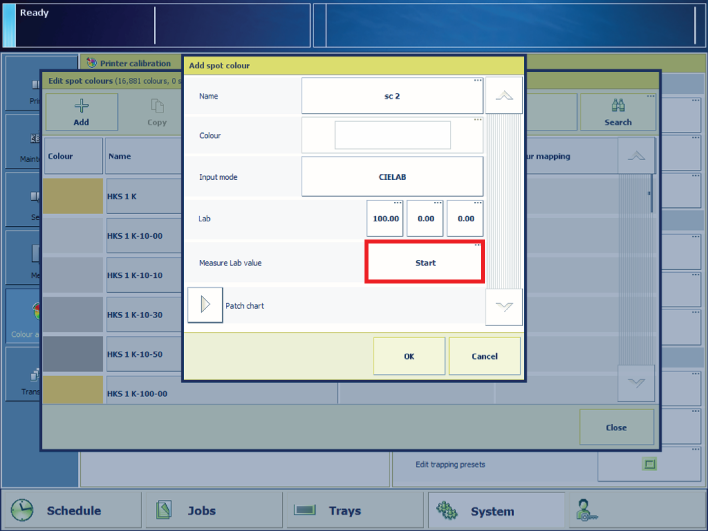
At [Input mode], select [CIELAB] .
Touch [Start].
Follow the instructions on the control panel.
If ∆E is larger than 3, you are advised to measure the spot colour again.
Touch [OK].
Touch to find the new spot colour.
How a spot colour looks exactly after printing depends on the used media and printer. When a spot colour does not fit in the colour gamut of the printer, you can print a patch chart to check the spot colour and adjust the CMYK values. This allows you to get the most optimal result.
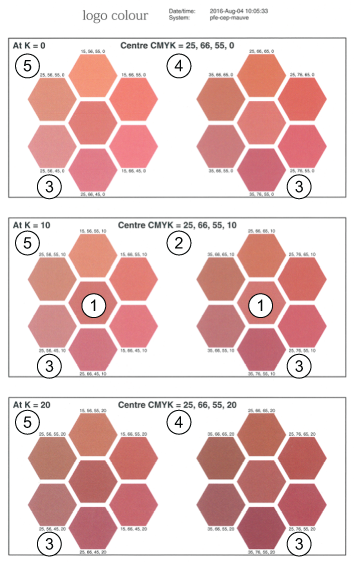 Patch chart with spot colours and their CMYK values
|
1 |
Patch of selected spot colour, printed twice in the centre frame. |
|
2 |
CMYK value of the centred patches in the centre frame. |
|
3 |
CMYK values of the surrounded patches (36x). |
|
4 |
CMYK values of the centred patches in the upper and lower frame. |
|
5 |
Black values, used to print the centred and surrounding patches. |
Touch .
Touch [Edit spot colours].
Touch [All libraries] to find the spot colour.
Select a spot colour.
Touch [Edit].
Touch [Add] to add a CMYK definition.
Select a media family.
Select a media.
Touch [Start].
Take the patch chart and check the defined spot colour in the middle frame:
If the spot colour is correct (1), touch [OK].
If another spot colour is correct, enter the corresponding CMYK values of this spot colour (3) and touch [OK].
If no spot colour is correct, increase the step size of the black value (5) and go to step 8.