
This topic contains the following instructions.
Go to the transaction setups
Define a new transaction setup
Edit a transaction setup
Export transaction setups
Import transaction setups
Validate a transaction setup
Restore the default transaction setup
Delete transaction setup
A transaction printing setup is a set of attributes that are used for transaction printing. You can create different setups, but only one setup can be loaded and is active. When transaction printing is offline, you open and load a transaction setup via the control panel or the Settings Editor.
The attributes of the active (loaded) transaction setup define the default properties of the output of the submitted data stream.
Open the Settings Editor and go to: .

Create a new transaction setup with a unique name and a description.
Use the [Add] option to create new setup.

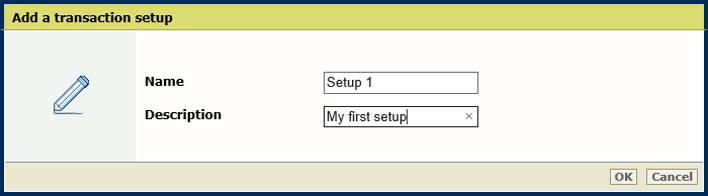 [ Add a transaction setup] option
 New transaction setup with status [Opened]
 Select an existing transaction setup and use the [Copy] option to create a new transaction setup.
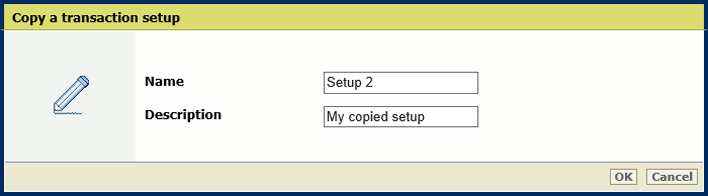 [Copy a transaction setup] option
 Copied transaction setup with status [Opened]
 Note that new setups have the status [Opened] needed to define the attributes.
Go to the [IPDS transaction setup] or [PCL transaction setup] tab to define the attributes.
Open the Settings Editor and go to: .
Select a transaction setup.
Click [Edit].

Define a unique name and a description.
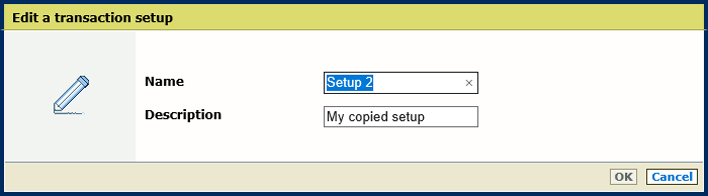
Click [OK].
Click [Open] .
Go to the [IPDS transaction setup] or [PCL transaction setup] tab to define the attributes.
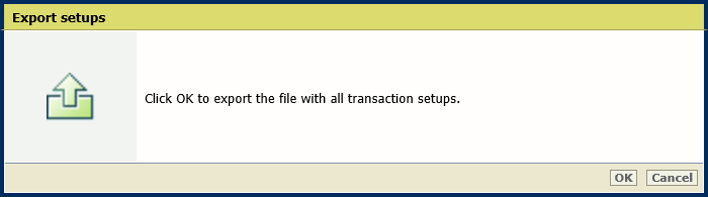
Click [Export] to save all transaction setups.
Click [OK].
Click [Import].
Browse to file with transaction setups and select the file.

Indicate how to handle the selected transaction setups.
[Replace]: replaces the complete list of transactions setups.
[Merge]: adds the selected transactions setups to the current list of transaction setups.
Click [OK].
Validate a transaction setup to check the media definitions.
Select a transaction setup.
Click [Validate].
Read the validation report.
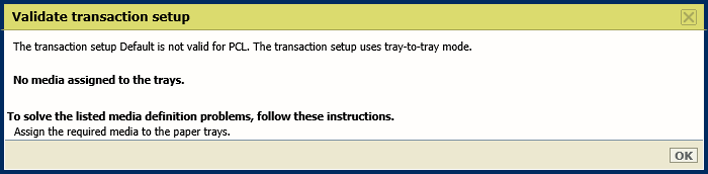
Go to the [IPDS transaction setup] or [PCL transaction setup] tab to follow the instructions, if required.
Click [OK].
Be aware that this option removes all custom transaction setups.
Click [Restore].
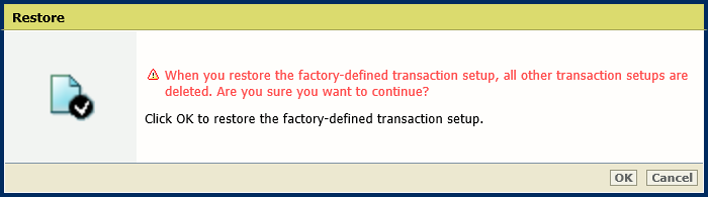
Click [OK].
Be aware that no confirmation window appears.
Select the setup.
Click [Delete].