
PRISMAsync Print Server offers a search, filter and select function to quickly find and easily select jobs at all available job locations.
The search function makes it possible to find jobs with a specific attribute, for example job name, media, or user.
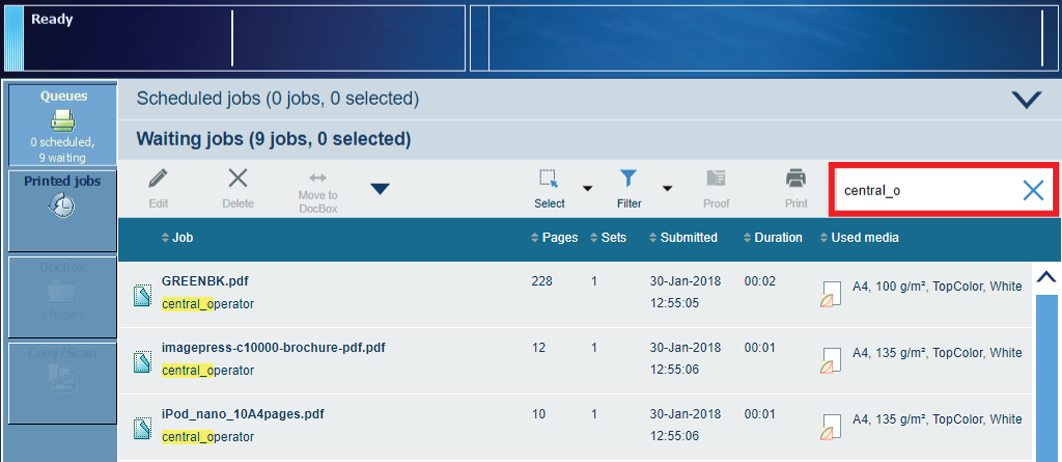 All jobs of a specific user in the list of waiting jobs.
You can use the filter option to limit the amount of jobs to select from.
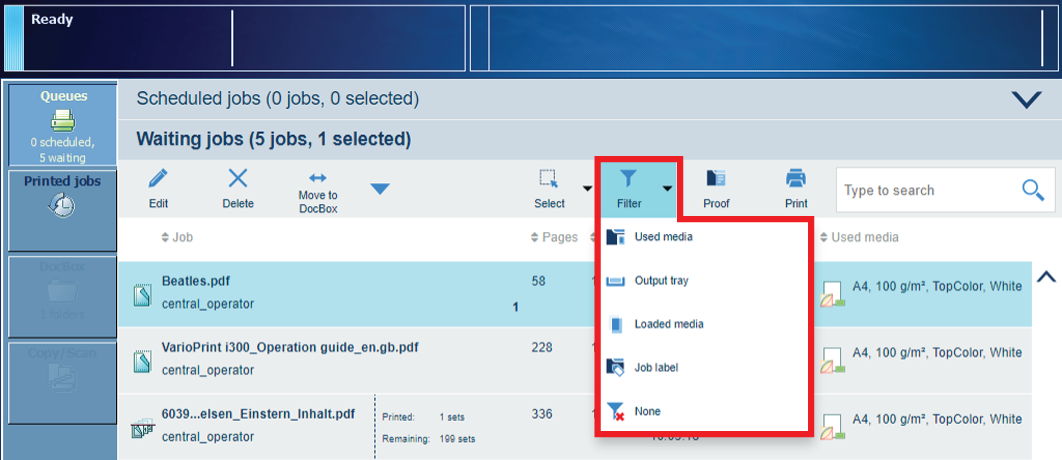 The filter options in the list of waiting jobs
The filter function offers the following possibilities:
|
When you want to |
Filter option |
|---|---|
|
Show only jobs that use certain media. |
[Used media] |
|
Show only jobs that use a certain output tray. |
[Output tray] |
|
Show only jobs that use media that are in paper trays. |
[Loaded media] |
|
Show only jobs that use a certain job label. |
[Job label] |
|
Remove the filter and show all jobs. |
[None] |
The select function enables you to perform an operation on all selected jobs in one go.
 The select options in the DoxBox
 The select function offers the following possibilities:
|
When you want to |
Selection option |
|---|---|
|
Select all jobs |
[All jobs] |
|
Select the jobs that use media that are in the paper trays. |
[Jobs with loaded media] |
|
Select jobs that are submitted with a certain automated workflow. The job label refers to the name of the automated workflow. A label is a name or tag that helps you to identify certain jobs on the control panel. When a job is sent to the printer, the person who submits the job can add a label to that job. The label can be any name that helps to identify certain jobs. The label can be defined in the printer driver, in a job ticket or via an automated workflow. When the label in the printer driver is identical to a defined automated workflow, then the print job will be printed with the settings of this automated workflow. For example, the label ‘Customer XYZ’ can be added to jobs. Then you can select and print all the jobs for 'Customer XYZ' at once. |
[Job label] |
|
Select printed jobs in DocBox folders. |
[Printed jobs] |
|
Select new jobs in DocBox folders. |
[New jobs] |
|
Unselect all jobs. |
[None] |
|
Select the unselected jobs and unselect the selected jobs. |
[Invert selection] |
|
Select a number of jobs manually. |
Touch the required jobs one by one. |
Touch [Queues] to go to the scheduled and waiting jobs.
Touch  or
or  to go the list of waiting jobs or the list of scheduled jobs.
Touch [DocBox] to go to the DocBox folders.
Touch [Printed jobs] to go to the printed jobs.
You can select all jobs found at once with the [All jobs] option.
You can select all jobs found at once with the [All jobs] option.
Touch and hold a job to bring a multiple job selection back to one job.