
This topic contains the following instructions.
Open the CMYK curve editor with pixel precise preview
Prepare the pixel precise preview to monitor adjustments
Adjust the CMYK curves in basic mode
Adjust the CMYK curves in advanced mode
Apply an adjustment with a preset
Be aware that achieving a consistent reproduction of colors is difficult when you adjust CMYK curves on job level.
First, check whether the printer calibration delivers the required color quality before you perform this procedure.
Touch [Jobs].
Go to the location of the job.
Select the job you want to change.
Touch [Edit], or double-tap the job to open the [Edit] window.
Touch [Adjust image].
The CMYK curve editor with pixel precise preview opens the [Basic mode] window.
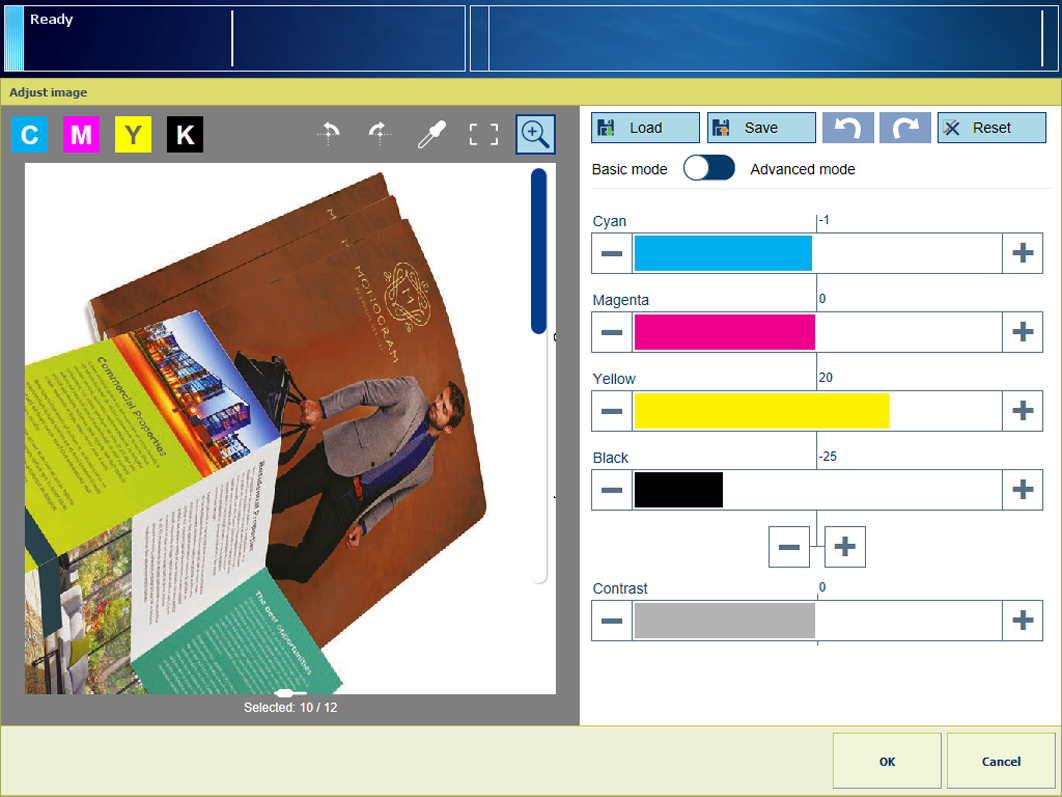 CMYK curve editor with pixel precise preview in basic mode
Touch the slider  icon to browse the document.
Touch  to rotate the pages.
Touch  and
and  to enter and exit the full screen view.
Touch the thumbnails of the page you want to examine.
Touch and hold one thumbnail to undo the selection of multiple pages.
Touch the zoom  function to examine the result of the adjustment in a specific area.
Use the zoom bar to zoom in or out.
Use your finger to pan the image.
Touch  to hide the zoom bar again.
Touch the color picker tool  to examine the result of the adjustment for a specific dolor.
Move the color picker icon  to a pixel.
Note that the input density (%) and output density (%) of the CMYK colors are the same.
The Basic mode is for simple CMYK editing with sliders for quick and easy color tweaking.
Adjust the colors with the color and contrast sliders.
Examine the results in the magnified area and color picker tool.
Touch the save icon to store the adjustment in a preset for later use, if required.
Touch [OK] to apply the adjustment to this job.
Touch the load  icon to open the list of presets.
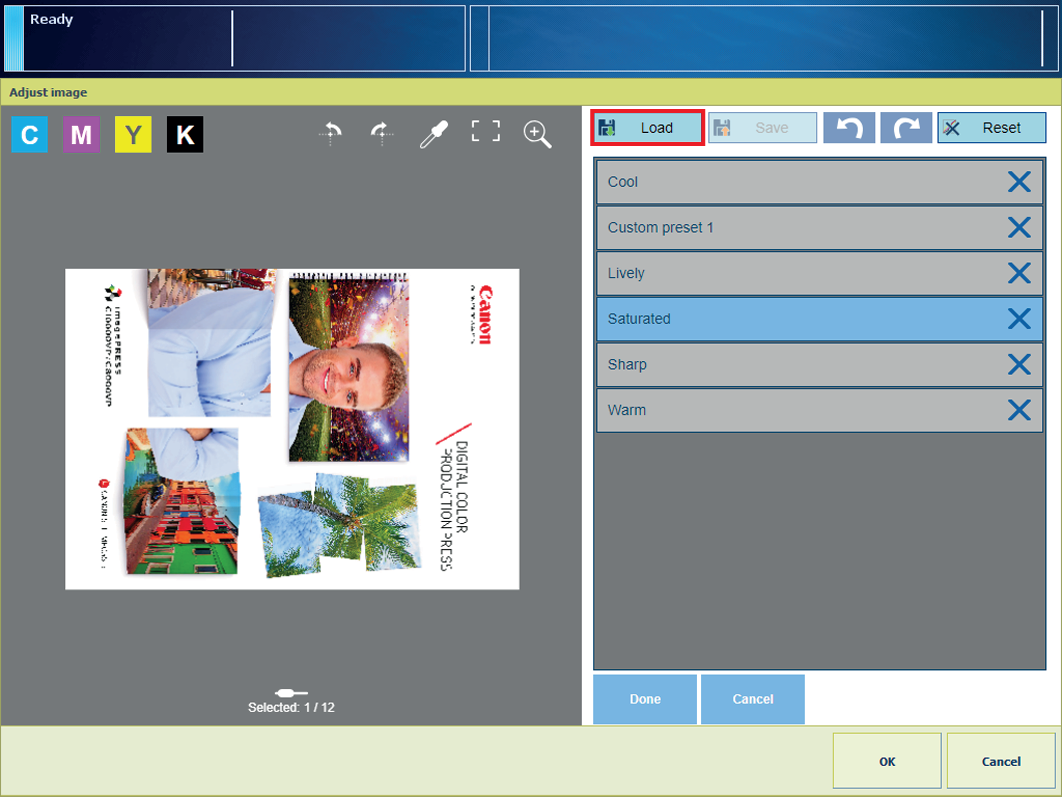
Select one of the standard presets.
Touch [Done].
Note that the CMYK curve editor switches to [Advanced mode].
Check the result in the pixel precise preview.
Touch [OK] to apply the adjustment to this job.
The [Advanced mode] is CMYK editing for precise and reproducible adjustments
Touch [Advanced mode].
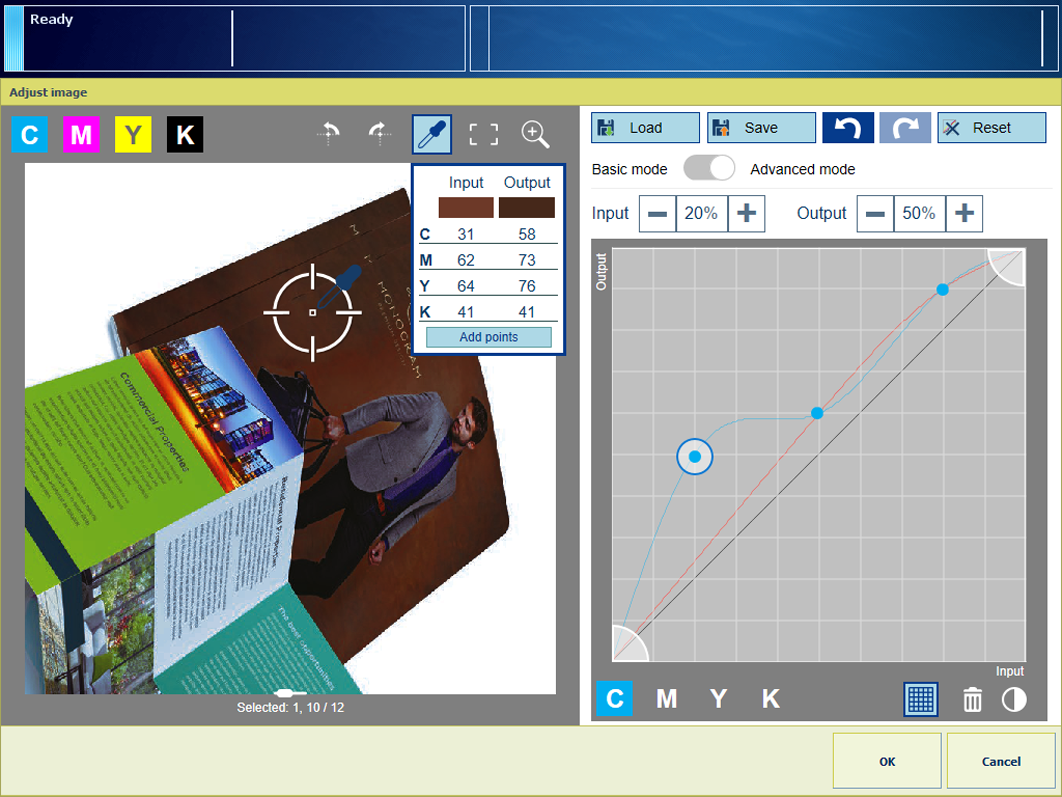 CMYK curve editor with pixel precise preview in advanced mode
Select one of the CMYK curves.
Add control points to adjust the tone curve.
Touch the curve to add a control point  .
.
The [Input] field represents the input density (%) of the selected control point.
The [Output] field represents the output density (%) of the selected control point.
Touch the [Add points] option of the color picker tool to add control points of a specific color.
Touch the + and - signs to move the control point or drag the control point with your finger.
Touch the raster  icon to locate control points more easily.
To delete a control point, first select a control point. Then, touch the trash  icon.
icon.
Repeat step 3 and 4 for other curves.
Touch the contrast  icon to adjust the contrast.
Clip the highlight and shadow tones.
Touch and drag the lower left-hand wedge  .
.
Touch and drag the upper right-hand wedge  .
.
Check the result in the pixel precise preview.
Touch the save icon to store the adjustment in a preset for later use, if required.
Touch [OK] to apply the adjustment to this job.