
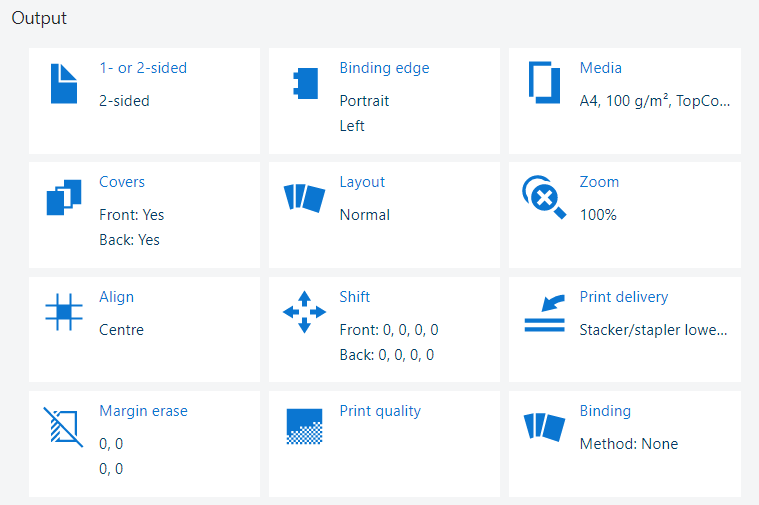
 Output settings
Open the job in the [Edit job] app.
Click [Print quality].
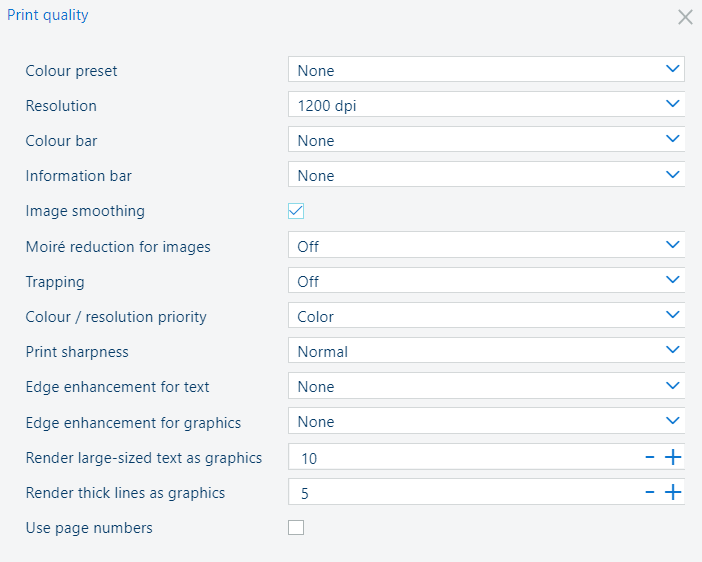 Print quality settings
Use the [Color preset] drop-down list to select one of the available colour presets.
Use the [Color bar] drop-down list to select the required colour bar.
Use the [Information bar] drop-down list to select the required information bar.
Use the [Image smoothing] setting to prevent unsmooth lines and image blocks in the document. This occurs when source objects have a lower resolution than the printer. The [Image smoothing] interpolation method only affects images below 300 dpi.
Use the [Moiré reduction for images] setting to apply a Moiré reduction algorithm to enhance photographic images. Please note that when images have a resolution below 300 dpi, the Moiré reduction only takes effect when the [Image smoothing] setting is enabled.
Use the [Trapping] drop-down list to disable the trapping or to select one of the available trapping presets.
Use the [Color / resolution priority] setting to indicate whether you want to give priority to colour or resolution.
Use the [Print sharpness] setting to indicate how sharp you want your prints to be.
Use the [Edge enhancement for text] and [Edge enhancement for graphics] settings to enable edge enhancement (smooth or strong) for text and graphics.
The [Render large-sized text as graphics] setting improves the quality of large text. This setting keeps the benefits of using the text halftone screen for small text.
Adjust the threshold value to optimise the quality for the fonts used in your print jobs. The value sets a threshold for font size in points. For fonts larger or equal to the threshold value, the same halftone screen for text and graphics/images is used. To disable this setting, set the threshold value to zero.
With the [Render thick lines as graphics] setting, you can optimise the printing of thick lines while keeping the halftone for thin lines. The threshold value in points determines for which line thickness the halftone for graphics will be applied. When the value is zero, the function is disabled.
Check the [Use page numbers] checkbox to indicate that the page numbers must be used. You can then define from which page the numbering will start, location of page numbers as well as text before and after page numbers.
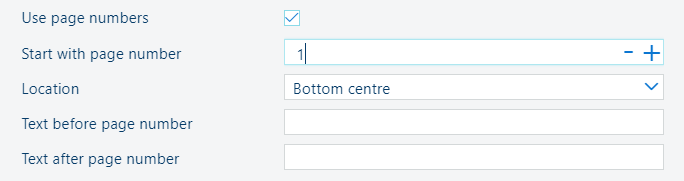 [Use page numbers] setting
Close the pop-up window.
Click [OK] to save the changes for the job.