
Printheads are automatically cleaned with tissue ribbon according to a cleaning scheme. A roll of tissue ribbon is enclosed in a cassette. For each ink color and the ColorGrip liquid two cassettes with ribbon are available, distinguished on the dashboard by cassettes on the right-hand or left-hand side. The cassettes for the ColorGrip are smaller than the cassettes for the ink color. (Learn about printhead maintenance)
The dashboard indicates when you must prepare the replacement of a series of tissue cassettes, either all the right-hand sided tissue cassettes or all the ones on the left-hand side.

|
One or two series of tissue ribbons are nearly used up. To know which series of tissue cassettes are almost used up, touch the orange symbol in the dashboard to go the [Supplies] pane. (Filling levels of supplies and waste) Only replace the cassettes when the action-required screen appears. |

|
One or two series of tissue ribbons are completely used up. An action required screen appears, with an instruction how to replace the cassettes. |
Replace the used tissue ribbons soon after you replace the tissue cassettes, so that you keep a stock of cassettes with new tissue ribbons. (Replace a tissue ribbon)
 Location of the maintenance module
In order to keep your hands clean, it is advised to use nitrile gloves when you work with ink, ColorGrip, PML, or SU70. For details see the related material safety data sheets. (Learn about printer maintenance)
Inks, ColorGrip PML and/or SU70 contain 1,2-Benzisothiazol-3(2H)-one. From the point of view of occupational health and safety, it is not recommended that people who are sensitive to chemicals (e.g., people with asthma) work with ink or chemicals.
You need to have the rights to access the maintenance tasks and the configuration settings.
You need tissue cassettes with new tissue ribbons.
You need a cardboard box to store the tissue cassettes temporarily.
The instruction video for this maintenance action is available, see Replace the tissue cassettes.
|
Action |
|||
|---|---|---|---|
|
1 |
It can take up to two minutes before the door is unlocked. |
||
|
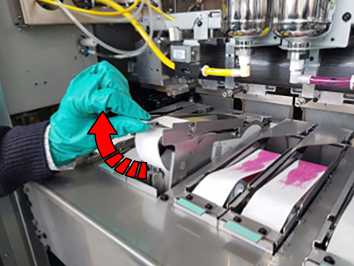
2 |
Take out the tissue cassettes. Because of ink pollution, store the tissue cassettes in a cardboard box.
|
|
|
|
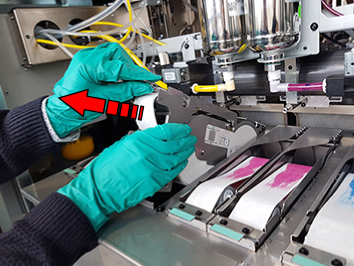
3 |
Return tissue cassettes with clean tissue ribbons.
Keep in mind that the cassettes of the ColorGrip are smaller than the cassettes of the ink colours. Do not switch places. |
|
|
|
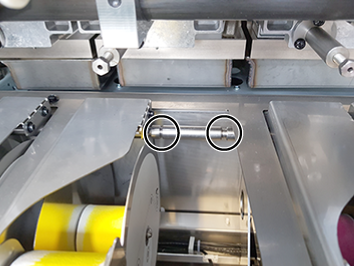
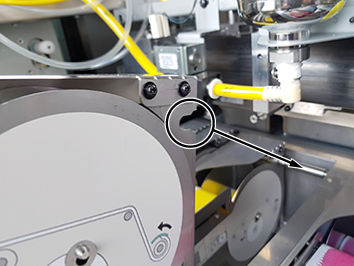
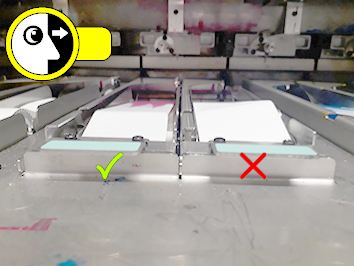
4 |
Make sure the top roller is in the correct position (horizontal, see picture). If top roller is not in correct position, this can result in damage to the printhead. |
|
|
|
5 |
Close the door of the maintenance module. |
||
Place new tissue ribbons in the replaced tissue cassettes. (Replace a tissue ribbon)