
The media edge guards ensure that the media is kept flat during printing. You can remove or attach the media edge guards.
You attach the media edge guards when you print on roll media.
You remove the media edge guards when you print on rigid media, or to perform various maintenance procedures.
 CAUTION
Only clean the media edge guards when the printer is not printing.
 NOTE
NOTE
Be careful not to bend the media edge guards. Damaged media edge guards can affect the media.
Use Colorado XL-series prescribed:
Microflex gloves for handling ink
Lint free cloths
Cleaning liquid (IPA)
Scraper
Screwdriver (Torx 25)
|
1 |
Put on the Colorado XL-series approved gloves. |
|
|
2 |
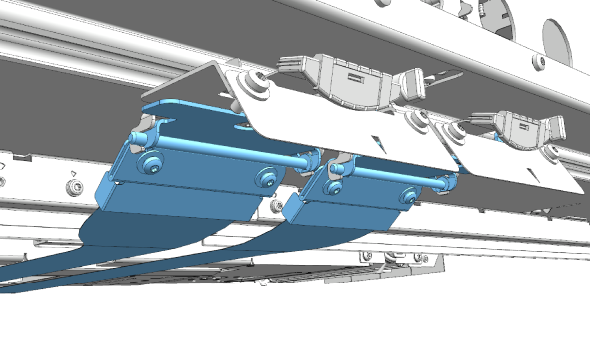
Go to the input side of the printer and locate the media edge guards. |
|
|
3 |
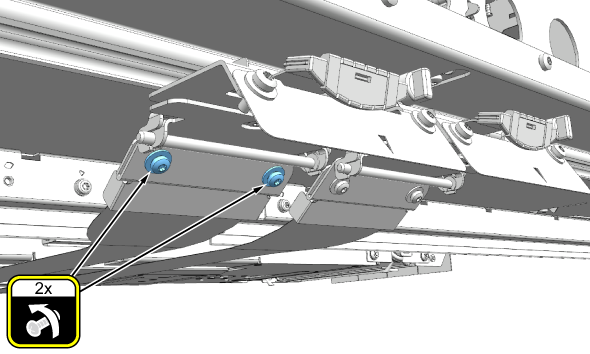
Take the screwdriver and loosen 2 screws to remove the first media edge guard from the printer. Do not remove the screws entirely, they can stay on the media edge guard. Repeat for the other media edge guard. NOTE
Be careful not to bend the media edge guards. |
|
|
4 |
Dispose the gloves and cloths as chemical waste according to local regulations. |
|
1 |
Put on the Colorado XL-series approved gloves. |
|
|
2 |
Go to the input side of the printer and hook the media edge guard into its slot. |
|
|
3 |
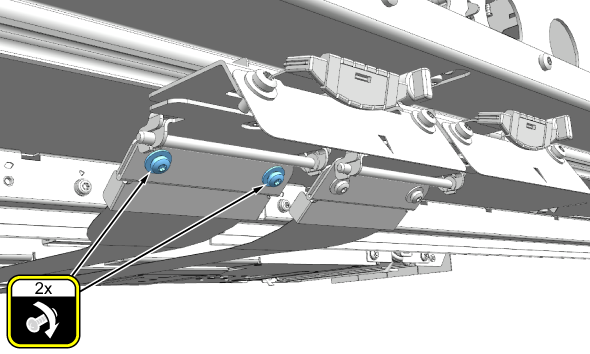
Tighten both screws on the media edge guard. NOTE
Be careful not to bend the media edge guards. |
|
|
4 |
Repeat for the other media edge guard. |
|
|
5 |
Dispose the gloves and cloths as chemical waste according to local regulations. |