As a daily maintenance task
When the back of the printed output shows ink pollution.
Make sure you have the following cleaning materials at hand.
Lint Free Cloths (moistened with demi water)
Demi water
The small plastic bottle (included in the vacuum hole cleaning kit)
One of the cleaning brushes (included in the vacuum hole cleaning kit)
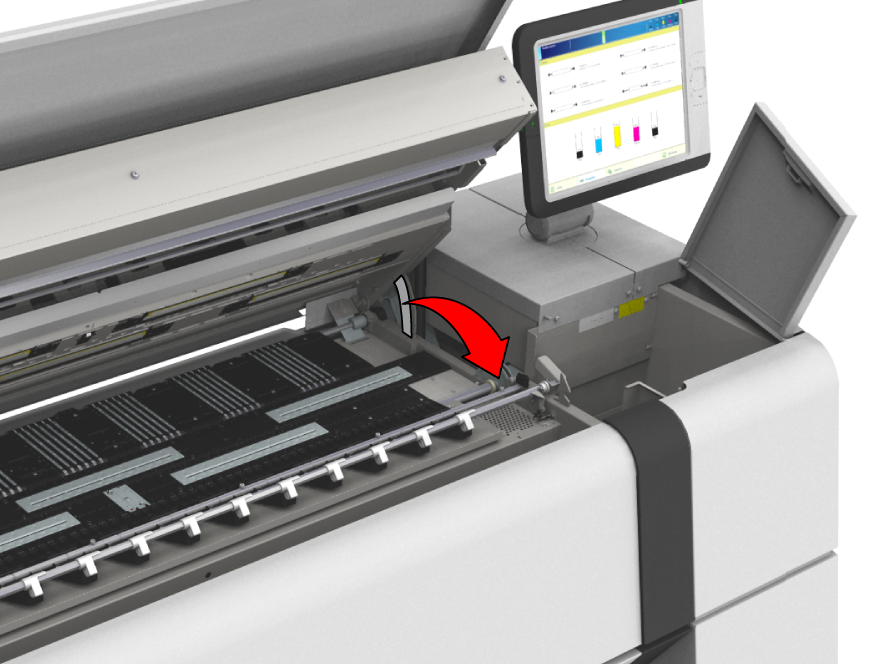
From this point you can also follow the video instruction. After that, proceed with step number 16.

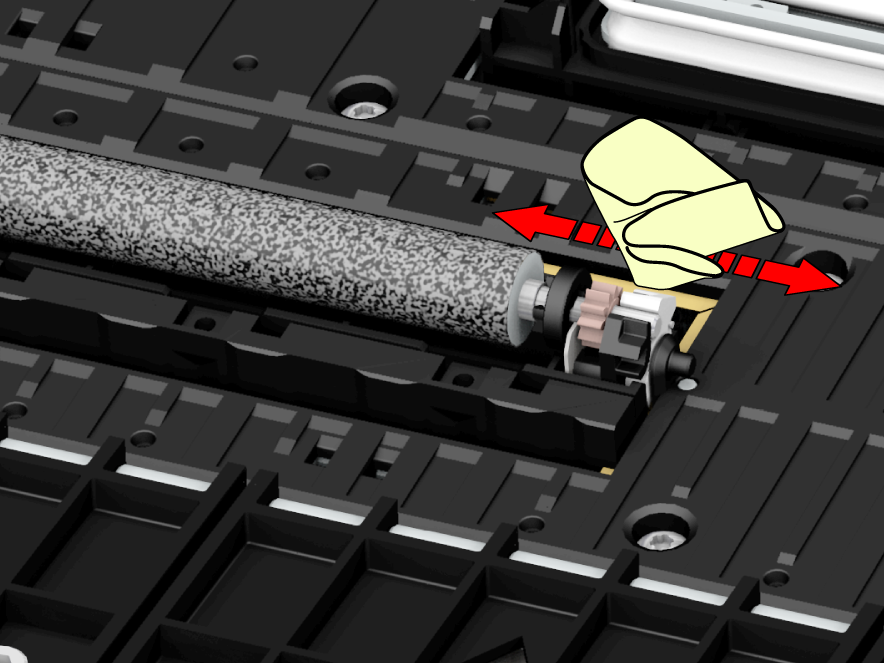
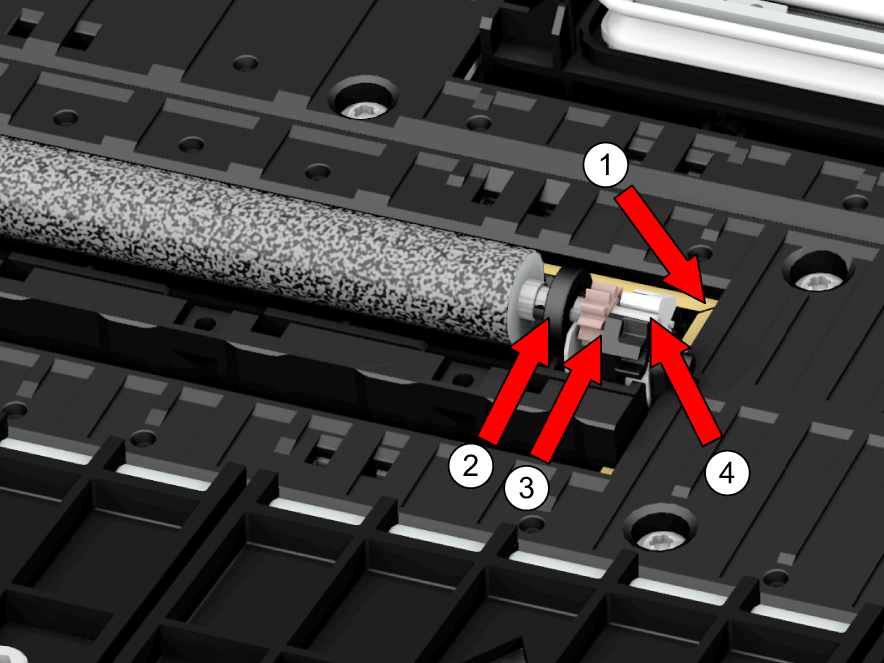
the plastic transparent sealing
the disc
the gear
the shaft
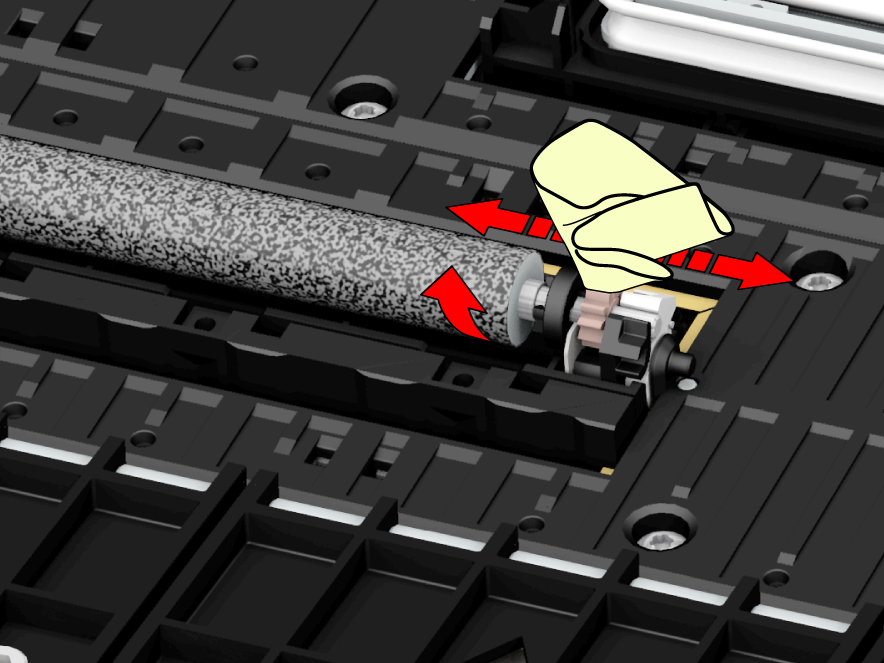
Do not touch the micro-fibre surface of the wiper roller.
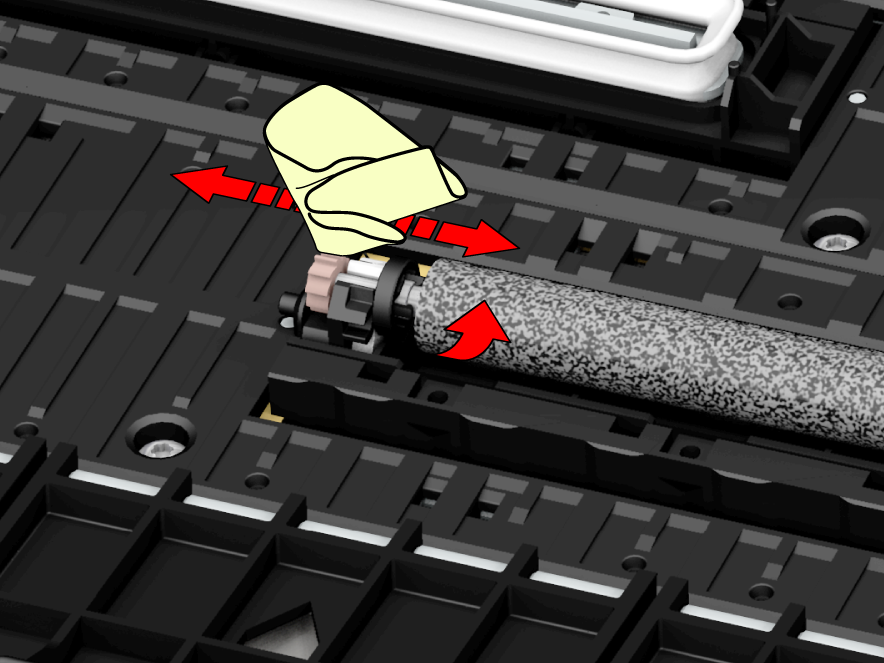
Do not touch the micro-fibre surface of the wiper roller.
Do not touch the micro-fibre surface of the wiper roller.