
UVgel can pollute the printbelt rollers and the print surface. To prevent damage to the printer, you must clean these areas. You must remove the printbelt to clean the rollers and print surface. If necessary, replace the printbelt.
You must clean 2 rollers: the idle roller on the input side, and the drive roller on the output side of the printer.
Use Colorado XL-series prescribed:
Microflex gloves for handling UVgel
Lint free cloths
Long pintle wire (if replacement is necessary)
New printbelt (if replacement is necessary)
Scraper
Pliers
Cutting pliers
Surface cleaner
Duct tape
large sheet of media
2 steering roller blocks
 CAUTION
Always wear protective gloves when opening the covers of the machine.
CAUTION
Wear gloves when contact with ink or maintenance materials is possible. Gloves should always overlap sleeves. Follow the ink related Safety Data Sheets (SDS) guidelines carefully in order to ensure maximum safety.
 NOTE
NOTE
Make sure the duct tape does not leave any residue after removal. Residue can damage the print surface.
|
1 |
Make sure the tables for rigid media are not attached to the printer. See Attach the tables to the printer. |
|
|
2 |
Remove the media edge guards from the printer. See Remove or attach the media edge guards. |
|
|
3 |
Make sure any media is removed from the printbelt. |
|
|
4 |
Put on the Colorado XL-series approved gloves. |
|
|
5 |
Go to the input side of the printer |
|
|
6 |
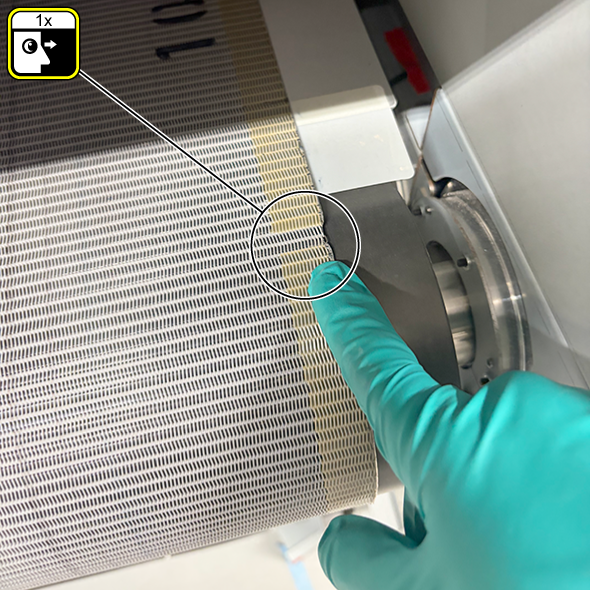
A long pintle wire holds both ends of the printbelt together at the seam. Use the media buttons to wind the printbelt until the seam is accessible from the input side of the printer. |
|
|
7 |
Shut down the printer. On the user interface, go to . When the printer shuts down, tension is taken off the printbelt. NOTE
Make sure that tension is taken off the printbelt before you continue. |
|
|
8 |
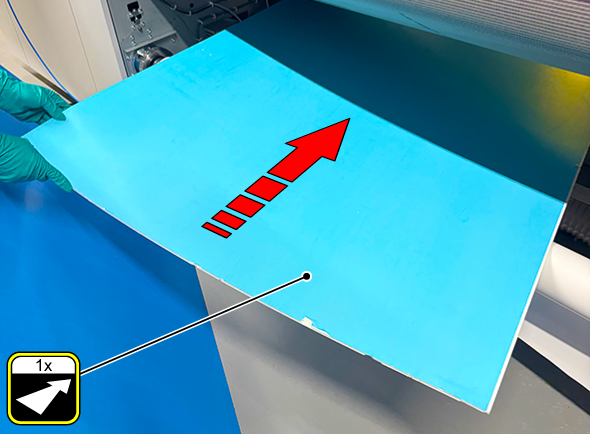
Place a large sheet of media under the print belt and over the media rolls. This protects the printbelt from damage after it is removed. |
|
|
9 |
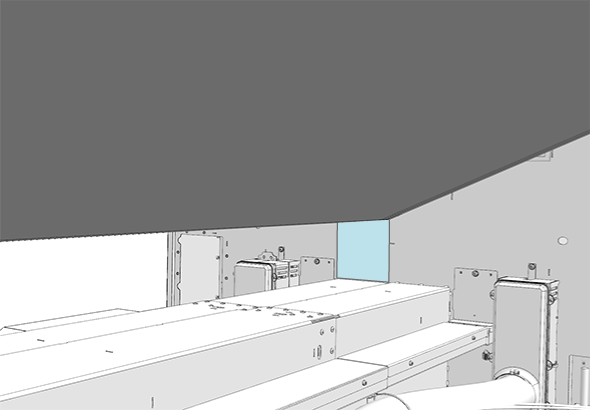
Push and lift a steering roller block into the space under the bearing on one side of the steering roller. Do this for the other side as well. |
|
|
10 |
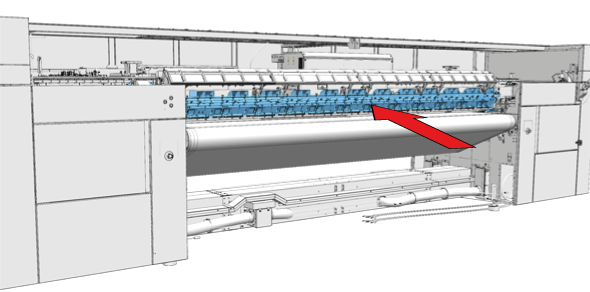
From the output side of the printer, manually move the curing beam to its highest position to access the printbelt more easily. |
|
|
11 |
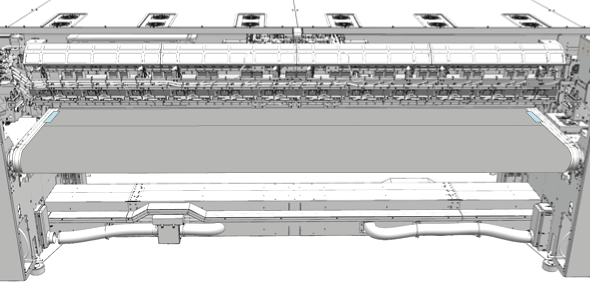
Use duct tape to secure the upper section printbelt to the print surface. Do this on the left-hand and right-hand sides of the printbelt. NOTE
Make sure the duct tape does not leave any residue after removal. Residue can damage the print surface. |
|
|
12 |
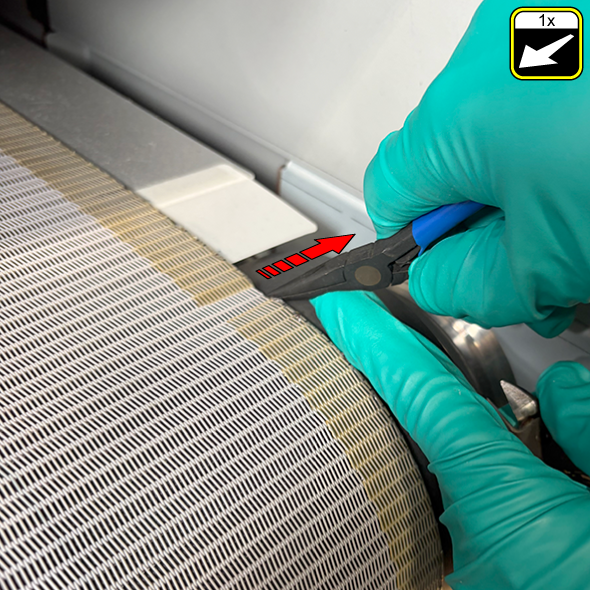
Pull the bent uncoated end of the pintle out of the print belt. Use the needle-nose pliers. Straighten the bent uncoated end, or cut off the bent uncoated end. Use the needle-nose pliers. NOTE
To re-use the pintle, try to reduce the amount of lost length. Only cut off the smallest amount necessary. |
|
|
13 |
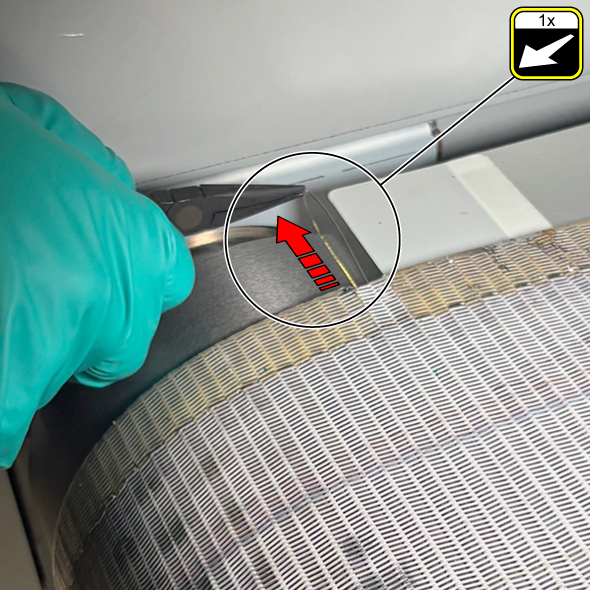
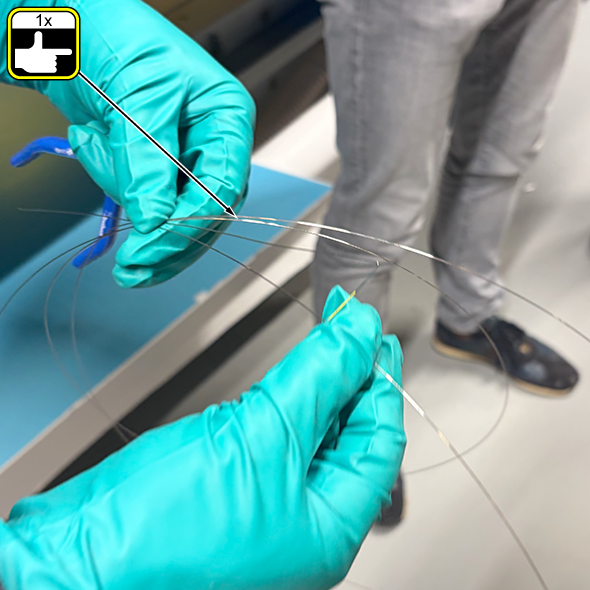
Pull the bent coated end of the pintle out of the print belt. Use the needle-nose pliers. Roll the pintle like a rope as it comes out of the print belt. CAUTION
Risk of injury to the eyes as the end of the pintle comes out of the print belt. Remove the end of the pintle carefully. NOTE
Be careful with the pintle. If the pintle will be re-installed, it must be undamaged and clean before the re-installation. |
|
|
14 |
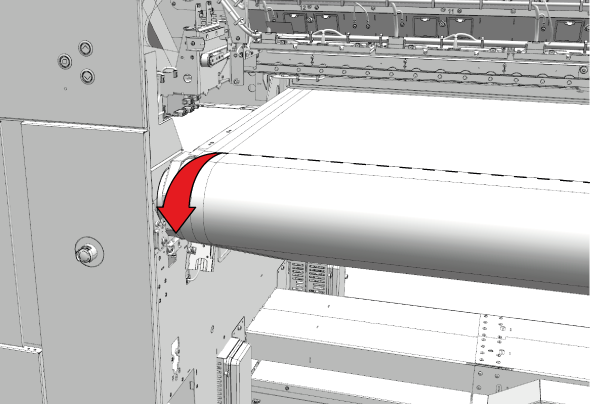
On one side of the print belt, start to disconnect the links of the edges. Use your hands to pull the links apart. |
|
|
15 |
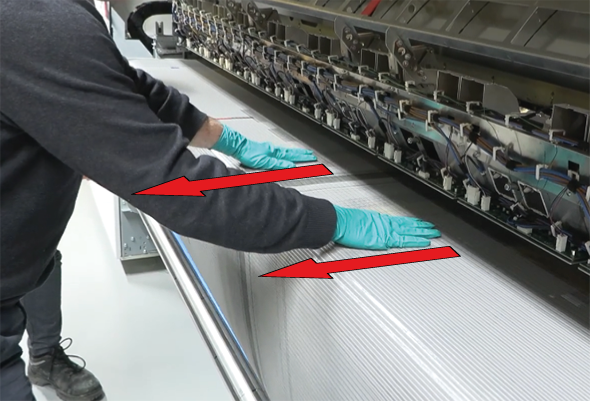
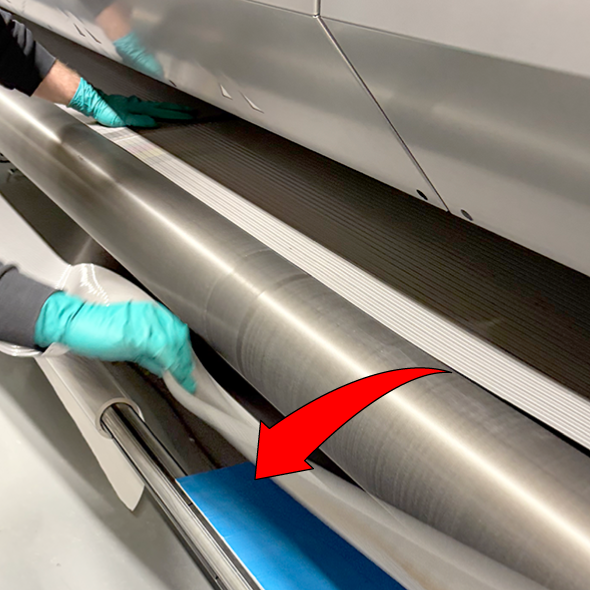
On the output side of the printer, place your hands on the printbelt and move the it towards you, through the printer, to unwind the printbelt. Gently lower the disconnected lower edge onto the rigid boards. Use your hands. |
|
|
16 |
When you reach the end of the printbelt, remove the duct tape to fully remove the printbelt from the printer. |
|
Inspect the rollers and print surface for pollution and clean where necessary
NOTE
Clean the rollers with lint free cloths only. Do not use a scraper on the rollers.
|
1 |
Put on the Colorado XL-series approved gloves. |
|
|
2 |
Go to the input side of the printer. |
|
|
3 |
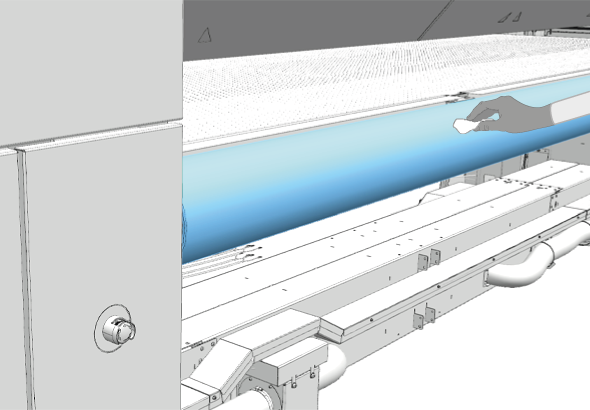
Dampen a lint free cloth with the surface cleaner and clean any uncured UVgel off the idle roller. |
|
|
4 |
Go to the output side of the printer. |
|
|
5 |
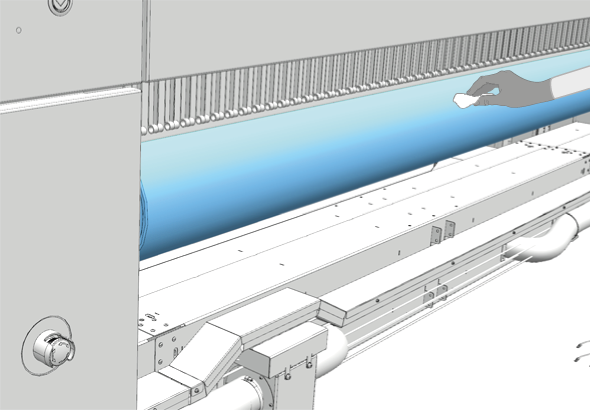
Dampen a lint free cloth with the surface cleaner and clean any uncured UVgel off the drive roller. |
|
|
6 |
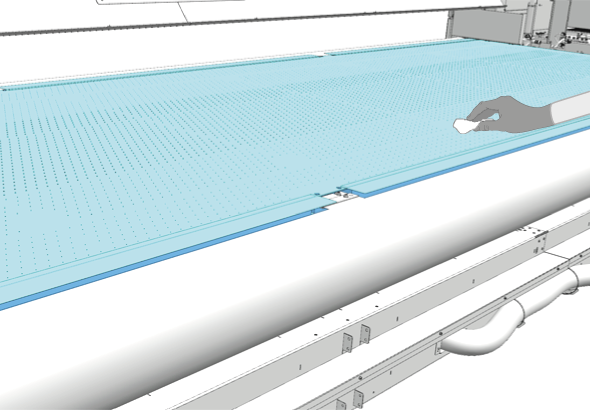
Inspect the print surface for any pollution. If needed, dampen a lint free cloth with the surface cleaner and clean any uncured UVgel off the print surface. |
|
|
7 |
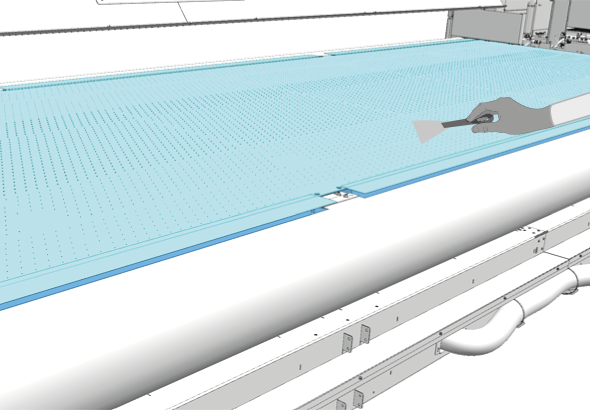
If any cured UVgel is on the print surface, take a scraper and carefully scrape it off. NOTE
Do not scrape too hard or with pointy tools. Be carefully not to damage the print surface. |
|
You can use the old pintle wire and printbelt again. If they are damaged, you can replace them in this part of the procedure.
|
1 |
Put on the Colorado XL-series approved gloves. |
|
|
2 |
Prepare about 9 pieces of duct tape and keep them within reach on the output side of the printer. |
|
|
3 |
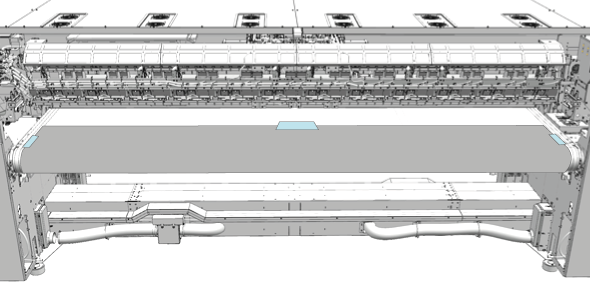
On the output side of the printer, place the end of the printbelt on the print surface. Use the duct tape to secure the printbelt to the print surface in the middle, left-hand side, and right-hand side. NOTE
Make sure the duct tape does not leave any residue after removal. Residue can damage the print surface. |
|
|
4 |
Manually push the printbelt through the printer until the taped edges are accessible from the input side of the printer. |
|
|
5 |
Go to the input side of the printer. |
|
|
6 |
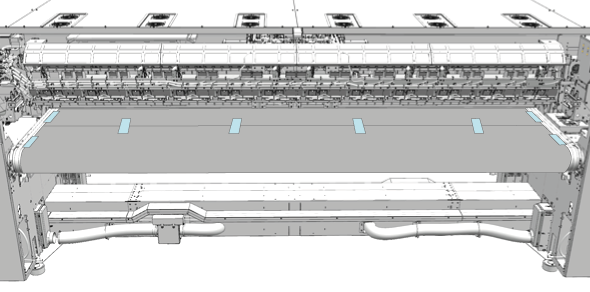
Pull the other end of the printbelt from underneath the printer and tape it to the upper end. Make sure they are aligned as closely together as possible. |
|
|
7 |
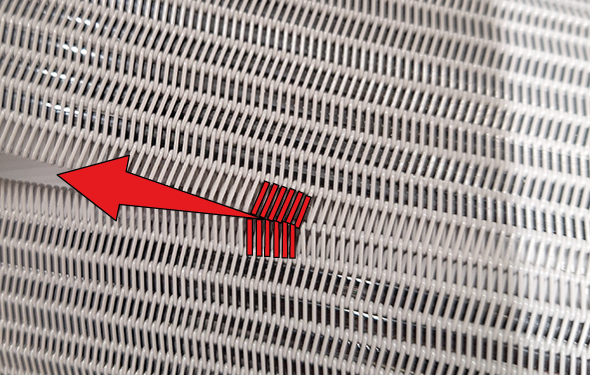
Starting from the left-hand or right-hand side of the printer, push down on the seam to weave the ends together. Follow the arrow-like direction of the teeth. This makes it easier to attach te ends together. |
|
|
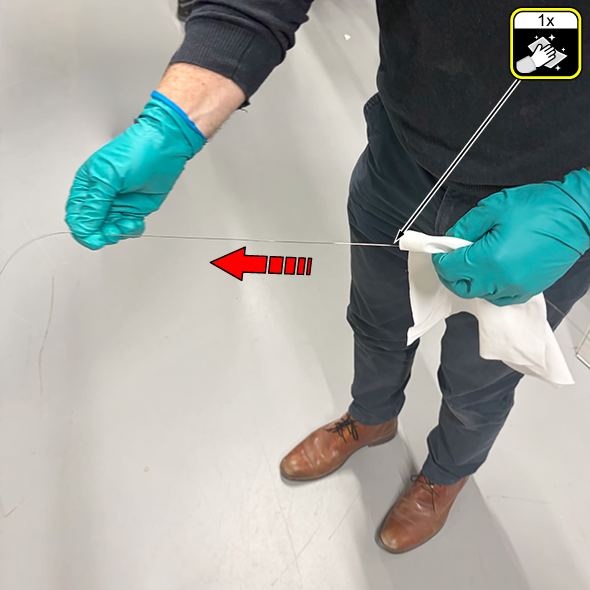
Pull the pintle through a cleaning cloth wetted with IPA fluid. |
|
|
|
8 |
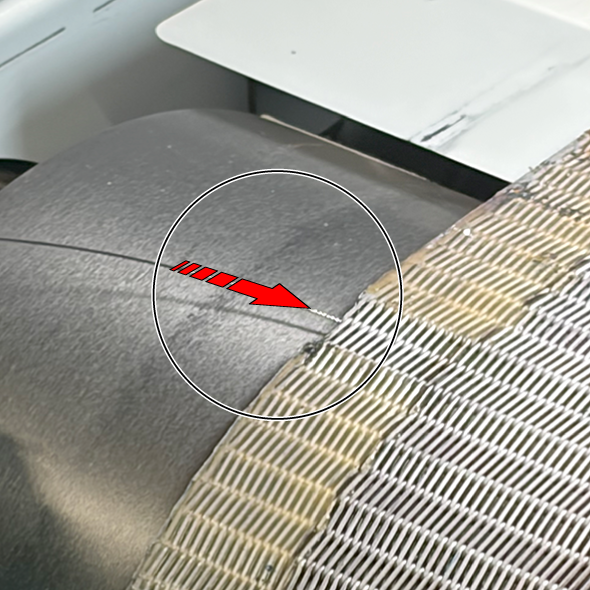
Put the uncoated end of the pintle into the connected links of the print belt. NOTE
Take care not to damage or bend the pintle. |
|
|
9 |
Feed the pintle wire through the entire length of the seam. |
|
|
10 |
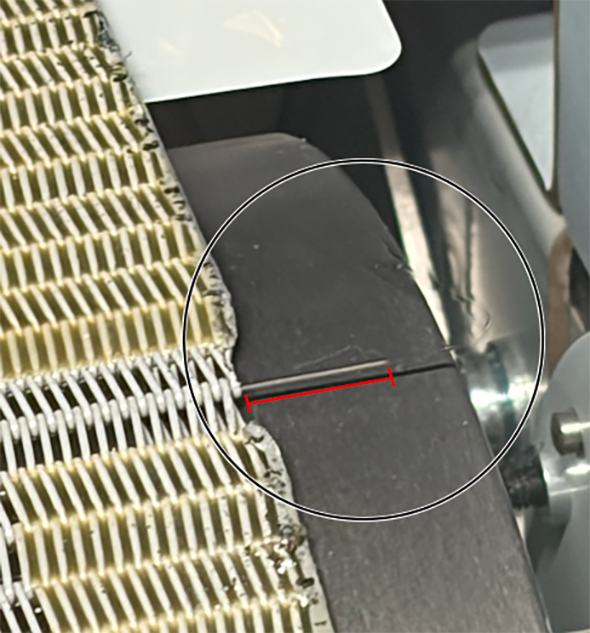
Continue to push the pintle until it extends out of the edge at the dry side for 6mm (0.2 inch). |
|
|
11 |
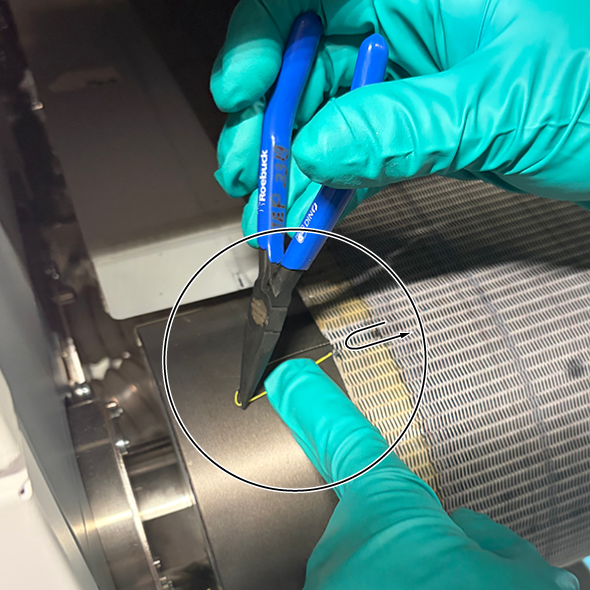
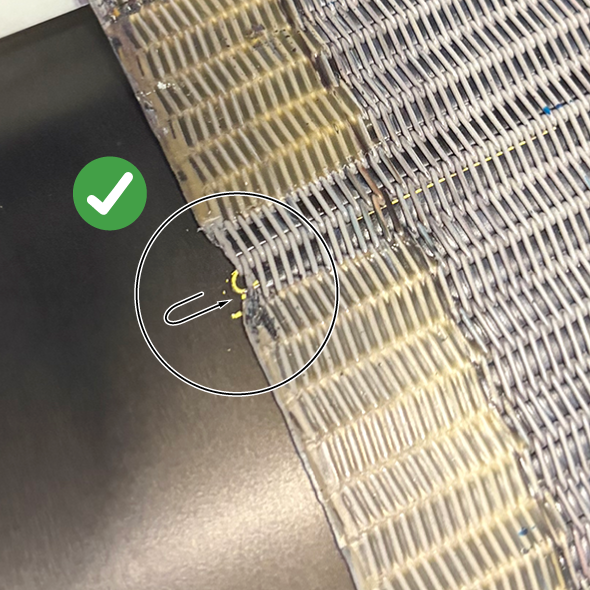
Starting with the longest end of the pintle, use pliers to bend the end of the pintle wire and weave it into the printbelt. NOTE
Do not twist the pintle when you weave in the ends of the pintle. If the pintle does not lie flat, the printbelt can curl. |
|
|
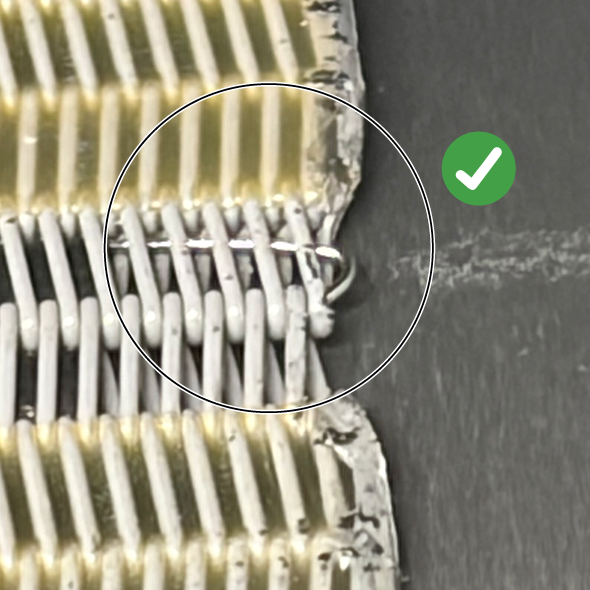
12 |
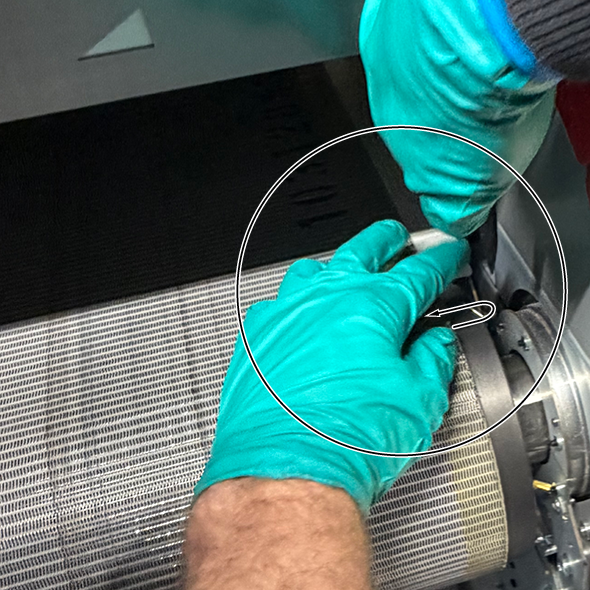
Repeat for the shorter end of the pintle wire. |
|
|
13 |
Ensure that both ends of the pintle wire are tucked in and that no sharp ends stick out. |
|
|
14 |
Remove the steering roller blocks and rigid boards. |
|
|
15 |
Dispose the gloves and cloths as chemical waste according to local regulations. |
|
|
16 |
Turn on the printer. |
|
|
17 |
The printer is now ready to print again. |
|