Loading

Remove UV-ink spillage from the table (FLXflow)

Introduction

This section explains how to remove uncured ink from the printer vacuum table with the FLXflow option.

Equipment:

  • Safety glasses with side shields

  • Gloves (for example: Ansell Microflex 93-260)

  • Absorbent cloths

  • Surface Cleaner

IMPORTANT

Make sure that the cleaning fluid does not leak into the vacuum holes. This can cause problems for the adhesion of the overlay.

Procedure

  1. Always use the recommended gloves for working with UV ink.
  2. Place a dry absorbing cloth on top of the ink spillage to absorb the ink.

    Avoid wiping. Repeat until most of the ink is absorbed.

  3. Wipe the table with a clean, dry absorbent cloth.

    Ensure that the table surface, including the holes, is completely clean.

  4. Place a sheet of paper on the ink spillage position and place something heavy on top of the paper to prevent it from drifting.
  5. Open the tab [Settings], section [Printer], on the operator panel.

    Set the [Table floating timeout (min)] to 5 minutes.

  6. Click the [FLXflow Settings] button in the Print tab.

    Set the Float percentage to 100%. For XTF models, set the percentage for the zone where the spillage is located.

  7. Double-click the Table Vacuum button to activate Float for 5 minutes.

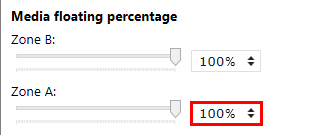
    For XTF models, double-click the Zone A or B button, depending on the location of the ink spillage.

  8. Visually check whether UV-ink is present on the table surface, holes or paper.
  9. If ink is still present, repeat steps 3-7 once.
  10. When no ink is present, clean the table with a wet cloth with surface cleaner. Then repeat steps 4-7 once.
    NOTE

    Notify the operators of the upcoming shifts that there has been a spillage of ink. There is a minor risk of ink pollution on the media or table later.

  11. If the ink is still present, please contact your local service representative for a cleaning action.