
The instructions of this topic belong to the preparation of the IEEE 802.1X environment.
The instructions below refer to a CISCO SG350 switch. Other switches may need other configuration. See the vendor documentation of the switch for complete instructions.
Perform the instructions in the order they are listed.
This configuration has been done:
 Configure IEEE 802.1X on the authentication server (phase 1)
 IEEE 802.1X on the switch
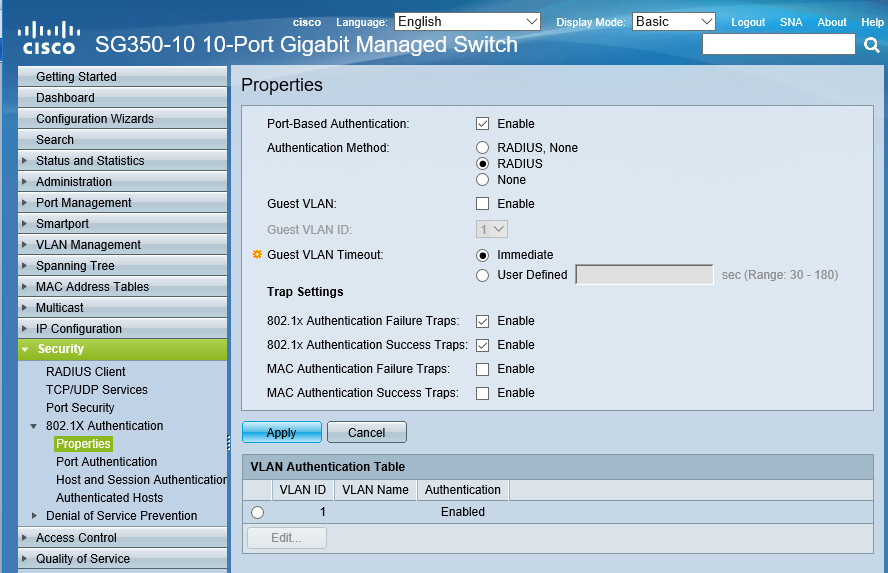
Start the web-based configuration utility.
Click [Security] -> [802.1X Authentication] -> [Properties].
Select the [Enable] check box in the [Port-based Authentication] field .
Select [RADIUS] in the [Authentication Method] option group.
Click [Apply].
 Port authentication
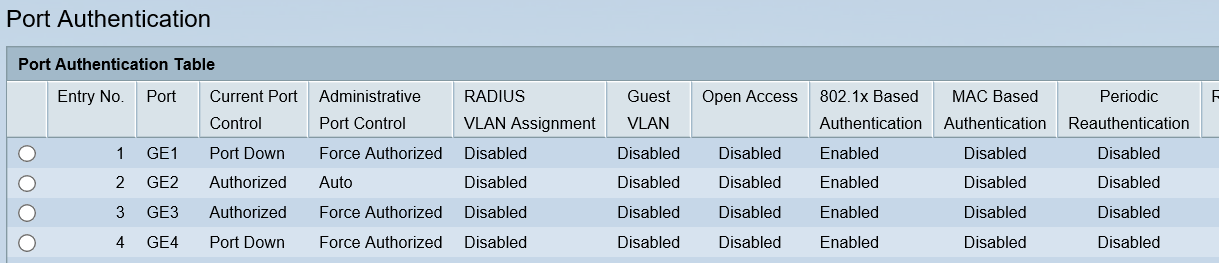
Start the web-based configuration utility.
Click [Security] -> [802.1X Authentication] -> [Port Authentication].
Select the port that you will use for the printer.
Click [Edit].
Select the option: [Auto] in the [Administrative Port Control] field.
Click [Apply].
 Communication with the RADIUS server
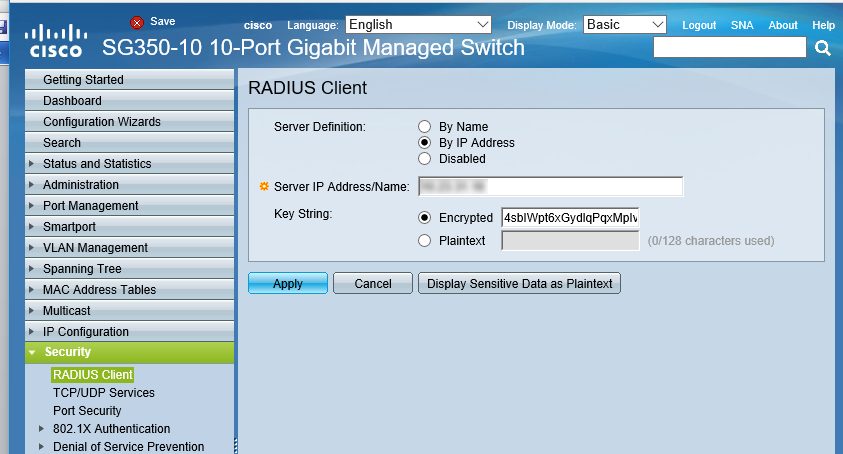
Start the web-based configuration utility.
Click [Security] -> [RADIUS Client].
Enter the hostname or IP address of the [RADIUS] server in the [Server IP Address/Name field].
Enter the shared key you configured on the [RADIUS] server in the [Key String] field.
Click [Apply].
When logging is enabled, you can see information and warnings about the IEEE 802.1X communication.
 Loggings
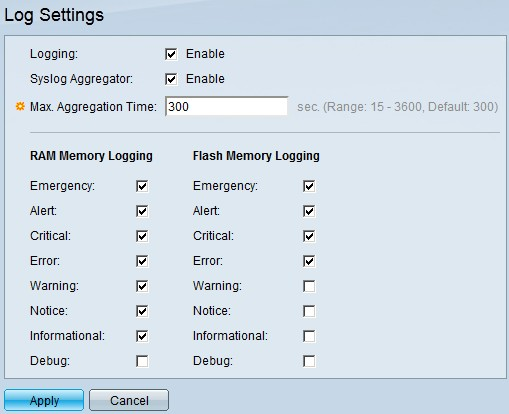 Log settings
Start the web-based configuration utility.
Click [Administration]-> [System Log]-> [Log Settings].
Select the [Enable] check box in the [Logging] field.
Click [Apply].