
The goal of the media family calibration is to achieve consistent color quality over time for media of the same media family.
Calibrate a media family in the following situations:
After the installation of the print system, for the default coated and uncoated media families.
When a new media family is created.
When your service organization replaces system parts.
When you want to keep the print quality high for frequently used media families.
A curve icon  indicates that a media family is not calibrated. This icon appears when a new media family was created without calibration or when the timer for media family calibration expires.
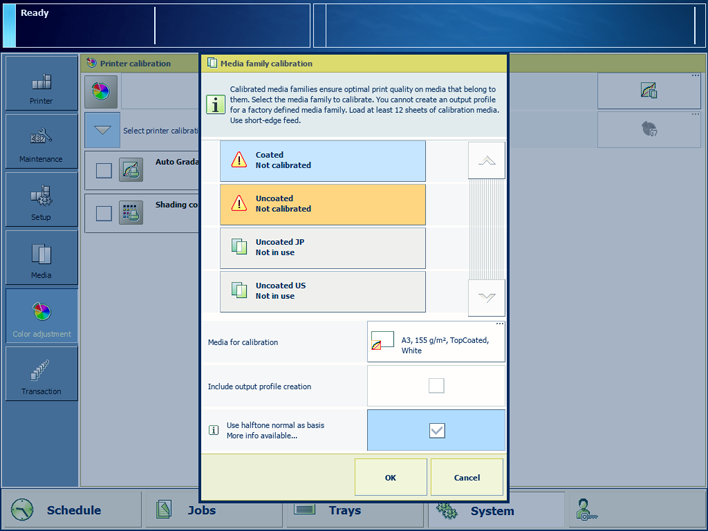 Media family calibration options
i1 spectrophotometer.
For more information about:
Calibration, see Learn about calibration.
Media family configuration, see Configure the media families.
Tolerance levels, see View tolerance levels for color evaluations.
Metrics, see Color validation metrics.
You must always perform a printer calibration before you continue with this procedure.
The system displays the default selected media for calibration.
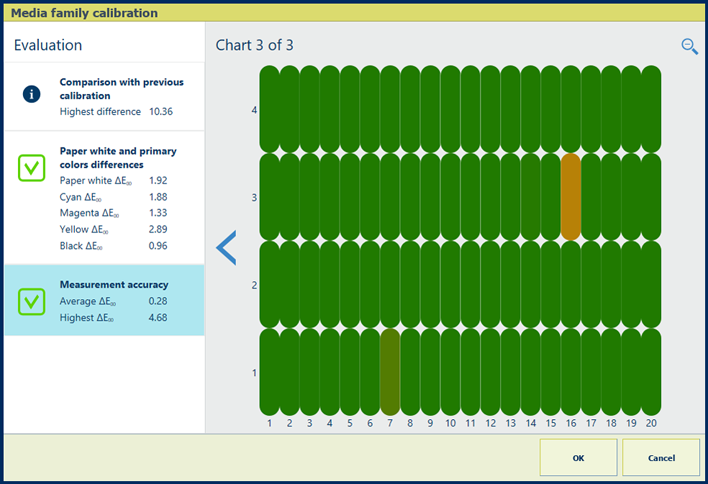
After media family calibration, the feedback window shows the results of the performed procedure.
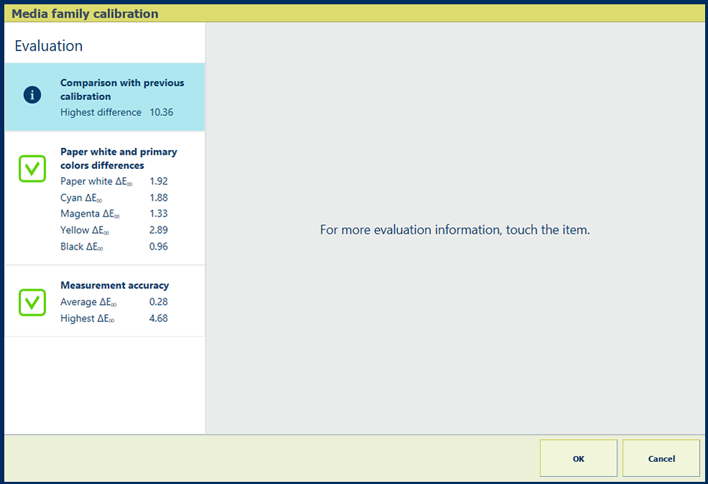 Feedback window of media family calibration procedure
When you see two green checkmark icons, touch [OK] to save the new calibration curves.
When you see a red cross icon, use the table below to evaluate the result. Then, click [OK] to save the new calibration curves or [Cancel] to discard the results.
|
Feedback screen |
Remarks |
|---|---|
|
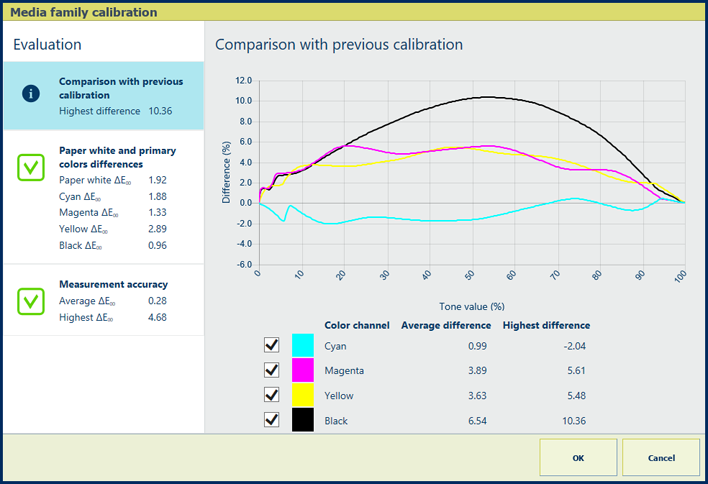
Description The CMYK lines in the graph show how many percent the color differs compared to the previous media family calibration. The [Highest difference] and [Average difference] values of the [Comparison with previous calibration] information are indicators for the frequency of the media family calibration. For the first media family calibration there are no reference values and thus no feedback information. |
|
Evaluation
|
|
|
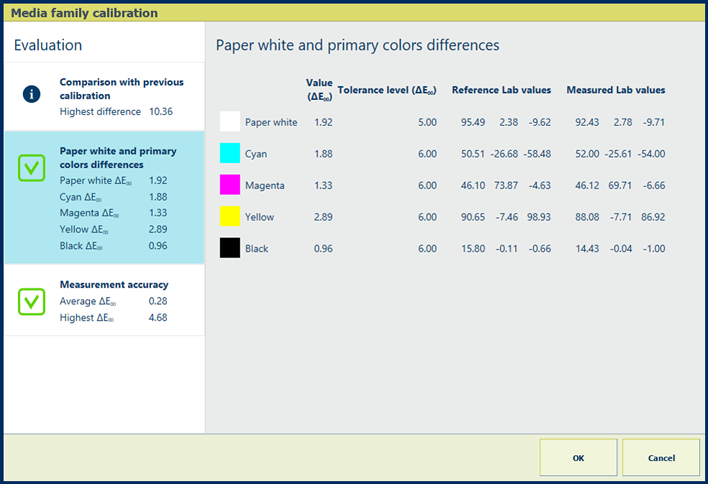
Description The ΔE values of the [Paper white and primary colors differences] information are indicators for the difference between the reference values and measured values. The [Reference Lab values] are taken during the first media family calibration. |
|
Evaluation
|
|
|
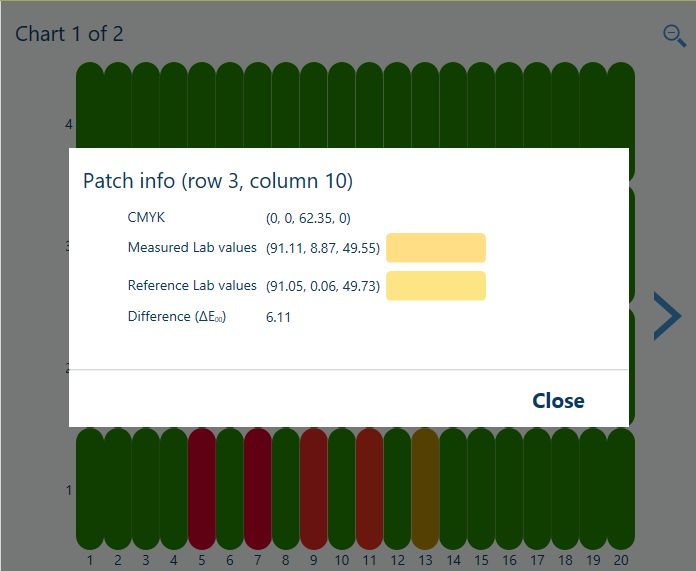
Description The ΔE values of the [Measurement accuracy] information are indicators for the accuracy by which the patches are printed and measured. The control panel displays a heatmap whose patch locations correspond with the printed chart. |
|
Evaluation
|
|
|
Options to improve color quality
|