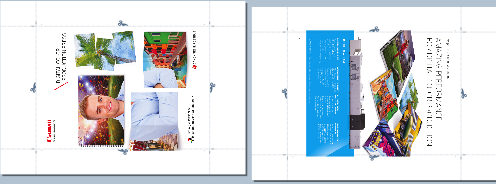
The print layout is defined during the job preparation. When jobs arrive in the list of waiting jobs or in a DocBox folder, there is time to check the layout in a realistic preview.
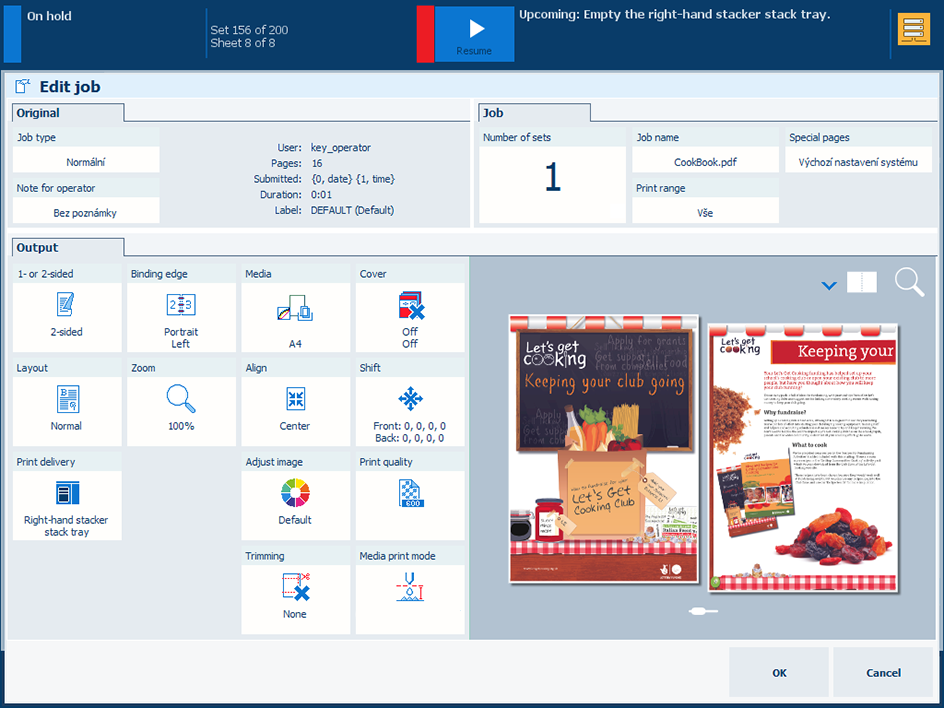 Job properties
Touch the print job.
Press [Edit].
The [Print sides] setting determines if one or two sides of the sheets are printed.
Press [1- or 2-sided].
Select [1-sided] or [2-sided].
Touch [OK].
The [Binding edge] setting determines how the document pages are bound.
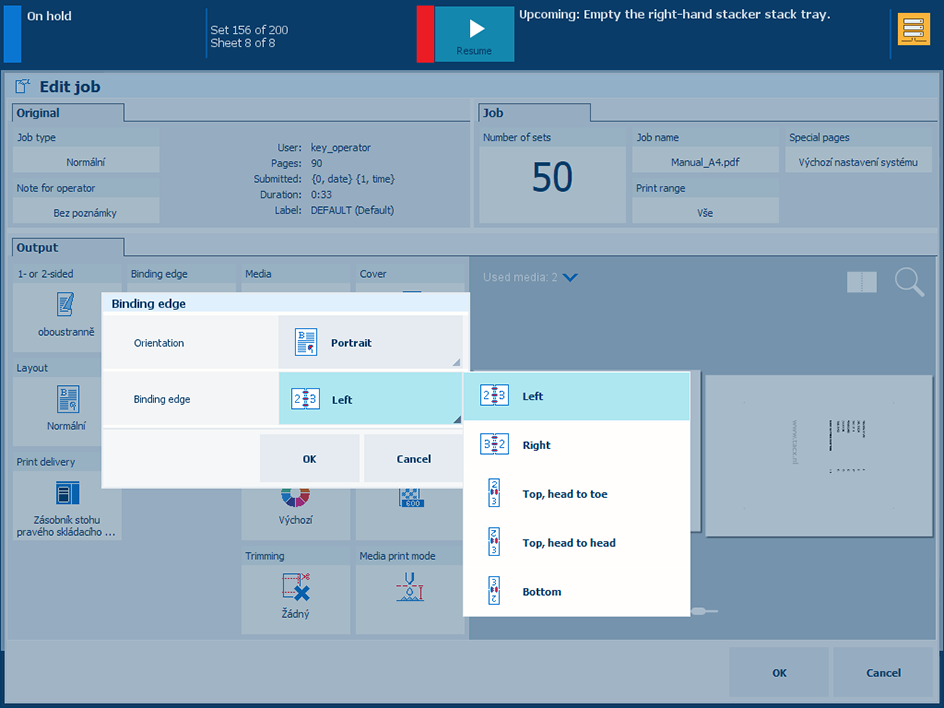 Adjust the binding edge
Press [Binding edge].
The document orientation ([Orientation] ) is the orientation when you hold the document pages to present it in a readable way.
The document orientation ([Orientation] is taken over from the source file and cannot be changed.
Use the [Binding edge] drop-down list to select how the pages of the document are bound: [Left], [Right], [Bottom], [Top, head to toe], [Top, head to head].
Touch [OK].
The [Cover] setting has several settings to define covers and cover media.
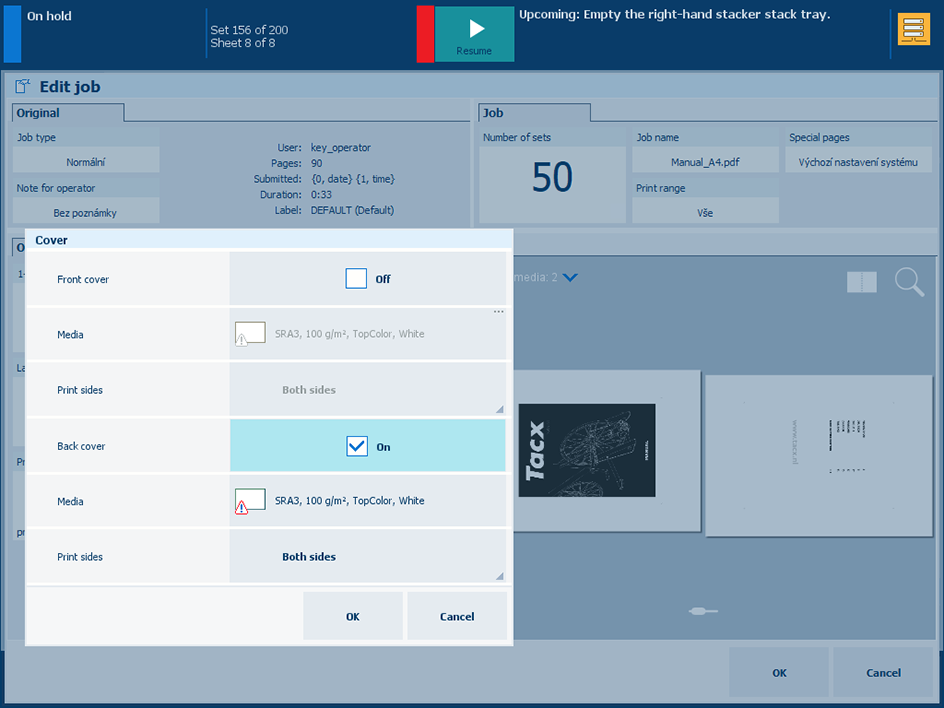 Adjust the cover settings
Touch [Cover].
Use the [Front cover] and [Back cover] check boxes to indicate the use of covers.
Use the [Media] drop-down lists to select the cover media.
Use the [Print sides] setting to indicate if you want to print the covers on one or both sides.
Touch [OK].
You select the media print mode of the covers in the [Media print mode] tile.
You can use the [Multiple up] setting to print subsequent source file pages on one document page.
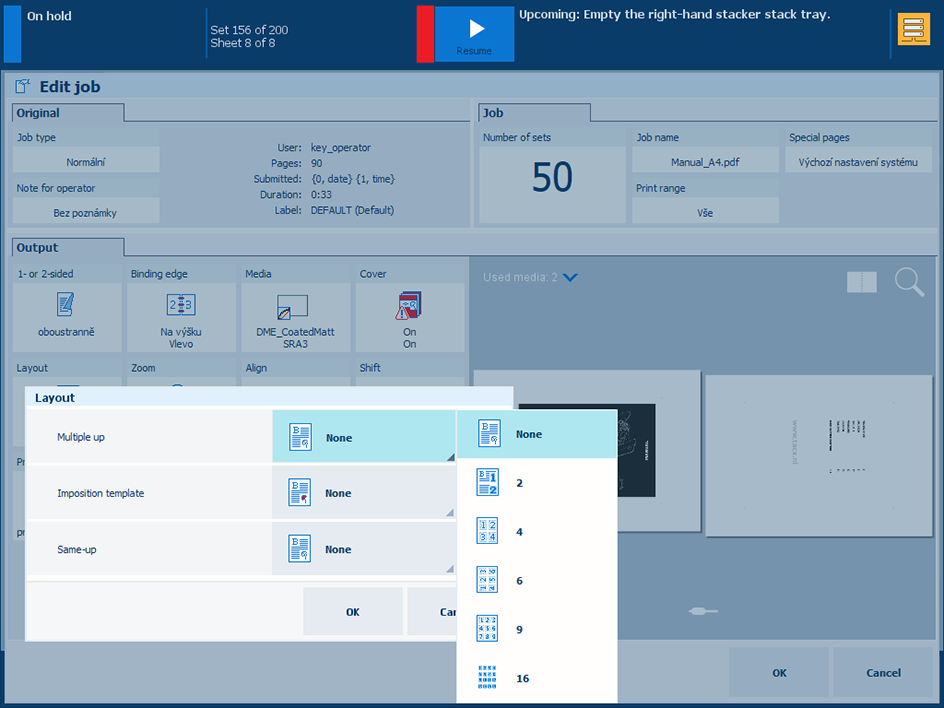 Select the [Multiple up] imposition
Touch [Layout].
Use the [Multiple up] drop-down list to select the number of pages that compose the imposition on a document page.
Touch [OK].
You can use the [Imposition template] setting to fold a document: once to create a booklet, twice to create a quarto, or three times to create an octavo. The sheets are printed in such a way that the pages of the folded document are presented in sequential order.
If [Same-up] is set to [None], all imposition templates are available. If [Same-up] is set to [2] or [2, rotate], you can only choose [Booklet (F4-1)] in [Imposition template]. If [Same-up] is set to any other value, [Imposition template] is not available.
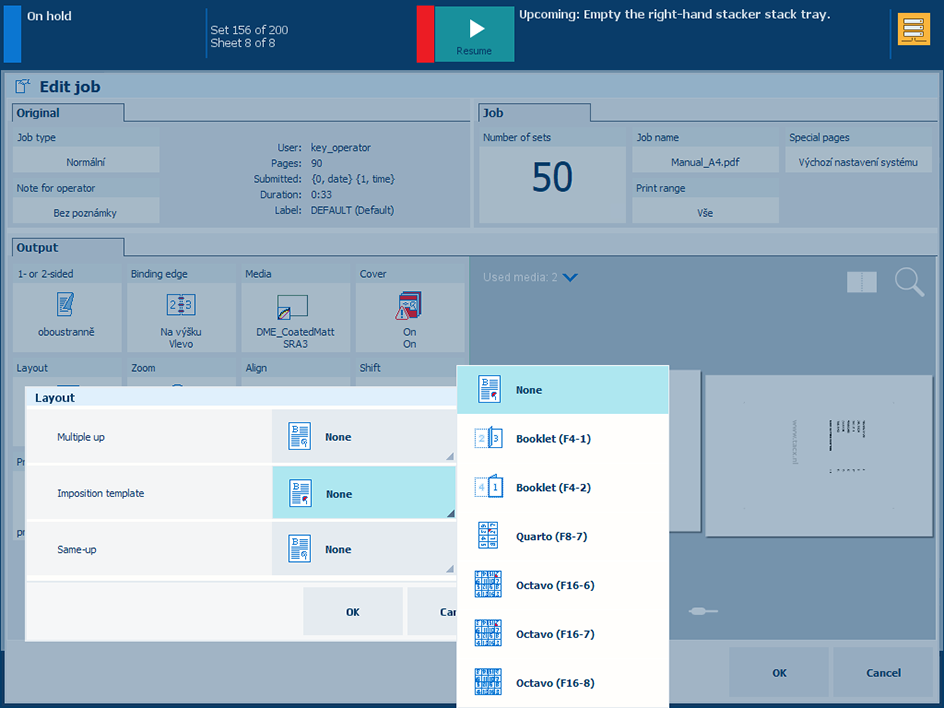 Select the [Imposition template]
 Touch [Layout].
Use the [Imposition template] setting to select one of the templates: booklet, quarto, or octavo.
Touch [OK].
You can use the [Same-up] setting to print the same source file page multiple times on a document page.
If [Imposition template] is set to [None], all values in [Same-up] are available. If [Imposition template] is set to [Booklet (F4-1)] or [Booklet (F4-2)], you can only choose [2] or [2, rotate] in [Same-up]. If any other imposition template is chosen, [Same-up] is not available.
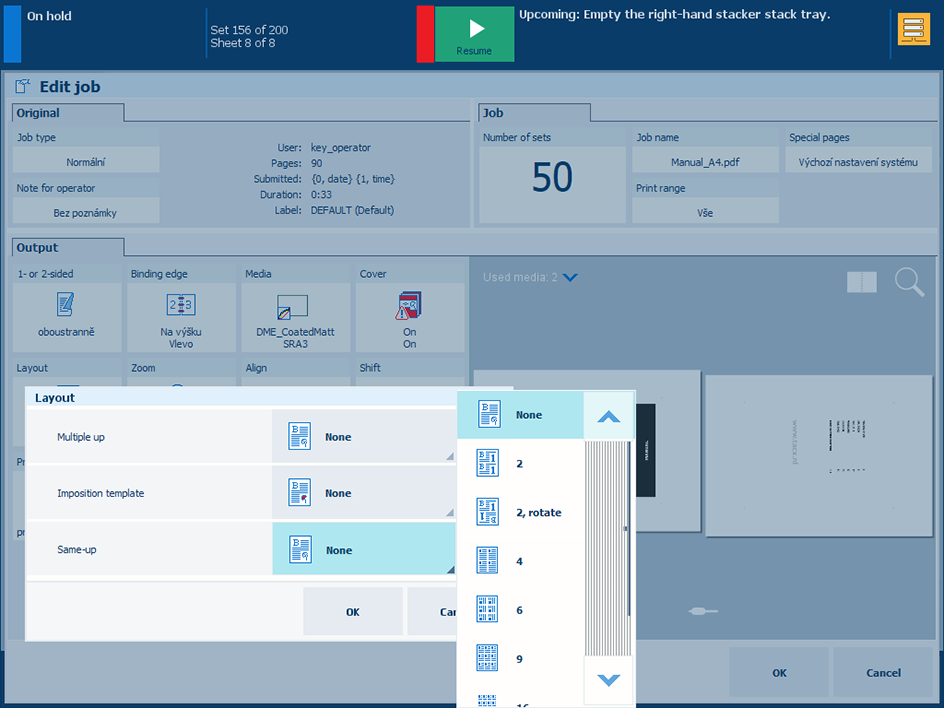 Select the [Same-up] imposition
Touch [Layout].
Use the [Same-up] drop-down list to select the number of source file pages that are printed on a document page.
Touch [OK].
When your printer has the Advanced Impose licence installed, you can select [Custom] in the drop-down list.
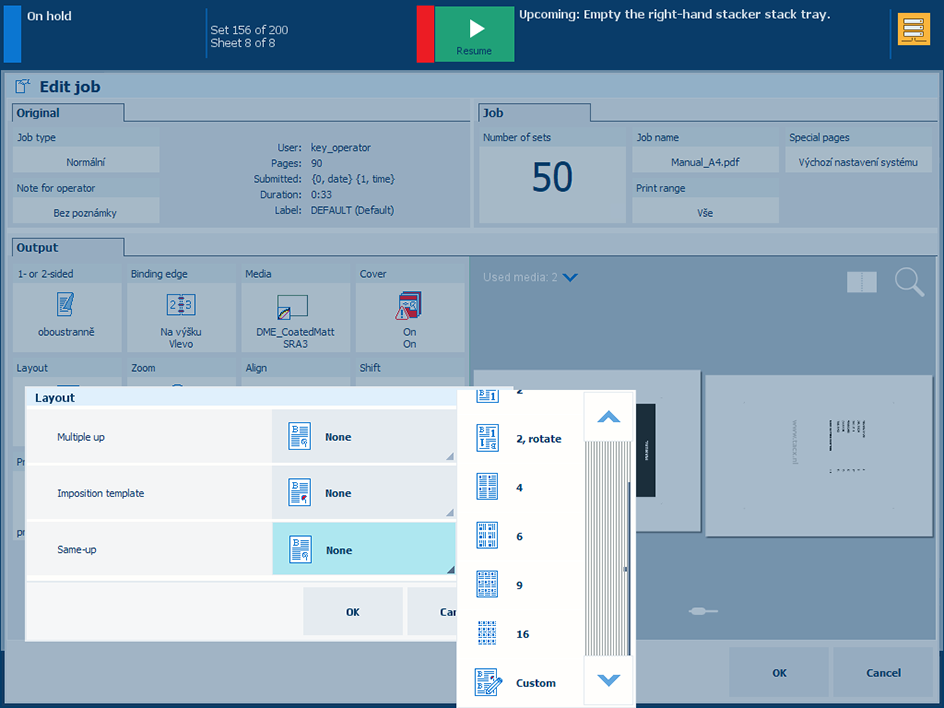 Select the [Custom] imposition
Use the [Same-up] drop-down list to select [Custom].
Use the [Cut and stack] setting to indicate if you want to cut and stack the sheets. You can choose to stack the sheets by sheet or by stack. It is also possible to choose the stacking directions: [Left to right], [Right to left], [Top to bottom] or [Bottom to top].
Use the [Columns] and [Rows] settings to select the number of rows and columns printed on a document page (values from 1 to 10). That way, you can define a custom number of source file pages that are printed on a document page. You can enter the number or use the - and + buttons.
Use the [Column spacing (mm)] and [Row spacing (mm)] settings to define the distance between rows or columns. The [Column spacing (mm)] and [Row spacing (mm)] settings become available only if [Trimming] is set to [Print trim marks] and [Size] is set to [Finishing size].
Use the [Column selection] and [Row selection] settings to select specific rows or columns: first, last, odd or even.
Use the [Column rotation] and [Row rotation] settings to rotate or flip rows and columns that you selected.
Touch [OK].
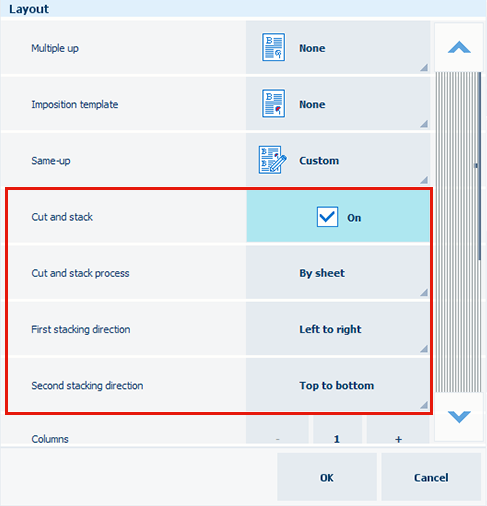 Settings for [Cut and stack]
 |
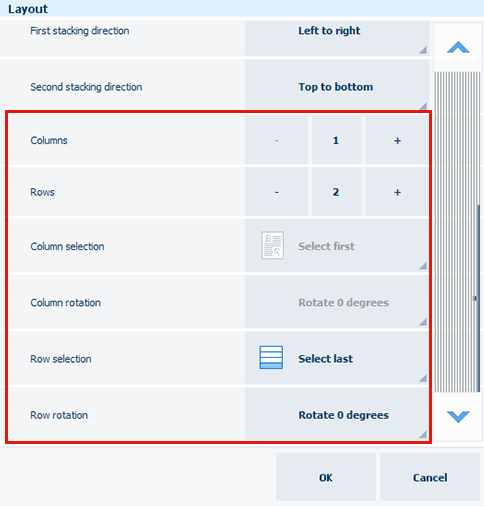 Settings for columns and rows
 |
You can scale the source file page or pages according to the document page size or set the zoom factor manually (25% - 400%).
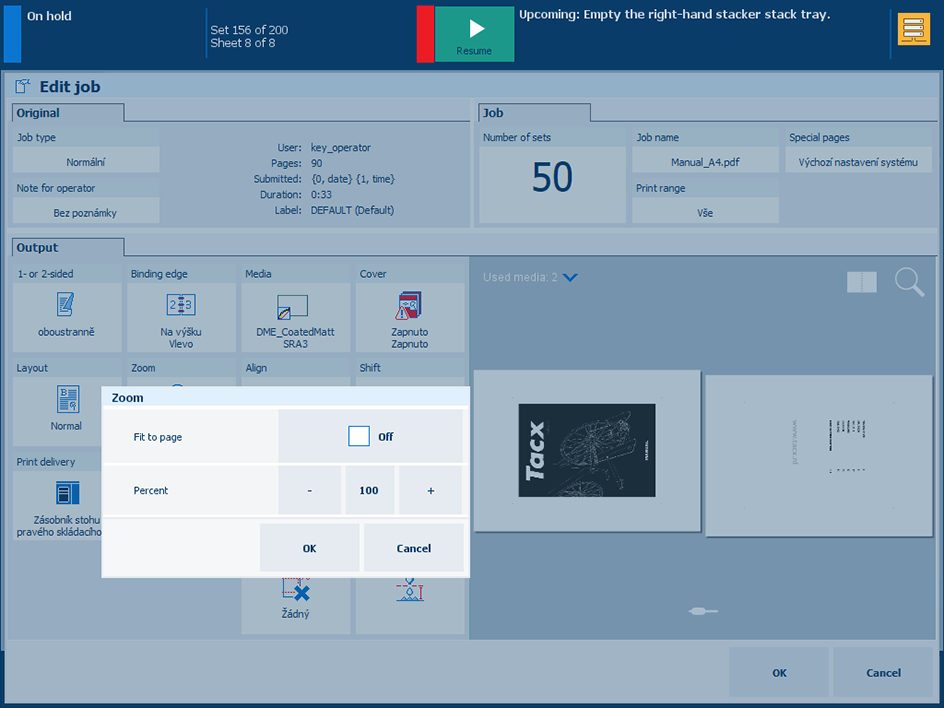 Use the Zoom setting
Touch [Zoom].
Use the [Fit to page] setting to resize the source file page according to the document page size.
Use the [Percent] setting to enter the zoom percentage or use the + and - buttons.
Touch [OK].
You can use the [Align] setting to align the source file page or pages on the document page.
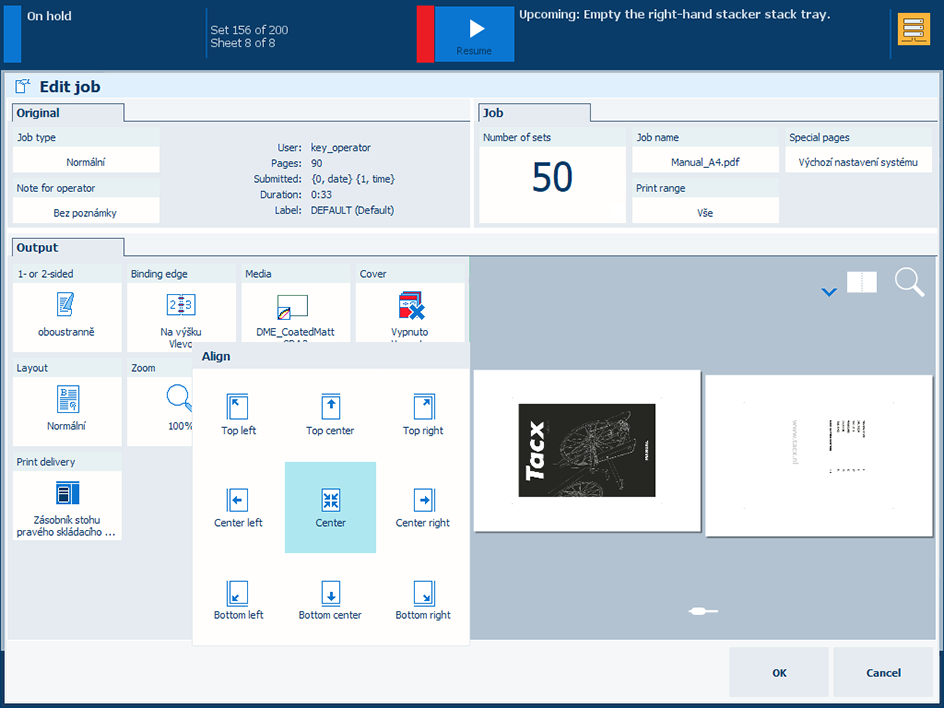 Select the alignment
Touch [Align].
Touch one of the available alignment positions.
Touch [OK].
The [Margin shift] setting shifts the source file page or pages on the document page to create more space at the binding edges. The maximum margin shift is +/- 100 mm / 3.94".
The margin shift of the front side and back side are coupled by default. To unlock the relationship, touch the chain symbol.
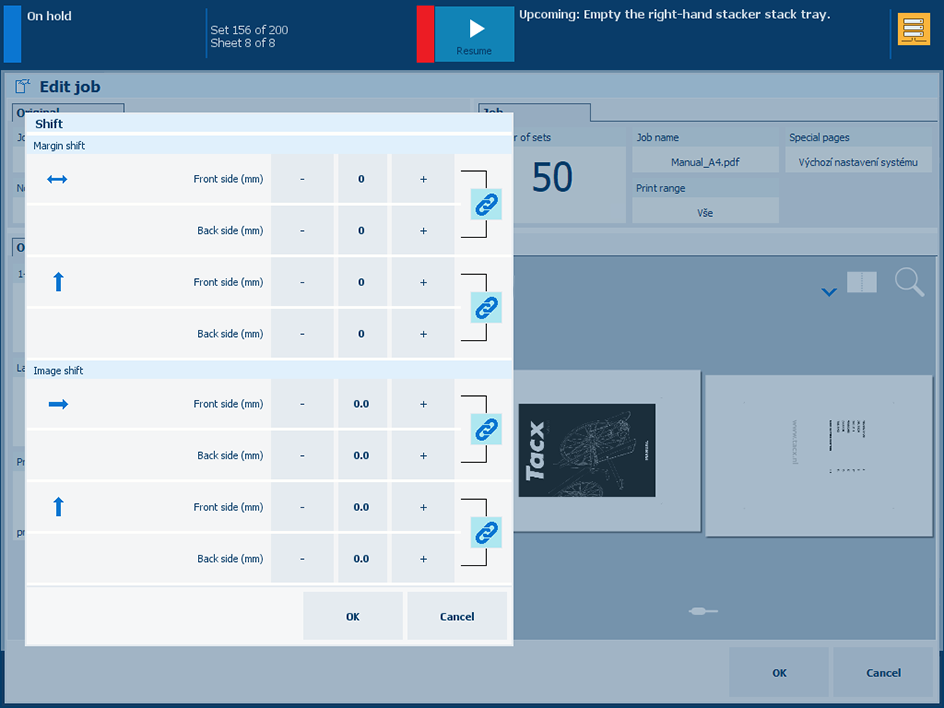 Adjust the margins
Press [Shift].
Use the [Margin shift] setting in horizontal direction ( ) or vertical direction (
 ).
).
Touch the [Front ({0})] field to enter a value or use the - and + buttons. This value is also displayed in the [Back side ({0})] field.
To define only the [Back side ({0})] margin, touch the chain symbol to unlock the front and back side fields.
Touch [OK].
The [Image shift] setting shifts the entire imposition that is composed of the source file page or pages. The maximum image shift is +/- 100 mm / 3.94".
The image shift of the front side and back side are coupled by default. To unlock the relationship, touch the chain symbol.
Adjust the marginsPress [Shift].
Use the [Image shift] setting in horizontal direction ( ) or vertical direction ().
Touch the [Front ({0})] field to enter a value or use the - and + buttons. This value is also displayed in the [Back side ({0})] field.
To only define the [Back side ({0})] margin, touch the chain symbol to unlock the front and back side fields.
Touch [OK].
The [Margin erase] setting erases the margin of the source file page or pages. The maximum margin erase is +/- 100 mm / 3.94".
 Define Margin erase
 Touch [Margin erase].
Touch the sheet edge (top, bottom, left, right) where you want to erase the margin.
Touch the [Binding edge] field to enter a value or use the - and + buttons.
Touch [OK].
The [Trimming] setting places trim marks on the document page. The trim marks come around the source file pages. The maximum trim size is 999.9 mm / 39.37".
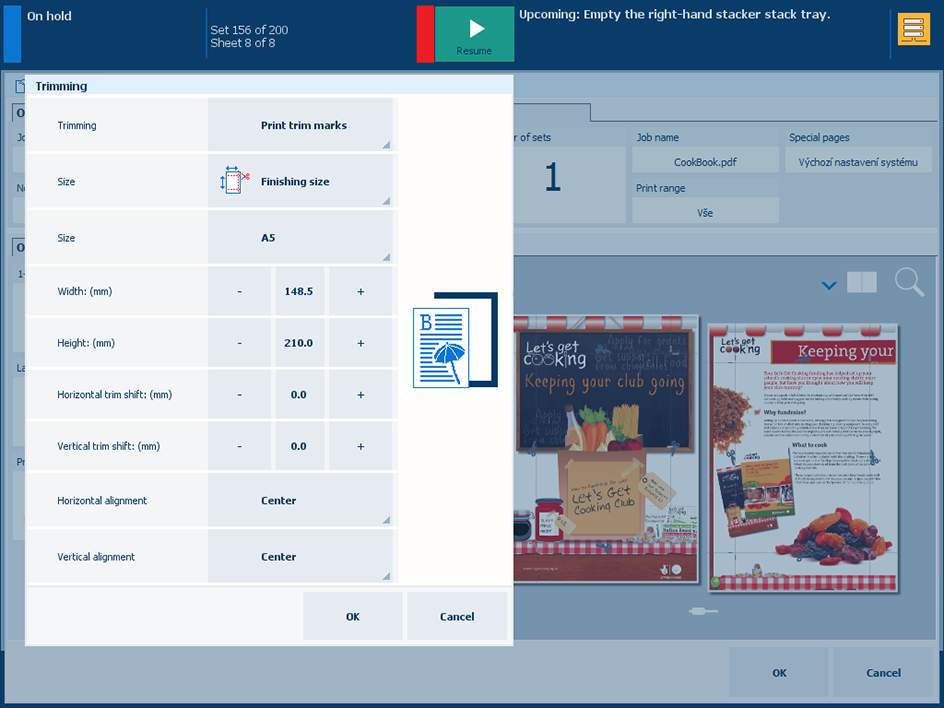 Print trim marks
[Horizontal trim shift: ({0})], [Vertical trim shift: ({0})], [Horizontal alignment] and [Vertical alignment] settings become available only if:
You have the Advanced Impose licence installed on your printer;
In [Same-up], [Custom] is selected;
[Trimming] is set to [Print trim marks];
[Size] is set to [Finishing size].
Touch [Trimming].
Select [Print trim marks].
Select the size: [Trim size] or [Finishing size].
Use the [Width ({0})] and [Height: ({0})] fields to enter a value or use the + and - buttons.
The notation {0} refers to the trim size in mm or inches.
Use the [Horizontal trim shift: ({0})] and [Vertical trim shift: ({0})] settings to shift the trim marks horizontally or vertically. Enter a value or use the + and - buttons.
The notation {0} refers to the trim size in mm or inches.
Use the [Horizontal alignment] and [Vertical alignment] settings to indicate whether the trim marks need to be aligned to the centre, top or bottom.
Alignment will be applied if [Column spacing (mm)] and/or [Row spacing (mm)] are set to values different than zero.
Touch [OK].
Check the trim marks in the realistic preview.