In order to print white applications, the media profile needs to be a CMYKSS profile with white print modes. These media profiles can be downloaded from graphiPLAZA and Mediaguide.cpp.canon.
A media profile with white print modes can also be duplicated from a generic media, or created from scratch using the profiling documentation from the Colorado M-series. This documentation can be found on graphiPLAZA and on the downloads website https://downloads.cpp.canon under the product name.
Check the media profile and print mode at the following location:
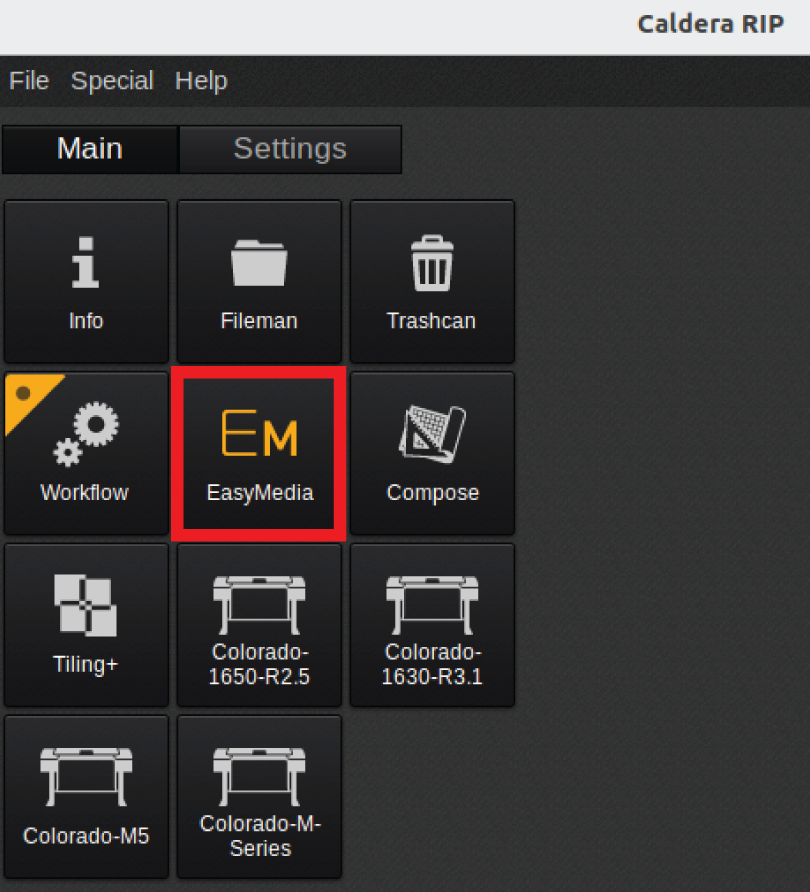
Open Caldera
Click on [EasyMedia].
Click on the printer icon, then click on [Next].

Select the printer and click on [Next].

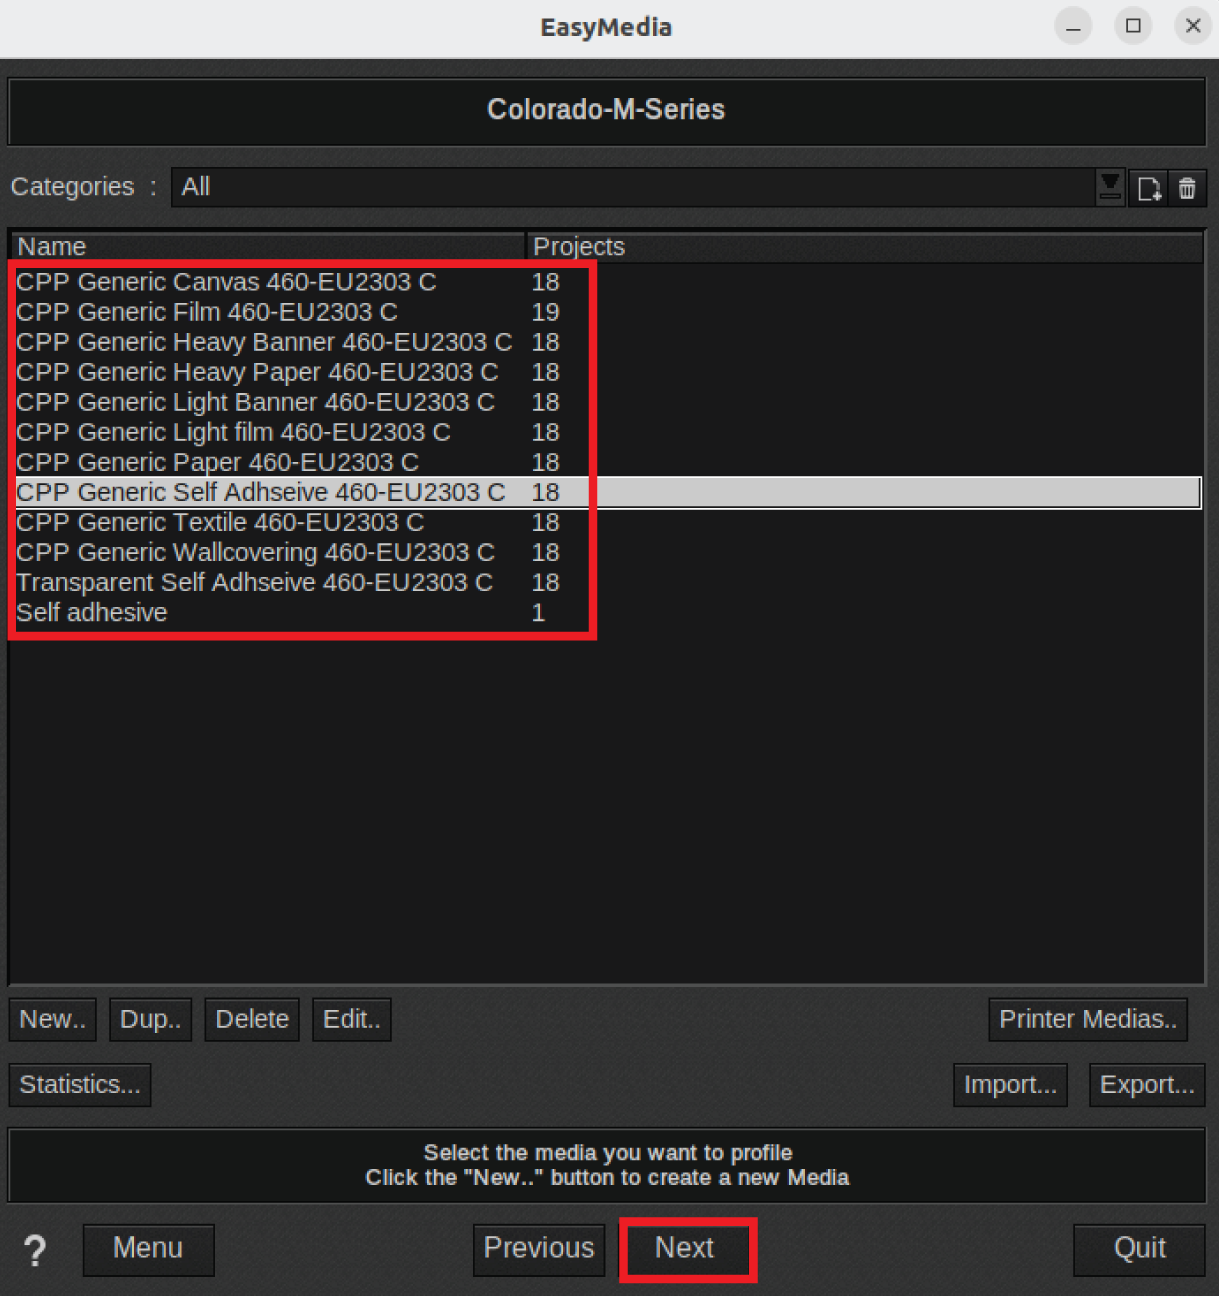
Select the media and click [Next].
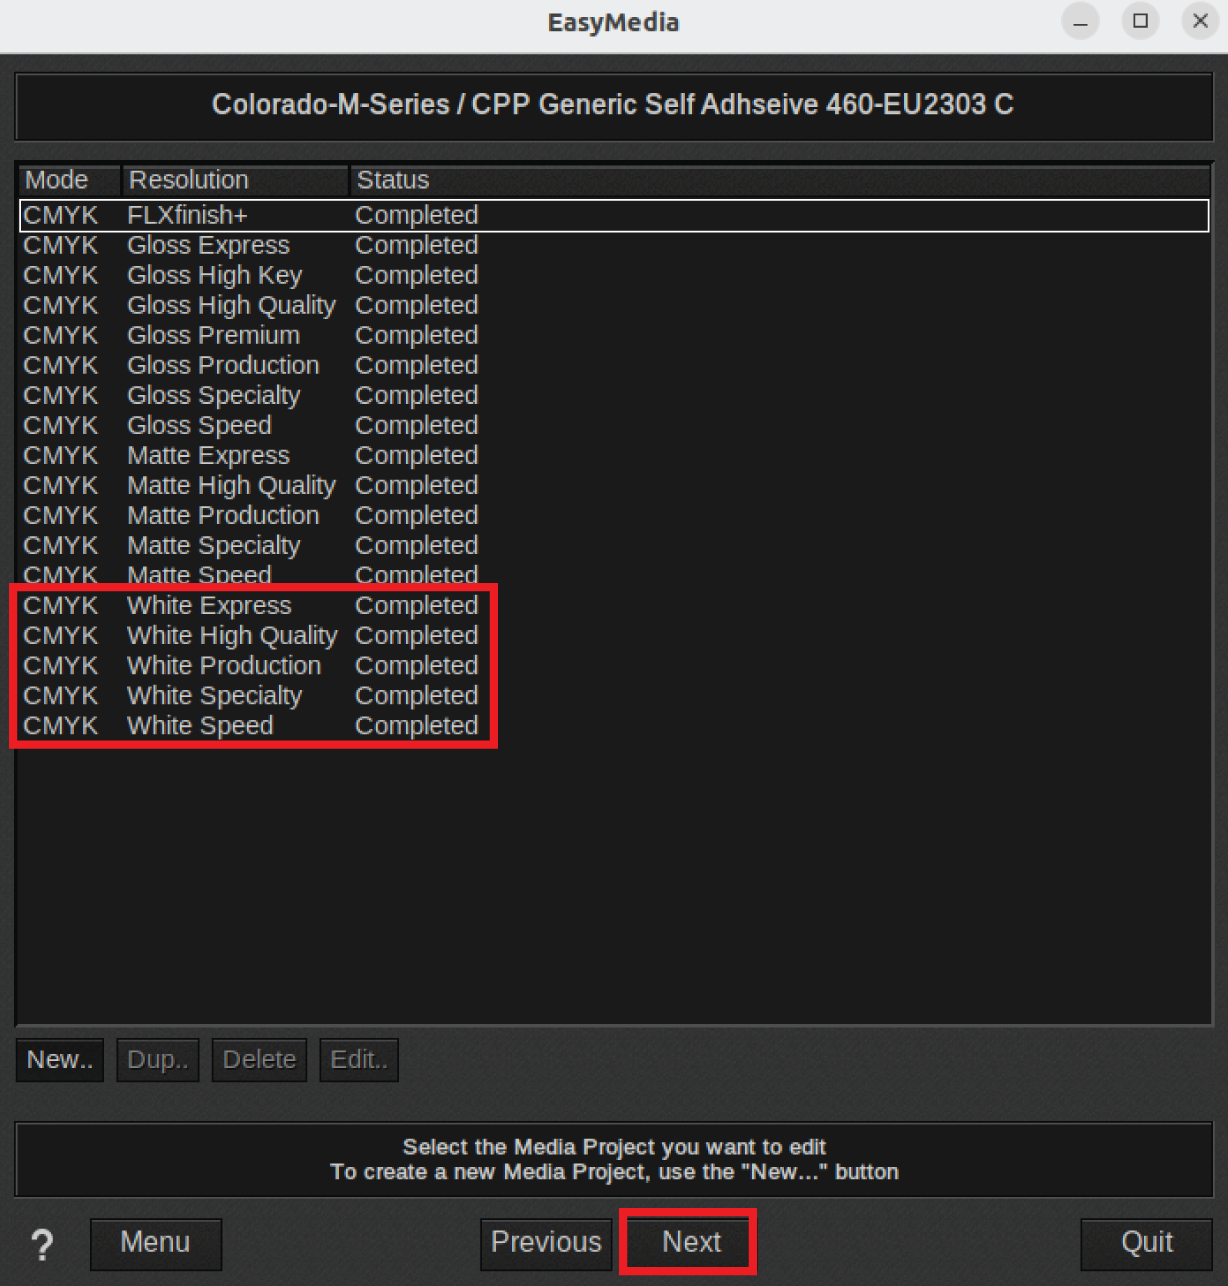
On the media project selection screen, select a print mode and click [Next].
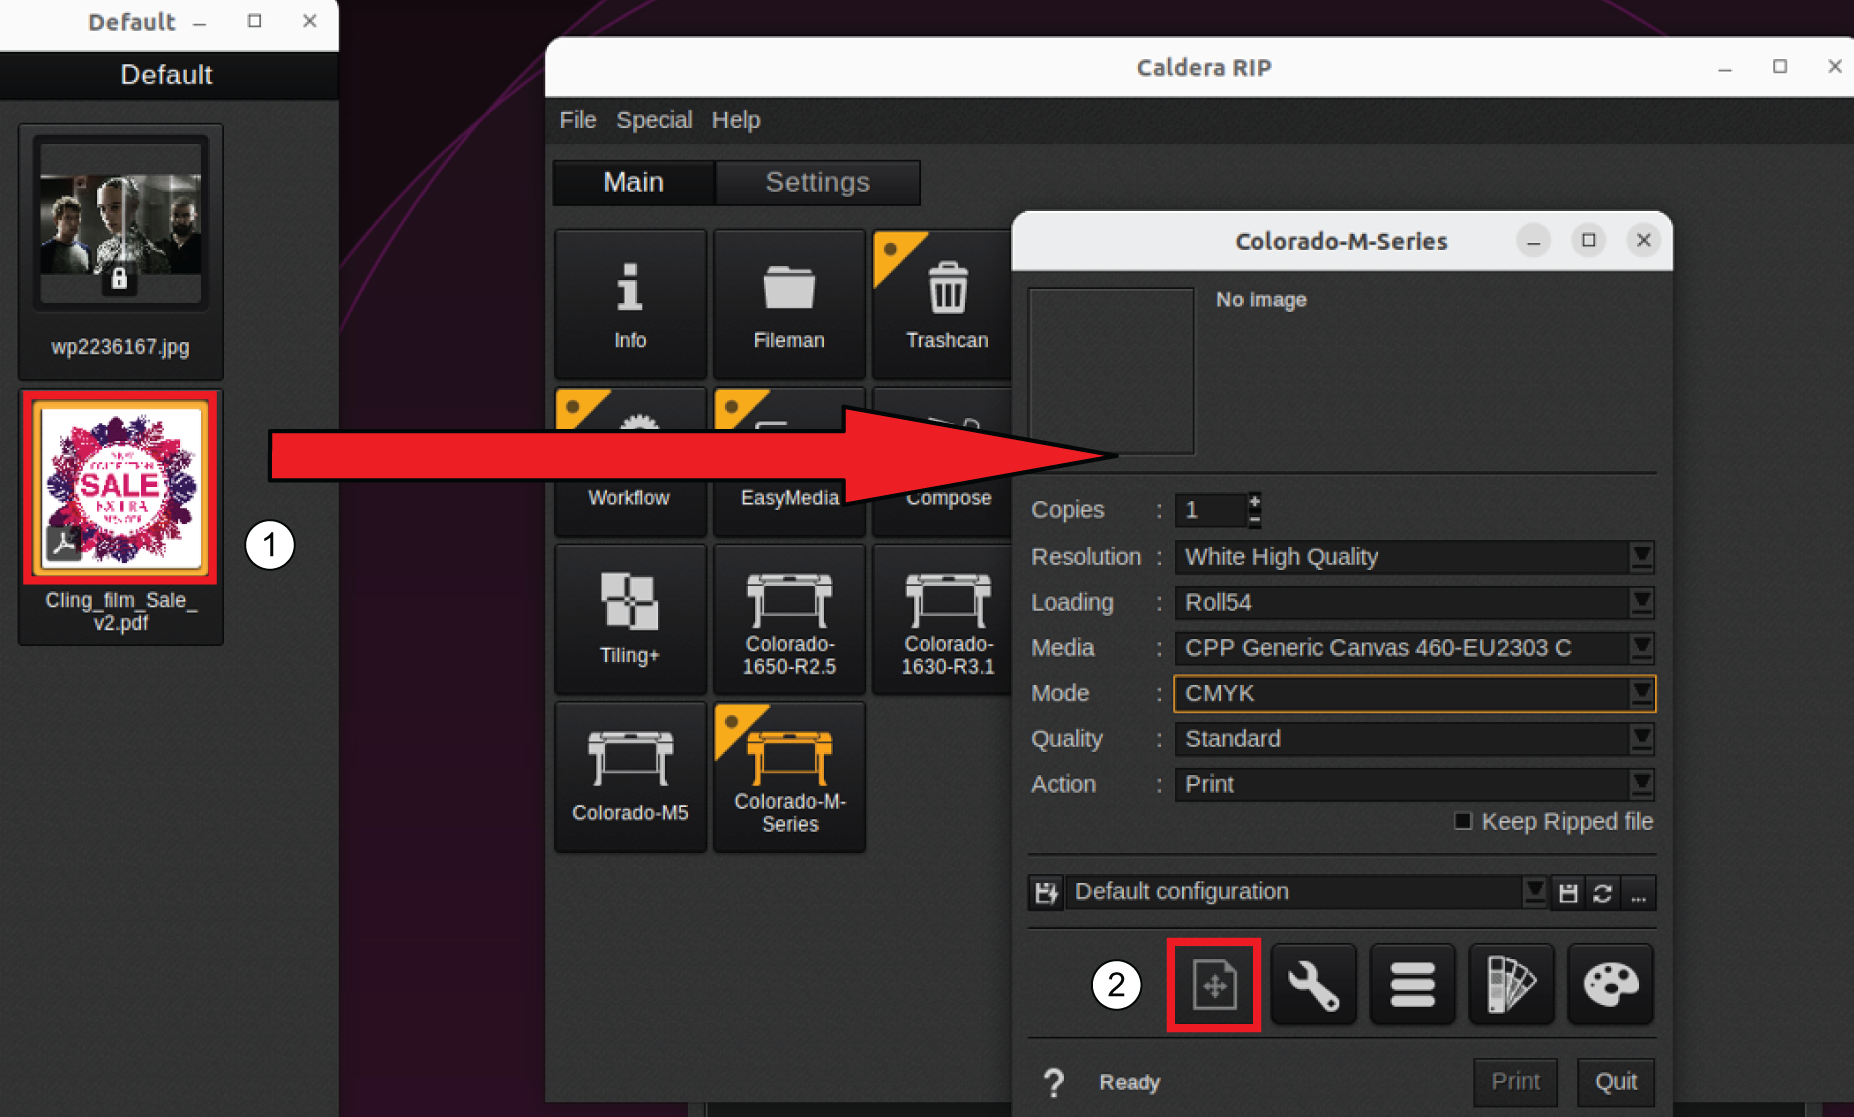
Open Caldera.
Double click on Colorado M-series.
Drag and drop the required file from your [Default] window to the Colorado M-series window, then click on the image positioning button.
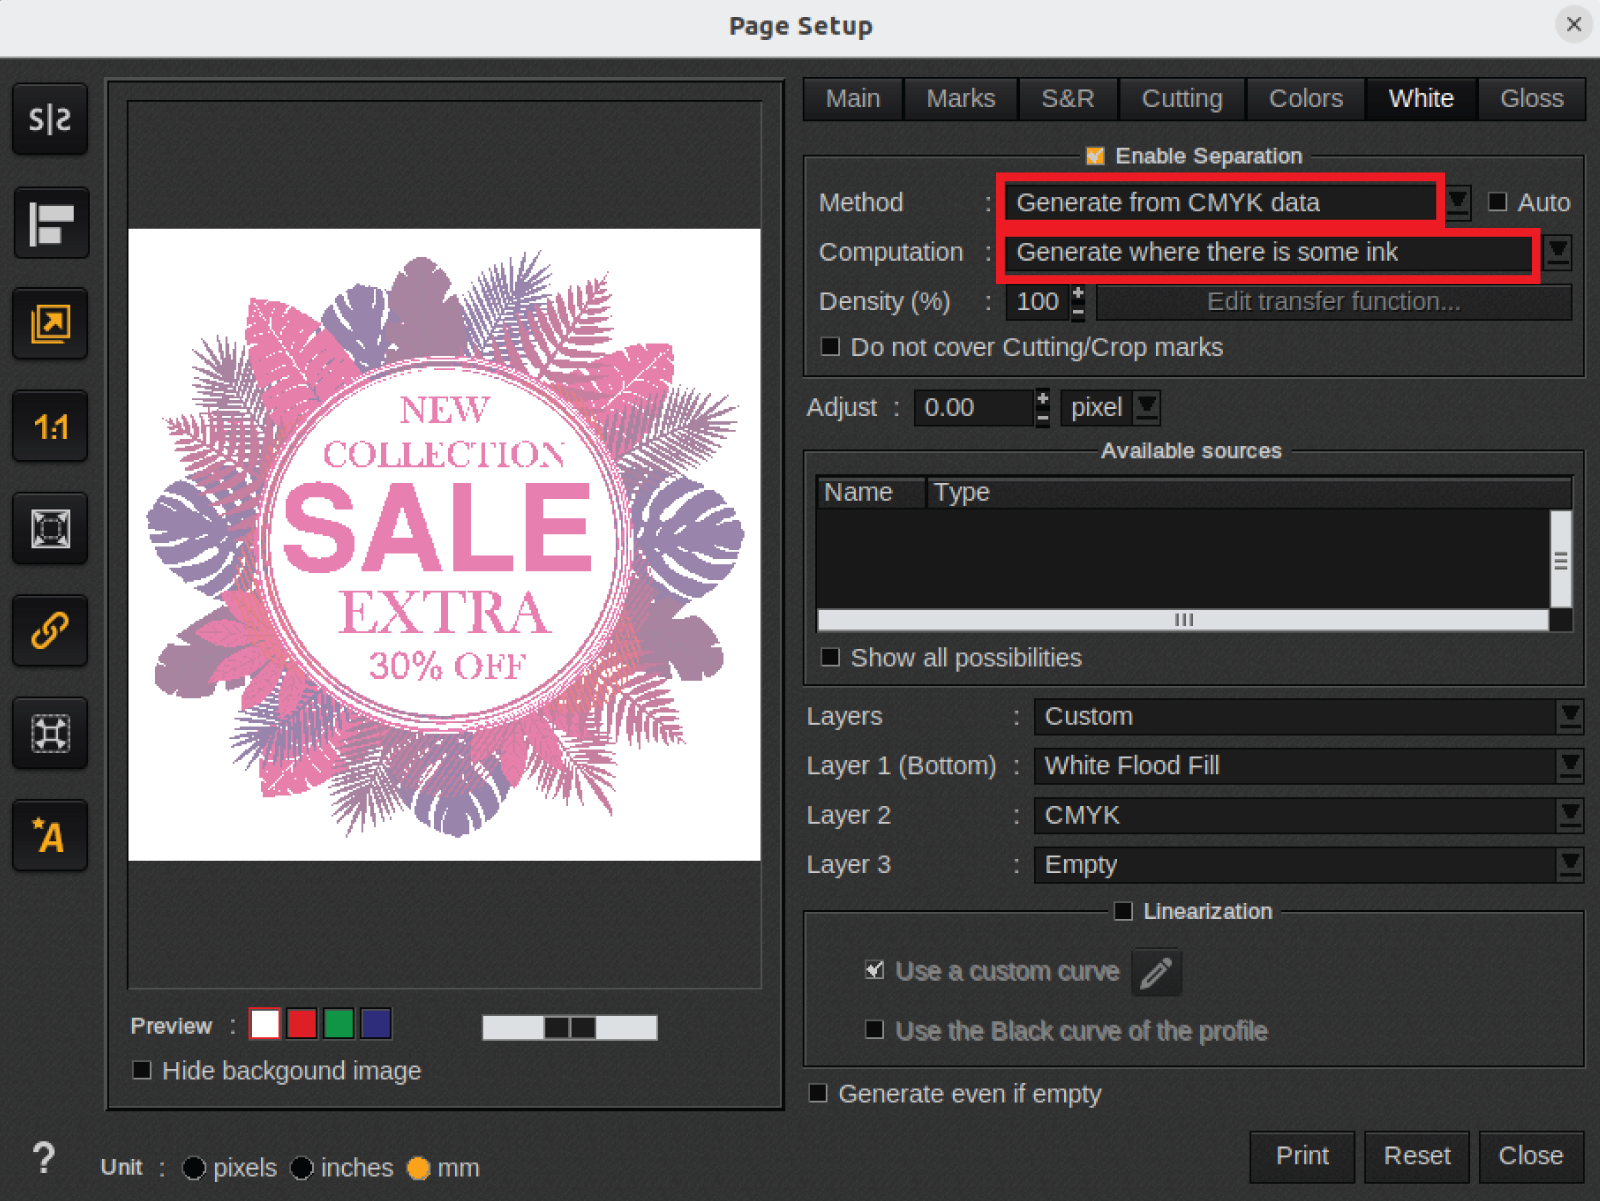
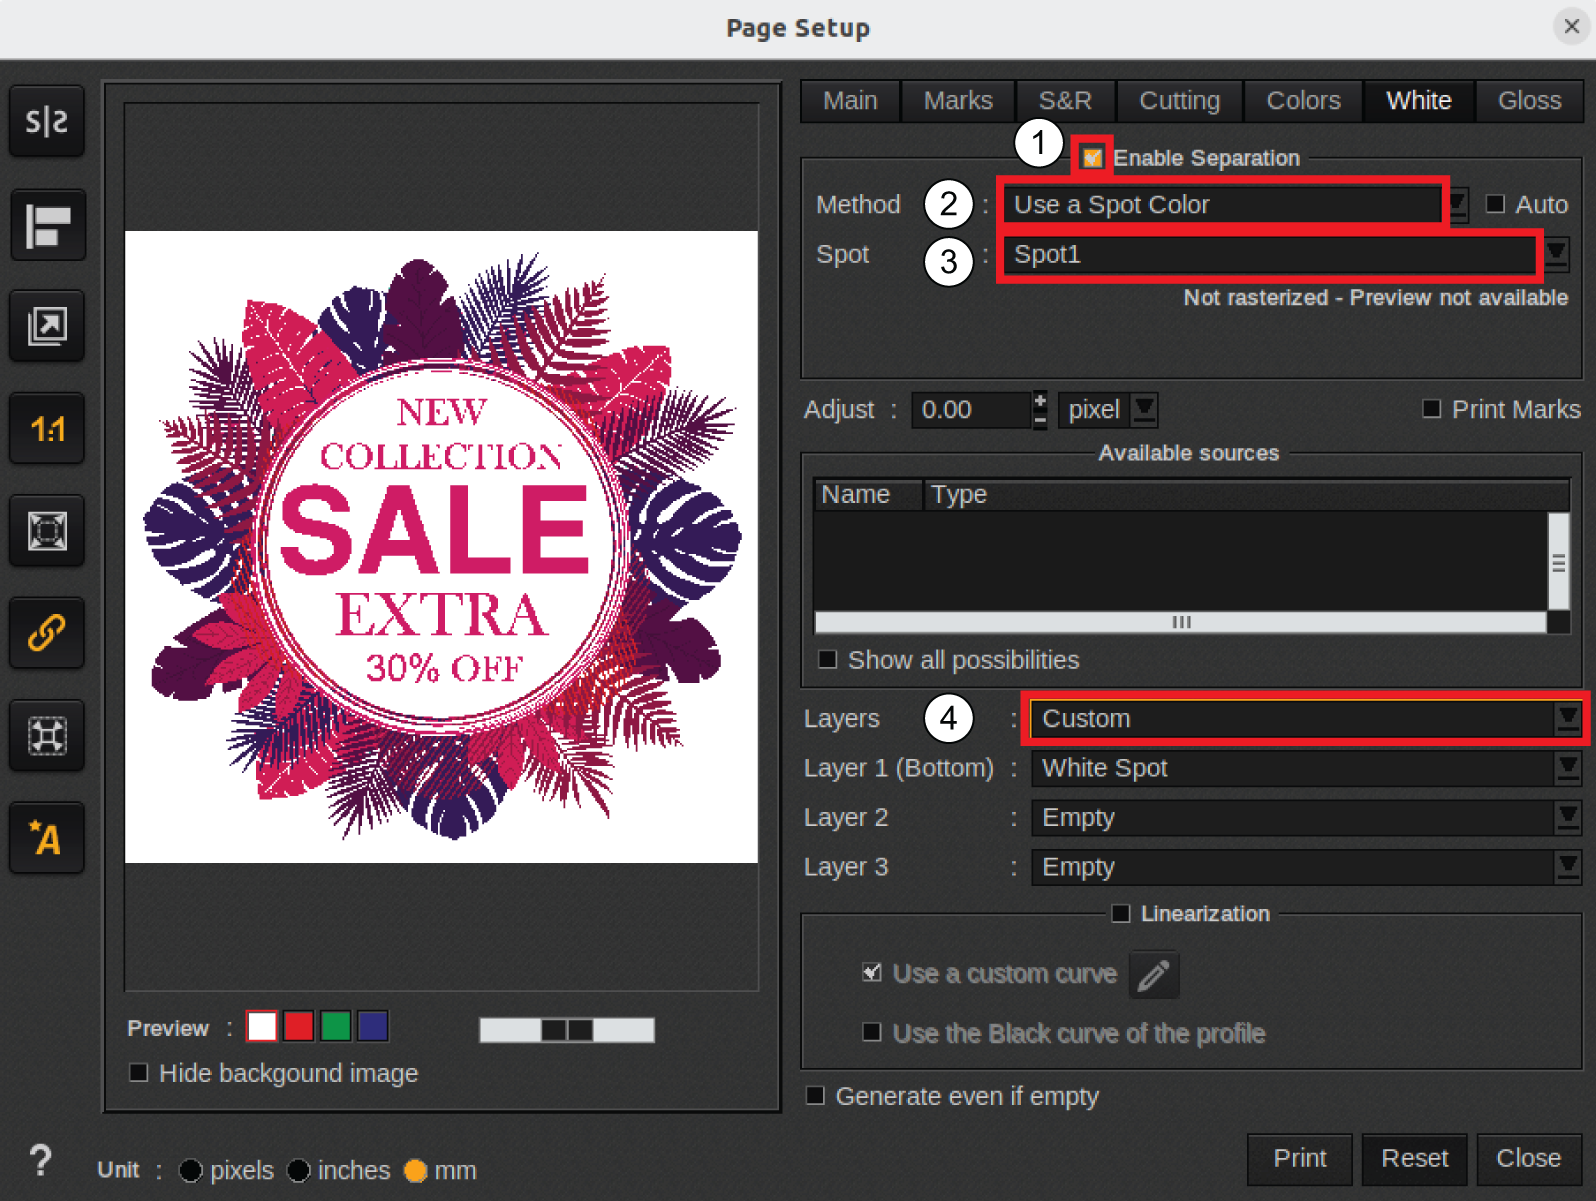
On the [White] tab, make the following configurations:
Select [Enable Separation].
From the [Method] drop-down menu select [Use a Spot Color].
From the [Spot] drop-down menu select the given spot name for white ink.
From the [Layers] drop-down menu select a layer configuration.
4 standard layer configuration options are given. Select [Custom] to create a custom layer configuration with up to 3 layers, depending on the selected print mode.
You can add a white layer to a print file that only contains CMYK data. Use the following options from the [Method] menu:
[Full page coverage] adds white to the entire print.
[Generate from CMYK data] adds white to specific areas of the print.
If you select [Generate from CMYK data], the following options are available in the [Computation] menu:
[ Generate where there is some ink] adds white to all areas in the print file that have CMYK data.
[ Generate where there no some ink] adds white to all areas in the print file that have no CMYK data.