The [Configuration] app allows you to configure: test specifications, metric tolerance sets as well as reference value sets. Additionally, you can find a list with the generic test charts and the links to the additional software needed.
[Test specifications]
[Metric tolerance sets]
[Reference value sets]
[Generic test charts]
[Supporting software applications]
Only the users with the role [Administrator] can change parameters in this app. Users belonging to other groups can read, but lack access to the "add", "edit" and "delete" functions.
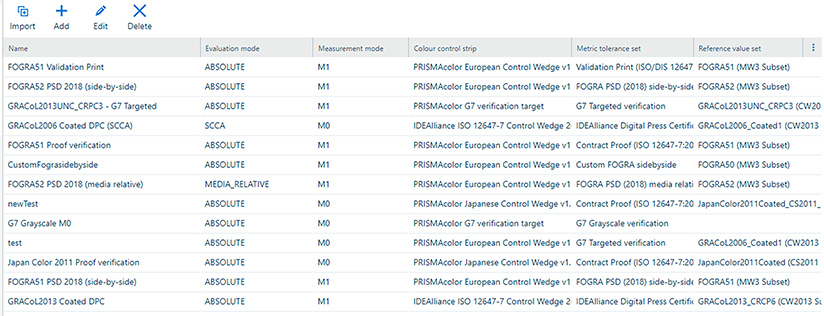 [Configuration]: [Test specifications]
 In the [Test specifications] section, you can do the following.
|
Action |
Description |
|---|---|
|
[Import] |
Import a new test specification. There are a number of factory installed test specifications for you to choose from.  Import a test specification
To import a new test specification, you need to:
To check whether the test specification was added, go to: . If the new test specification was imported successfully, you will see it in the drop-down menu. |
|
[Add] |
Add a custom test specification. To add a new test specification, you need to define a number of settings:
Additionally, several other settings, grouped together under the title [Print settings] :
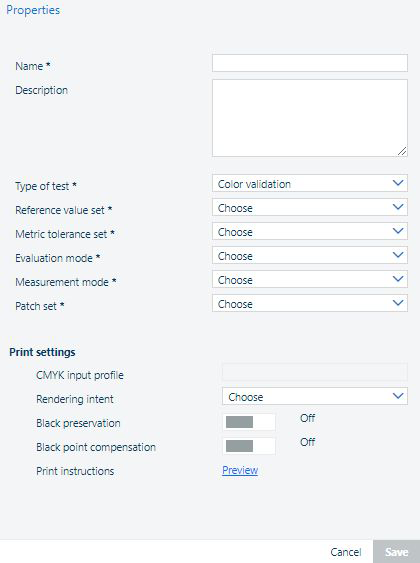 Add a test specification After you define all settings, click the [Save] button to save the test specification. |
|
[Edit] |
Edit the test specification. The test specification can only be edited if it is not used in a color test. However, the description and print instruction can always be edited. 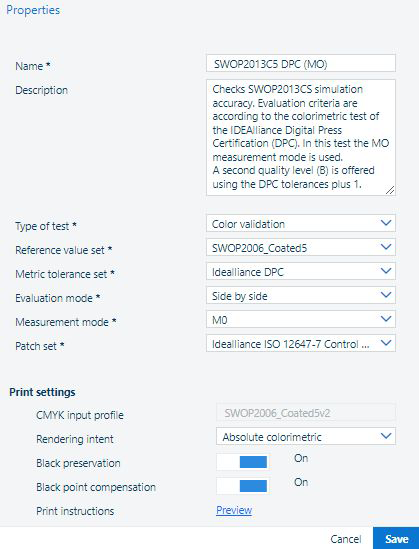 Edit a test specification
After you adjust the settings, click the [Save] button. |
|
[Delete] |
Delete the test specification. This action is irreversible. The test specification can only be deleted if it is not used in a color test. 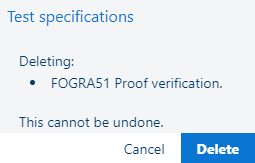 Delete a test specification
If you are sure that you want to delete the test specification, click the [Delete] button. |
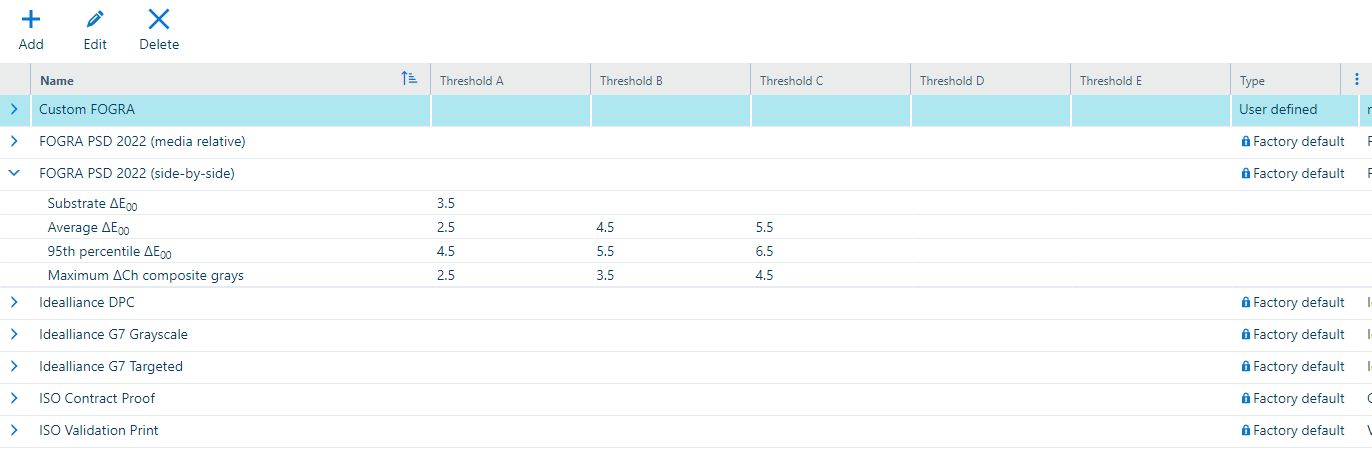
Two types of sets are present in this list:
Predefined ones, which are present in the list by default, marked with the
![]() lock icon and the text "[Factory default] " in the [Type] column.
lock icon and the text "[Factory default] " in the [Type] column.
The [Factory default] items cannot be deleted or modified.
Your own sets
 [Configuration]: [Metric tolerance sets]
 In the [Metric tolerance sets] section, you can do the following.
|
Action |
Description |
|---|---|
|
[Add] |
Add a custom metric tolerance set. To add a new metric tolerance set, you need to define at least two metrics. 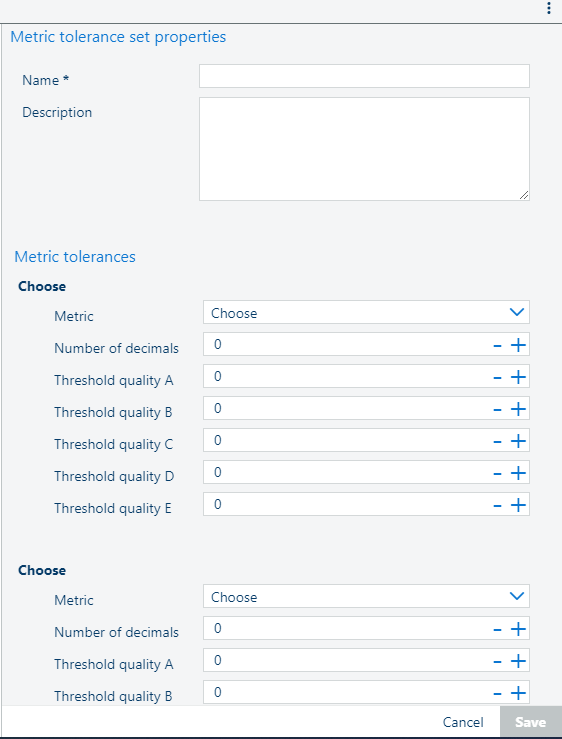 Add a metric tolerance set
To add or remove a metric from the set, use the + and - buttons. 
After you define the metrics, click the [Save] button to save the metric tolerance set. |
|
[Edit] |
Edit the metric tolerance set. The metric tolerance set can only be edited if it is not used in a color test. The [Factory default] items cannot be deleted or modified. 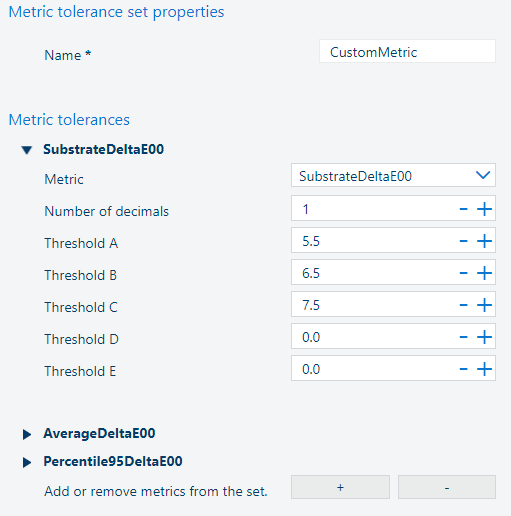 Edit a metric tolerance set
After you adjust the metric tolerance set, click the [Save] button. |
|
[Delete] |
Delete the metric tolerance set. This action is irreversible. The metric tolerance set can only be deleted if it is not used in a color test. The [Factory default] items cannot be deleted or modified. 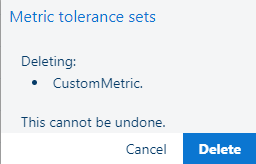 Delete a metric tolerance set
If you are sure that you want to delete the metric tolerance set, click the [Delete] button. |
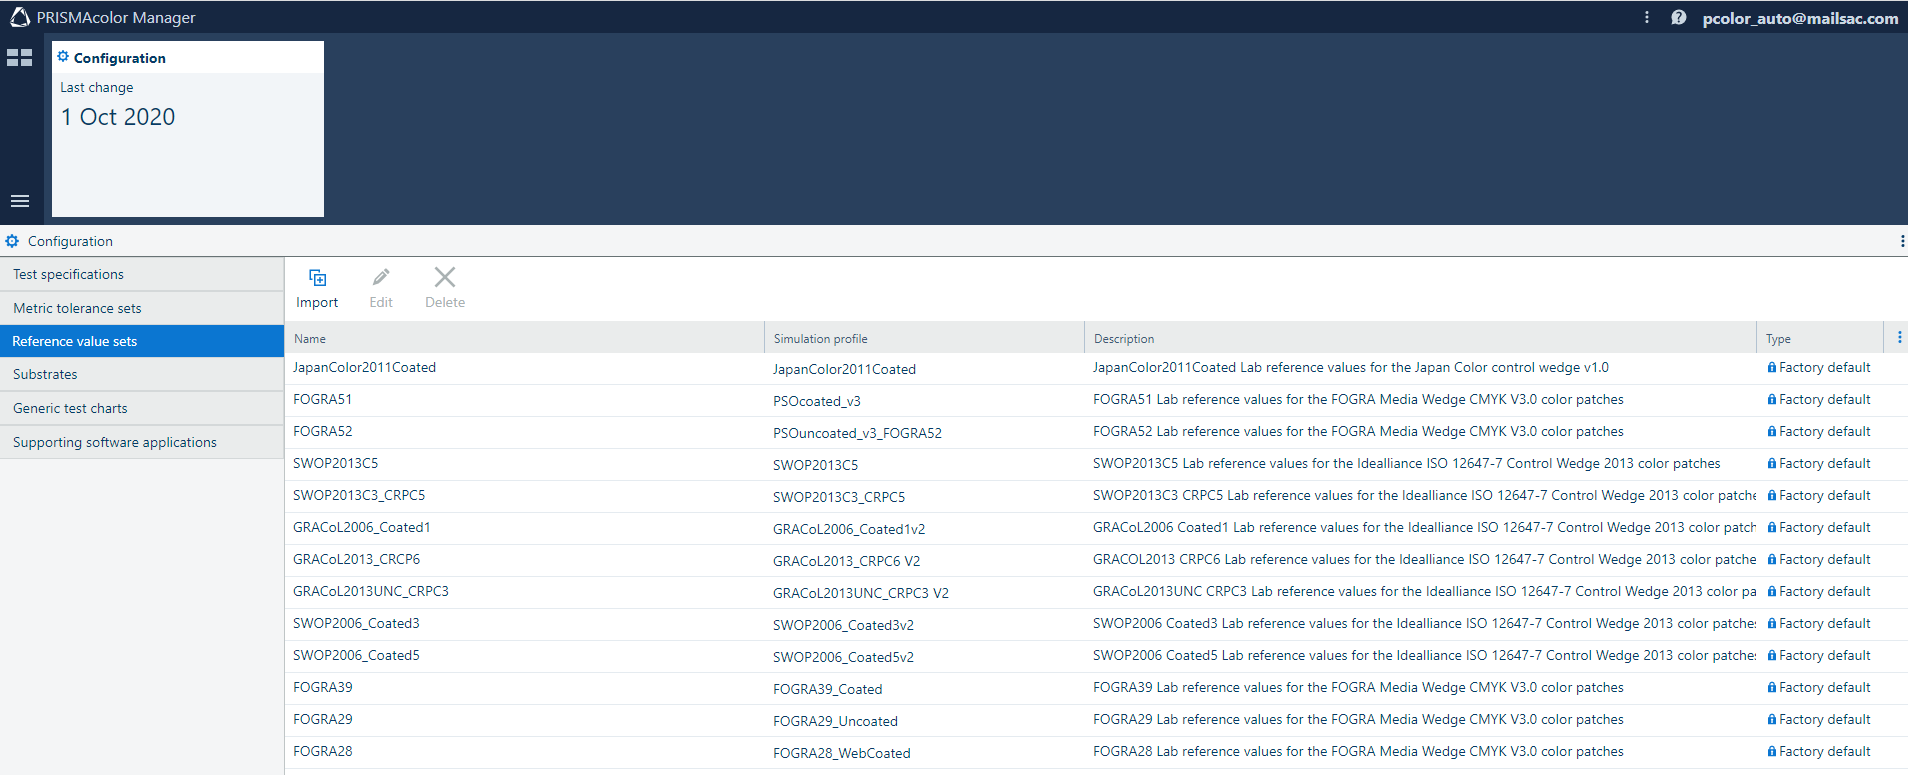 [Configuration]: [Reference value sets]
 In the [Reference value sets] section, you can do the following.
|
Action |
Description |
|---|---|
|
[Import] |
Import a reference value set. To import a reference value set, do the following:
|
|
[Edit] |
Edit a reference value set. You can change the name, description of the reference value set as well as the simulation profile name. 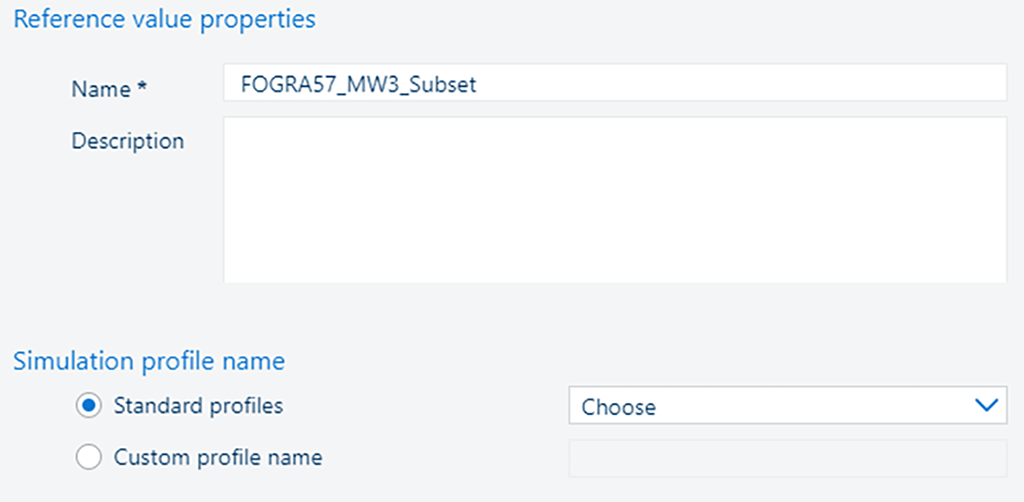 Edit a reference value set
The reference value set can only be deleted if it is not used in a color test. The [Factory default] items cannot be deleted or modified. After you adjust the reference value set, click the [Save] button. |
|
[Delete] |
Delete the reference value set. This action is irreversible. The reference value set can only be deleted if it is not used in a test specification. You can change the value of the description field. The [Factory default] items cannot be deleted or modified. 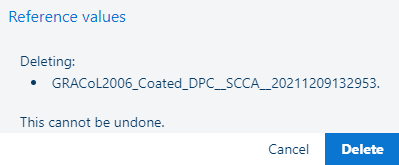 Delete a reference value set
If you are sure that you want to delete the reference value set, click the [Delete] button. |
 [Configuration]: [Substrates]
 Substrate reflects the physical properties of the media that affect color behavior of the printer. Several media from a media catalogue map to the same substrate. Substrates are defined on the basis of the type of color validation tests that you want to perform.
For instance, if you have a toner printer, two substrates might be enough: one for uncoated media and one for coated media because color behavior of toner printers on different coated and uncoated media is very similar.
In the [Substrates] section, you can do the following.
|
Action |
Description |
|---|---|
|
[Add] |
Add a substrate. To add a new substrate, you need to define its name and description. 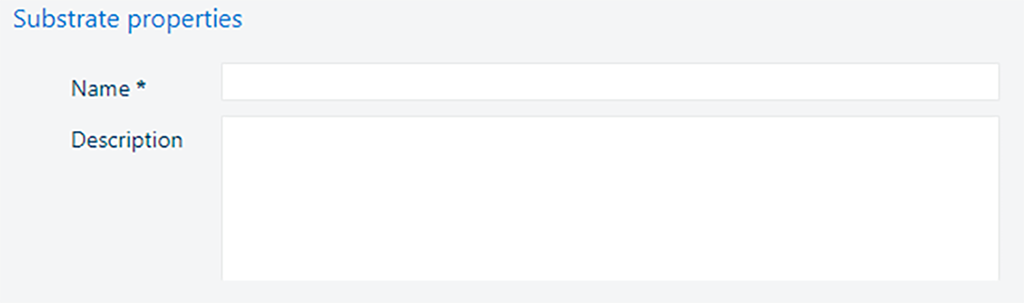 Add a substrate
After you define the substrate properties, click the [Save] button to save the substrate. |
|
[Edit] |
Edit the substrate. The name of the substrate can only be edited if it is not used in a color test. The description can always be edited. 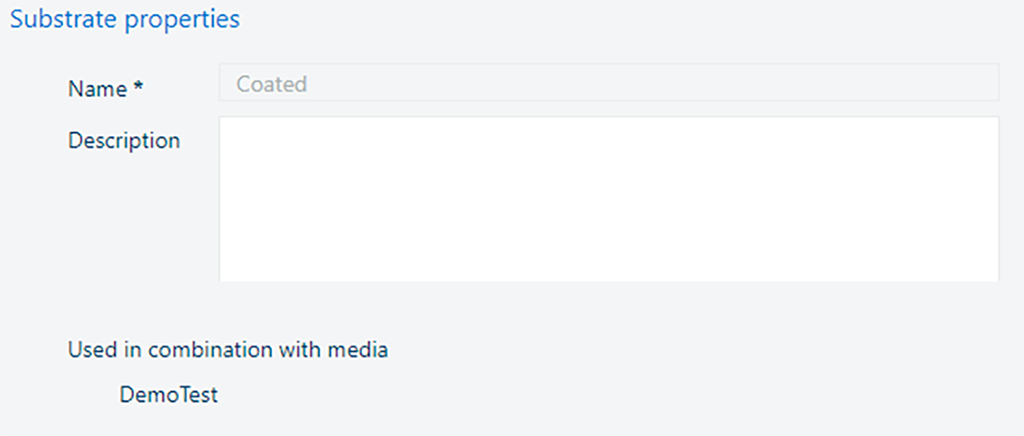 Edit the substrate
After you adjust the substrate, click the [Save] button. |
|
[Delete] |
Delete the substrate. This action is irreversible. The substrate can only be deleted if it is not used in a color test. 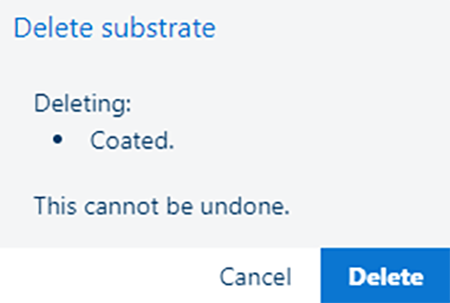 Delete the substrate
If you are sure that you want to delete the metric tolerance set, click the [Delete] button. |
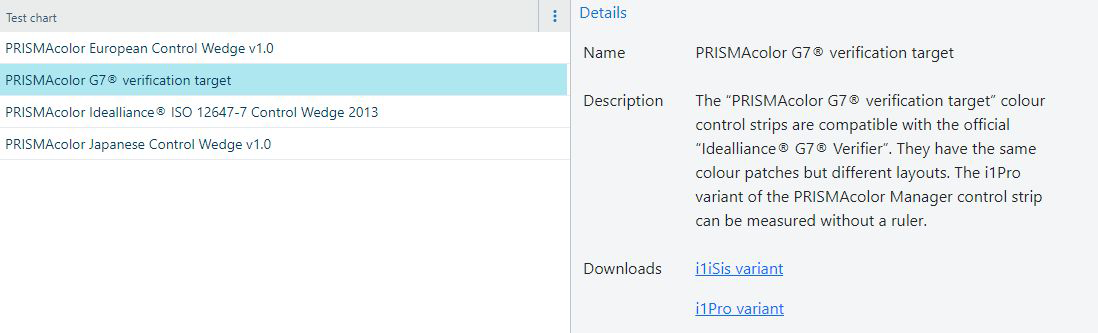
A number of generic test charts are present in this list, along with a short description and links for the control color strip PDFs for the supported scanning devices.
These charts do not contain a [ID short code] and can only be used in the manual workflow of the measurement app.
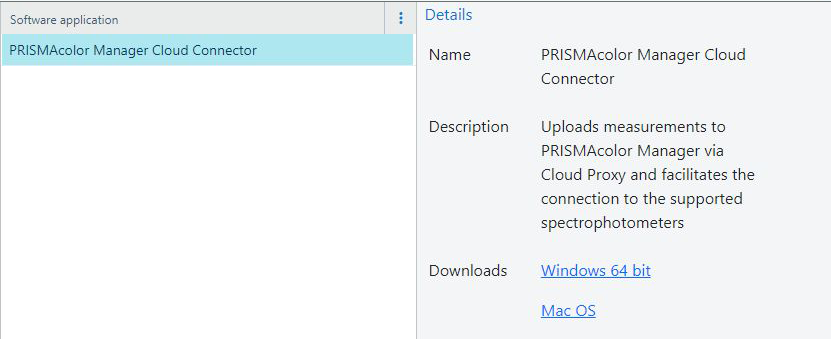
[Configuration]:[Supporting software applications]
You can access the installation kit of the [Software application]. The installer comes in two flavors, for the two supported Operating Systems: MS Windows and Apple macOS.
You need to use a local administrator account to install the software.