
When you create a new tenant, all the contact person email addresses are filled in with your details. They can be changed later.
Each entity in the [List of sales offices] has a separate list of applications. While the list of [Applications available] is distributed from top (HQ) to bottom, the list of tenants is not shared with the parent organization.
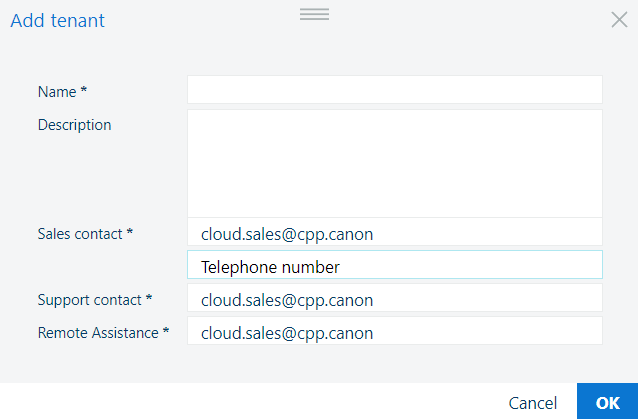
|
Field name |
Description |
|---|---|
|
[Name] |
This will be the name of the new tenant, as agreed with the beneficiary. |
|
[Description] |
Add a short description of the tenant (optional). |
|
[Sales contact] |
Provide a valid email address to be available to the tenant. By default, this is already filled out with your email address. This email recipient will receive the [Contact sales] requests. |
|
[Telephone number] |
Provide a valid telephone number (optional). |
|
[Support contact] |
Provide a valid email address to be available to the tenant. By default, this is already filled out with your email address. |
|
[Remote Assistance] |
Provide a valid email address to be available to the tenant. By default, this is already filled out with your email address. This email recipient will receive the remote assistance requests. |
Navigate to the .
Click the ![]() sign to add a new tenant.
sign to add a new tenant.
Fill out all the details as needed.
Mandatory fields are marked as such.
Click [OK].