
You can use the printer discovery tool to easily add printers to PRISMAprepare. The newly added printer is not automatically available in PRISMAprepare. You have to close and open PRISMAprepare to load the printer in the application.
With this printer discover tool, you can detect printers on your network and get the configuration of the printers by standard SNMP protocol. The SNMP protocol must be enabled on the printers. When SNMP is not enabled, you can still add printers manually.
You can discover printers on the network either by broadcast, by scanning a range of IP addresses or by defining a subnet mask. By default, the range of IP addresses and the subnet mask are retrieved from the local IP address and the local Windows subnet mask.
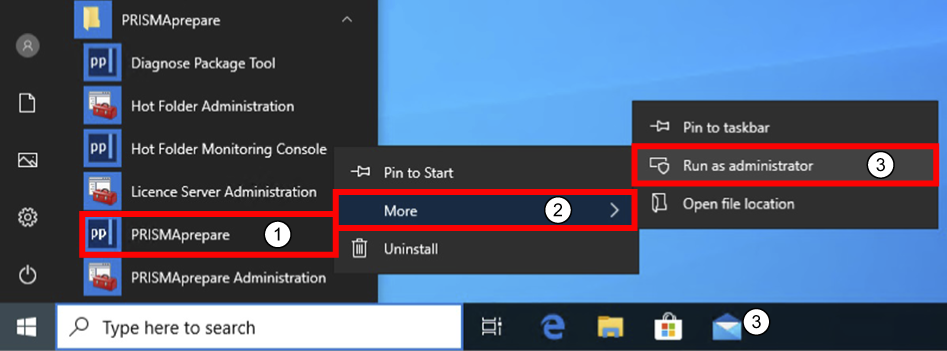
Open the [PRISMAprepare Administration] from the Windows Start menu. Run the [PRISMAprepare Administration] as administrator.
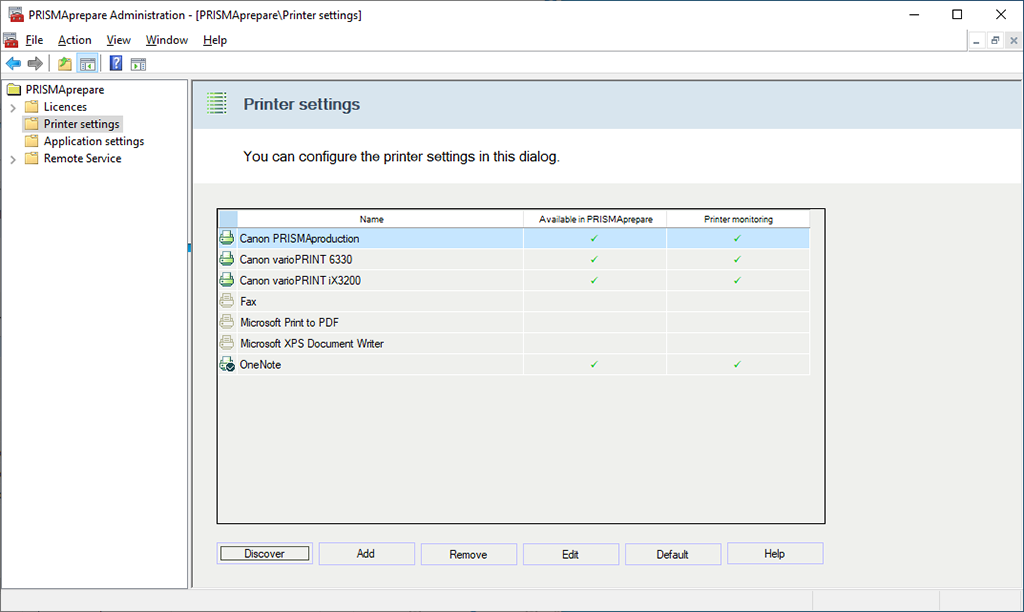
Select [プリンタ設定].
Click the [検出] button to launch the [プリンタ検出ツール].
Check on which network your printers reside and select the concerning option to discover your printers. In this example, you printers are on your local network.
|
Discovery method |
Description |
|---|---|
|
[ローカル ネットワークにブロードキャスト] |
Use this discovery method when printers are connected to the local network. SNMP enabled printers that recognise this type of broadcast will respond. Not all SNMP enabled printers respond to the broadcast. |
|
[範囲のスキャン] |
Use this discovery method when printers are connected to another subnet of the network than the local network. When you have multiple network cards in your system you should use the scan range discovery method. Scan a range of IP addresses for SNMP enabled printers from the lowest to the highest IP address. |
|
[サブネットのスキャン] |
Use this discovery method when you network is divided into sub networks. Scan the defined subnet for SNMP enabled printers. The system uses the subnet mask to determine the scan range. You can change the subnet mask. |
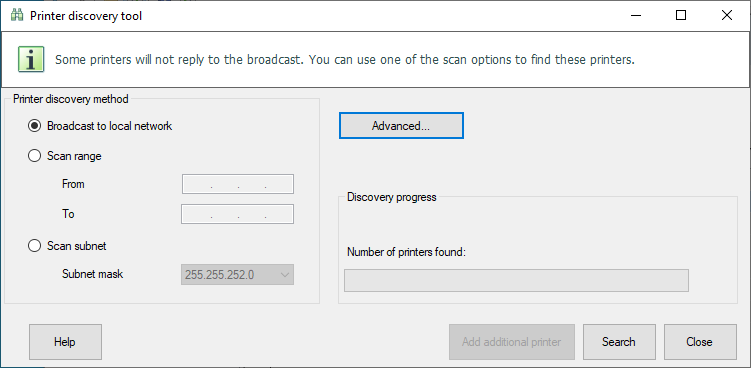
Click [検索] to start the discovery of printers.
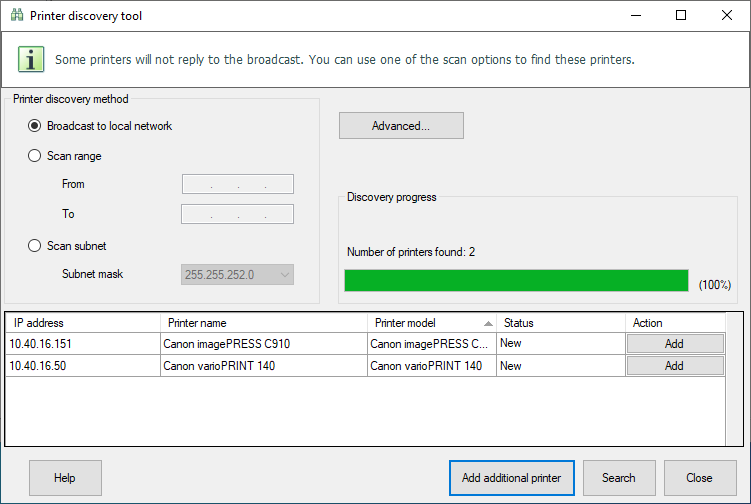
To add one of the found printers, continue with the next step.
However, when no printer has been found, or when you want to add a different printer manually, you can click button [他のプリンタの追加] to add a printer manually. For example, SNMP is not enabled on a printer. Therefore, the printer discovery tool cannot find the printer. Start with step 4 in procedure Discover a new printer.
Click [追加] to add your printer to PRISMAprepare. In this example, you want to add the "imagePRESS C910".
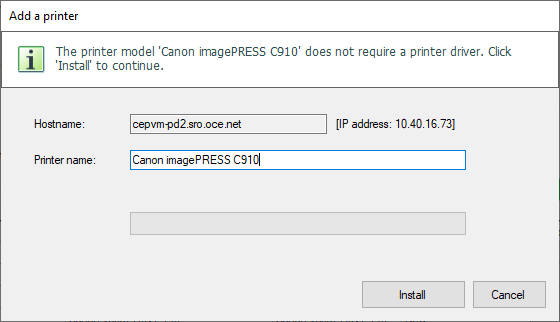
Click [インストール].
You can configure the printer when the printer is installed and available for PRISMAprepare. For example, you can select the print queues (Destination), the finishers and the output locations of the finishers.
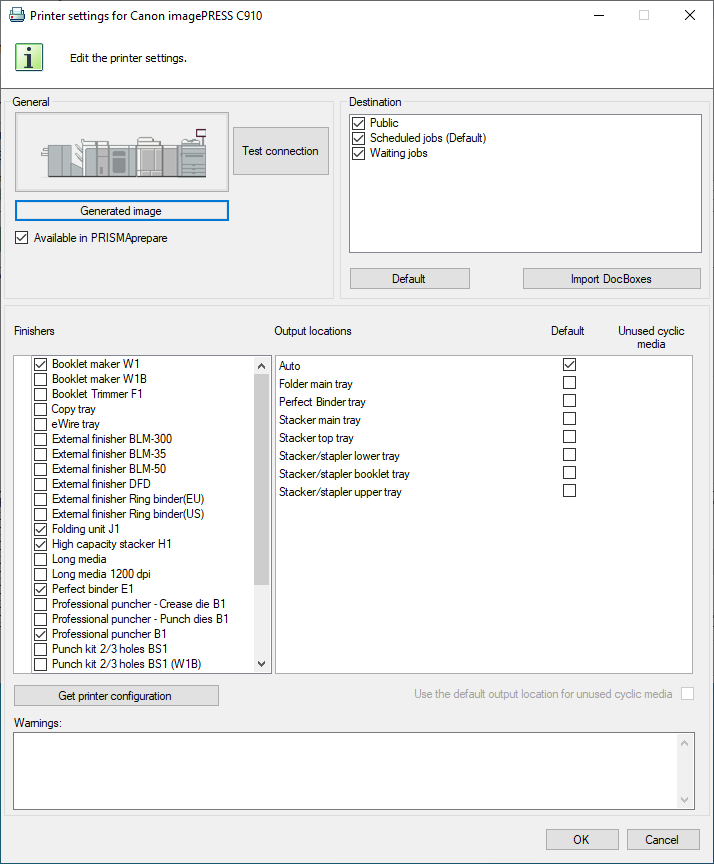
Click [OK], then close the [プリンタ検出ツール]. The printer is now available to PRISMAprepare.

Click button[詳細設定...] to define SNMP parameters. These parameters are used during the scan process. Some of them are also used to configure the discovered printers.
|
Setting |
Explanation |
|---|---|
|
[再試行:] |
Define how many times the tool tries to contact a printer. |
|
[タイムアウト (ms):] |
Define the response timeout of a printer in ms. |
You can select which SNMP version is supported by the printer:
SNMP V1
SNMP V3
You can define the following settings when you select SNMP V1:
|
Setting |
Description |
|---|---|
|
[読み取りコミュニティ:] |
The read community name is used to identify the group of devices that support printer monitoring. Default value 'public'. |
You can define the following settings when you select SNMP V3:
|
Setting |
Description |
|---|---|
|
[セキュリティ ユーザー名:] |
Define a user name for the authentication service. |
|
[コンテキスト:] |
'Context' refers to the collection of management information accessible by the SNMP entity. This setting is optional. |
|
[認証プロトコル:] |
Select the authentication protocol that is used by the printer.
|
|
[認証パスワード:] |
The 'Authentication password' is the password required for the authentication service. |
|
[パスワードの確認入力:] |
Confirm the authentication password. |
|
[プライバシー プロトコル:] |
Select the encryption algorithm that is used by the printer.
|
|
[プライバシー パスワード:] |
The 'Privacy password' is the password required for the privacy (encryption) service. This setting is optional. |
|
[パスワードの確認入力:] |
Confirm the privacy password. |
Once the discovery starts, using the selected scan method and its parameters, progression status information shows the current number of scanned IP addresses and the current number of printers found. The result of the scan process is updated progressively and displays the following information:
|
Column header |
Explanation |
|---|---|
|
[IP アドレス] |
The printer IP address. |
|
[プリンタ名] |
The Windows printer name if the printer is already defined in the local Windows system, else the model name is used as printer name. |
|
[プリンタ モデル] |
The printer model. |
|
[ステータス] |
The printer configuration status. The following status can be shown:
|
The following actions are available depending on the configuration status of the printer:
[追加]
The configuration status of the printer is [新規]. Click [追加] to add the printer to the local system and/or configure the printer for PRISMAprepare.If the driver is required but not yet installed, the action button also launches the printer driver installation wizard before adding the printer to the local system.
For printers for which no driver is needed, the action button opens a dialogue that allows adding the printer to PRISMAprepare. No printer is added to the local system. The finishers are automatically retrieved from the printer.
[編集]
The configuration status of the printer is [設定済み]. Click [編集] to edit the configuration of the printer.
[設定]
The configuration status of the printer is [未設定] or [無効な設定です]. Click [設定] to configure the printer for PRISMAprepare. The available finishers are automatically retrieved from the printer.
[削除]
The configuration status of the printer is [未応答] or [無効なプリンタ]. Click [削除] to remove the printer from the local system and from the PRISMAprepare configuration.