
You can use the online help of PRISMAprepare while working on the exercises. Press the F1 button on your keyboard or click .
The exercises use specific terms for specific functions and for areas of PRISMAprepare. These terms are illustrated below. In addition, you can read the introduction of the online help file.

Menu
Workspace selection
Structure view
Preview
Footer
All functions are available via the menu bar. The available option in the menu bar differ depending on the selected workspace.
You can use shortcuts to reach most options. For example, to select "Pages", press ALT + P.
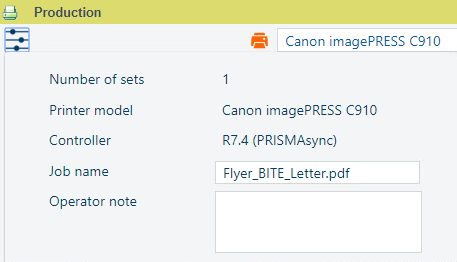
Select the [Production] workspace to print from PRISMAprepare. The different sections of the [Production] workspace are explained below.

Toolbar
Thumbnail view
Preview
Production settings
The [Production] workspace always displays a preview. The preview shows the document imposition settings. You can select media, layout and additional page marks, image quality, finishing options and delivery choices (e.g. offline finishing) in section [Production settings]. The options available in the [Production settings] depend on the selected printer, due to the specific functionality and configuration of each printer.
You can collapse the thumbnail view and the production settings. The thumbnail view can be hidden automatically. In the toolbar, several parts can be expanded:
 General information
 |
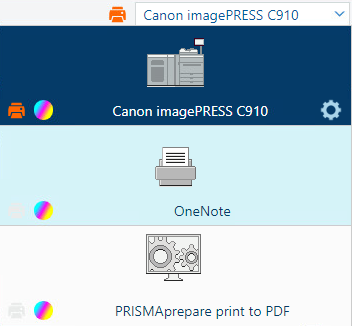 Printer list (pull down)
 |
 Destination on the printer (also listing DocBoxes)
 |
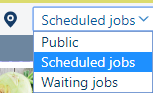
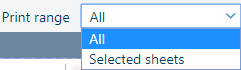 Print range
 |
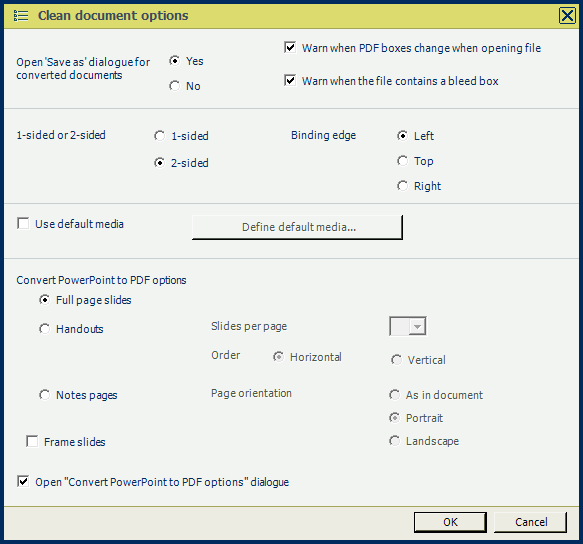
When you open a non-page programmed document in PRISMAprepare, then the application adds page programming to the document. For example, a default media size is assigned and any PDF bookmarks are converted into sections. Furthermore, the settings in the [Clean document options] dialogue are applied to the document. When you save the document, the document is considered to be page programmed.
For example, click to define if a non-page programmed document will always be loaded as a 1-sided or 2-sided document.
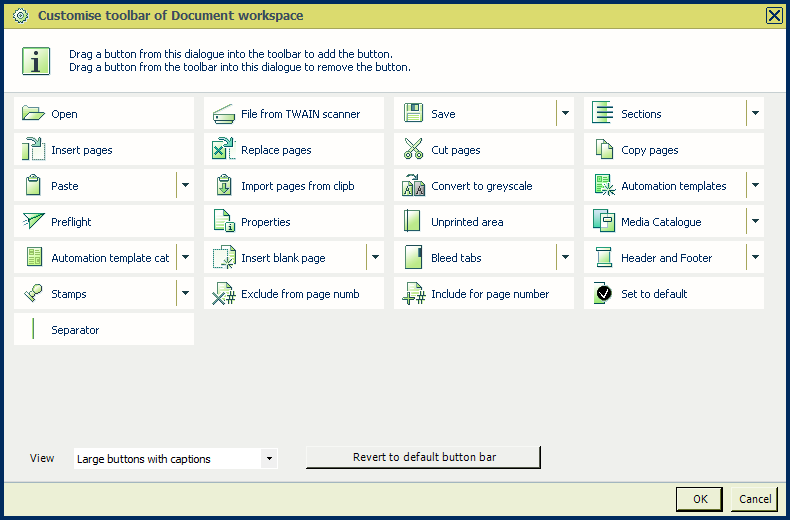
You can customize the toolbar of the [Pages], the [Document] and the [VDP] workspace to achieve the best fit for your usage.
In the left pane, select the workspace for which you want to customize the toolbar. For example: [Document].
From the menu, click . A 'Customise toolbar' dialogue opens.
Drag a button from this dialogue into the toolbar to add the button. Drag a button from the toolbar into this dialogue to remove the button.
You can customize your [Structure] view in order to achieve the best fit for your usage. To get a clear view on your document it is possible to collapse and expand groups.
To open a file, click .
From the menu, click . This option is also available as a little button in the bottom-left corner. You can see that all pages in range, of the same media, are represented by one line.
For the [Document] workspace, groups represented in the columns are: [Media], [Output group], [Section], [Page size] and [Hole punch]. When you cannot see them all, drag the bar between the [Structure] view and the preview to the right.
Click to enable or disable any columns in the [Structure] view.
The collapse function works on the group of pages in the first column.
Drag and drop the [Section] column on the position of the [Media] column, and with [Collapse all groups] you collapse all sections of your document.
Click the small plus-sign in front of chapter 1 to expand that section.
Drag the dividers in the header of the columns to set the width of the columns in the [Structure] view.
For having an overview of the document, a more collapsed view is probably the best. An extended view is helpful when you need to programme pages separately. Always adapt the structure view that suits you the most.
In the rest of the exercises you'll find out which view is the most helpful for you.