
The [Measurement] app of PRISMAcolor Manager helps you to carry out the color measurements.
The measurement process consists of the following steps:
Select the test chart.
The test chart determines the measurement workflow.
In the field [Test selection method]:
Select [Manual] to follow the steps of the download and print workflow.
Select [ID short code] to follow the steps of the external color control strip workflow.
Prepare the measurement device.
Measure the color patches.
Upload the measurement results to PRISMAcolor Manager.
The measurements are performed with the help of PRISMAcolor Manager cloud connector. PRISMAcolor Manager cloud connector facilitates the connection between the measurement device and PRISMAcolor Manager. PRISMAcolor Manager cloud connector needs to be installed on your workstation and runs as a background process.
When you start the measurement for the first time and do not have PRISMAcolor Manager cloud connector installed, a new window appears. You are asked to download PRISMAcolor Manager cloud connector for your operating system.
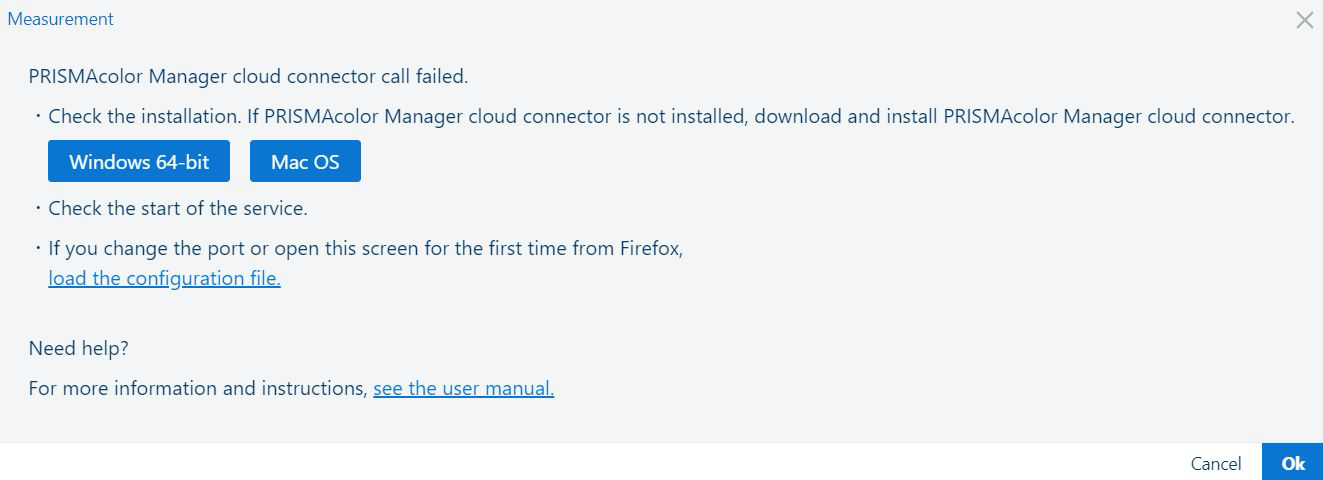 Download PRISMAcolor Manager cloud connector
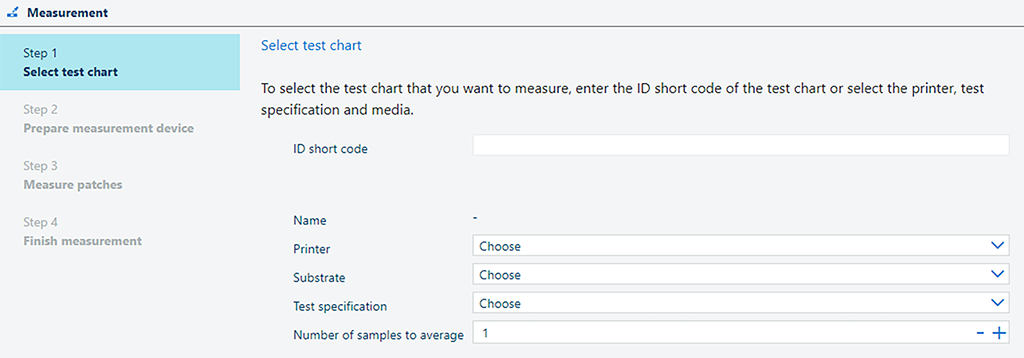 Step 1: Select test chart
The way you select the chart depends on whether you initiated printing of the test chart in PRISMAcolor Manager (download and print workflow) or outside of PRISMAcolor Manager (external color control strip workflow).
Download and print:
If you use the download and print workflow, enter the ID short code of the test chart. You can find the ID short code on the test chart.
Press [Enter]. The other fields (printer, substrate, test specification) will then be filled in automatically.
If you enter an ID short code, you can no longer use other fields because the download and print workflow is implicitly chosen in this case.
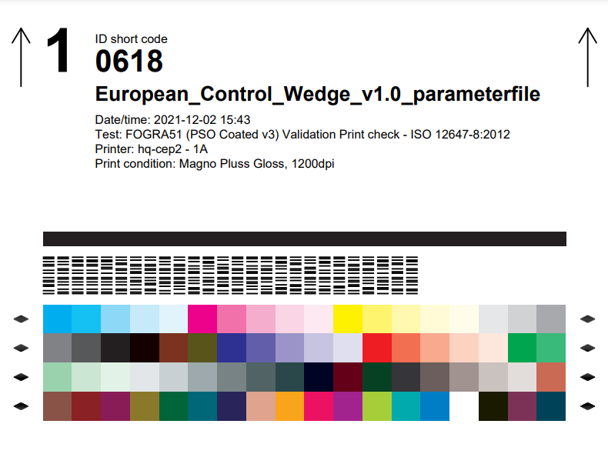 Test chart with an ID short code
External color control strip:
The "external color control strip" workflow can be used if one of the supported color control strips is already available on the printer. For instance, a color control strip can be part of a standard test job or be printed on the edge of a sheet of an ordinary print job.
If you use the external color control strip workflow, manually select the printer, substrate, test specification and number of samples to average.
The higher the number of samples to average is, the more accurate the validation results are. It is strongly recommended to increase the number for samples for G7® verification.
The external color control strip workflow is available for i1Pro and i1iSis color control strips:
Fogra Media Wedge CMYK V3.0a
Idealliance ISO 12647-7 Control Wedge 2013
Japan Color control strip Ver 1.0
G7 Verifier
After you select the test chart, click the [Start measurement] button.
The measurement device needs to be calibrated before you can measure the test chart. To calibrate the device, do the following:
Select the measurement device. In case multiple measurement devices are connected, select which measurement device you want to use.
The supported measurements devices are:
X-Rite i1Pro 2;
X-Rite i1Pro 3;
X-Rite i1iSis 1 XL and i1iSis 1 standard;
X-Rite i1iSis 2 XL and i1iSis 2 standard.
PRISMAcolor Manager only shows measurement devices that match the printed test chart.
Follow the instructions on the screen to calibrate your measurement device.
The instructions vary depending on the connected measurement device.
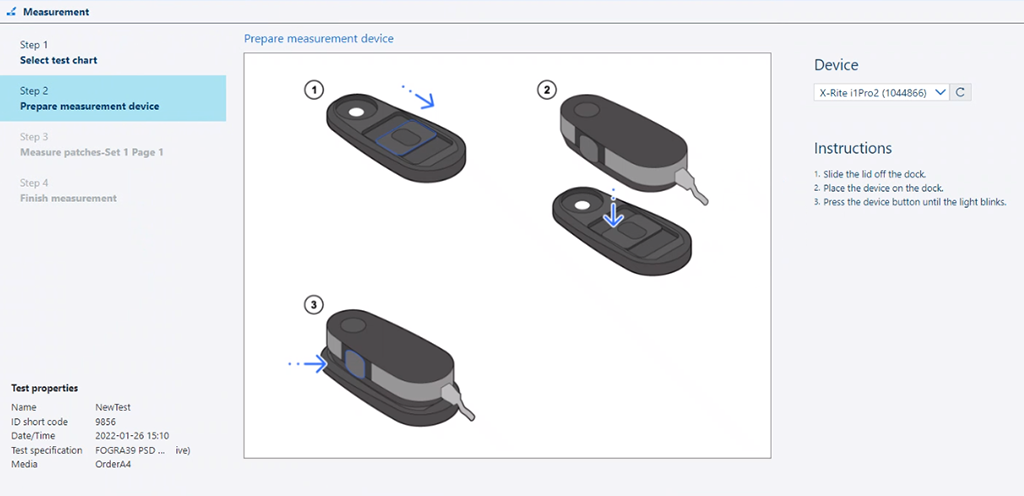 Step 2: Prepare measurement device
After the measurement device is successfully calibrated, you can continue to the next step.
If you are using the i1Pro as a measurement device, you will also see instructions on how to prepare the backer board for the measurement.
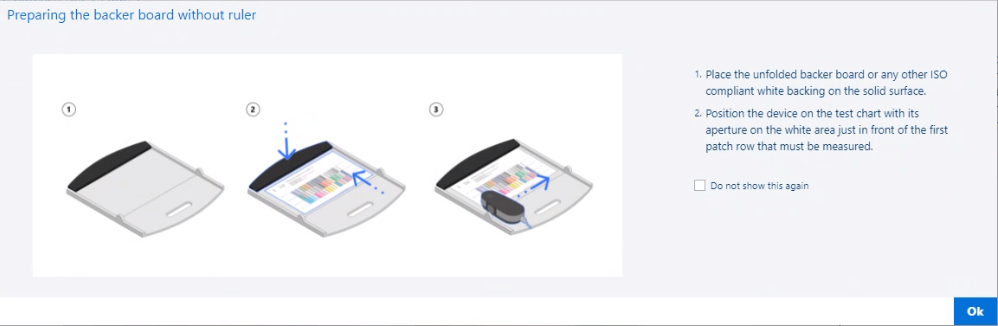 Prepare the backer board
The procedure for measuring the color patches differs depending on the connected measurement device and test specification. Follow the instructions on the screen to perform the measurement correctly.
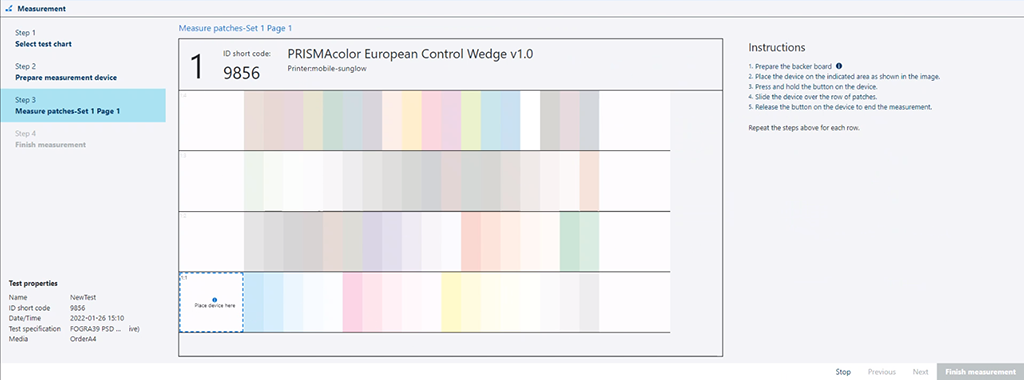 Step 3: Measure patches
PRISMAcolor Manager gives visual feedback on the measurement progress. You are provided with the following types of feedback:
The row that is being measured is highlighted.
If the row is measured successfully, a green checkmark appears on the left-hand side of this row. You also see a message in the bottom-right corner about the successful measurement.
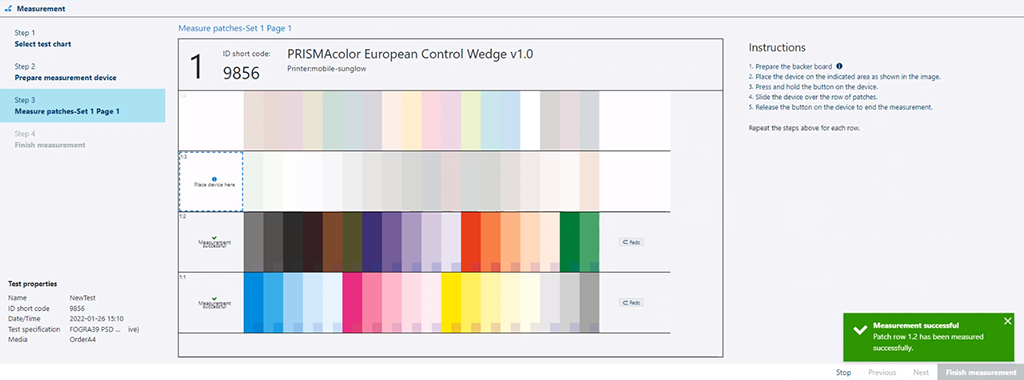 Row measured successfully
The small square in the bottom right corner of each patch represents the measured colour. Do not expect an exact match between the colour of the square and that of the patch; hue has to be similar while lightness can differ considerably.
If the measurement of a row fails, you are asked to measure this row again.
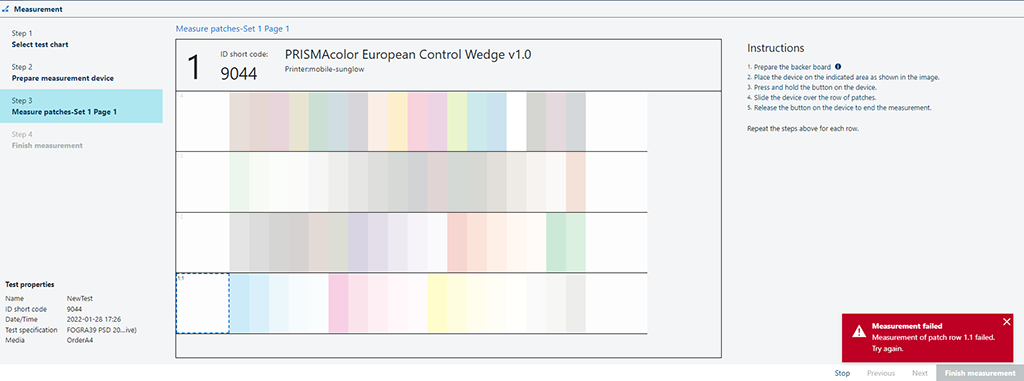 Row measurement failed
A warning is shown if wrong patches are being measured.
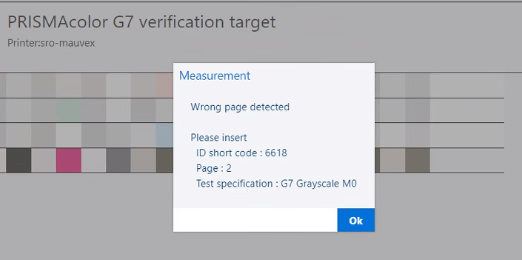 Wrong patches measured
You are also warned if the expected and measured colour values are very different. If you see this warning, it is very likely that some rows were not measured correctly.
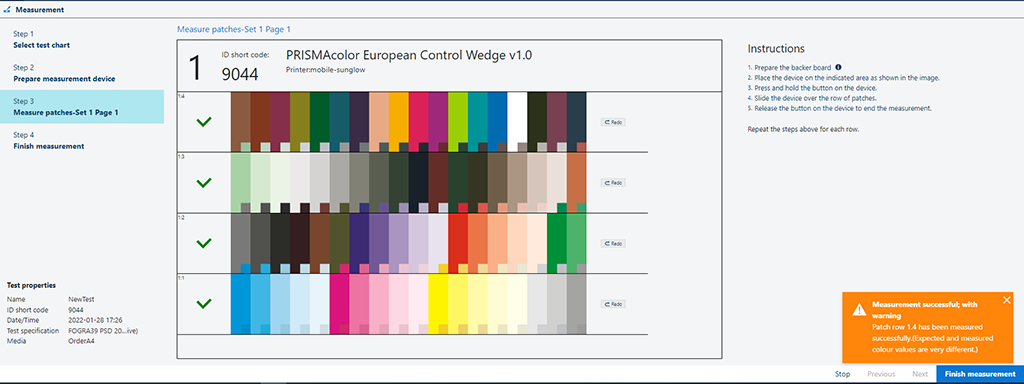 Patches measured successfully, with a warning
It is possible to remeasure a row. To do that, click the [Redo] button on the right-hand side of the row and measure the row again.
 Remeasure a row
After the measurement is finalised, you need to upload the measurement results to PRISMAcolor Manager via Cloud Proxy. To do that, click the [Generate report] button.
You can leave a comment about the current measurement.
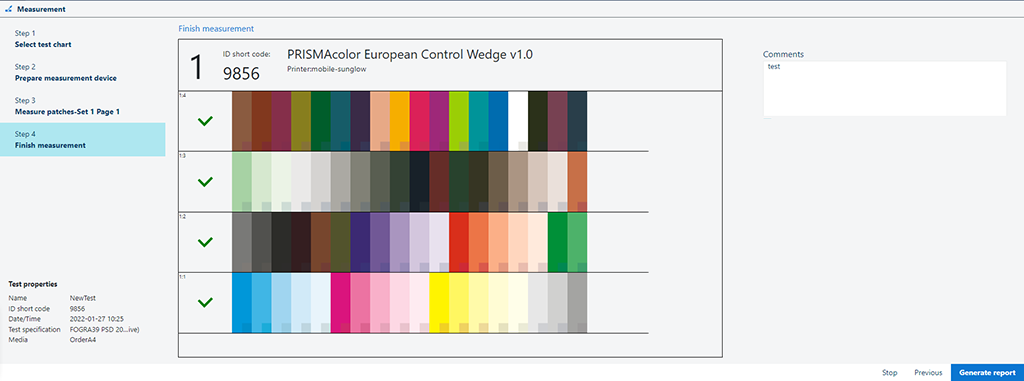 Step 4: Finish measurement