
There is an air filter located in the cooling unit. The user interface gives a warning when you must replace the filter. Always check the cooling liquid level when you replace the air filter.
Use Colorado XL-series prescribed:
Cooling unit filter
Screwdriver (Torx 25)
Demineralized water
 CAUTION
Always wear protective gloves when opening the covers of the machine.
CAUTION
Wear gloves when contact with ink or maintenance materials is possible. Gloves should always overlap sleeves. Follow the ink related Safety Data Sheets (SDS) guidelines carefully in order to ensure maximum safety.
|
1 |
On the user interface, tap [Maintenance], then [Replace the cooling unit filter]. |
|
|
2 |
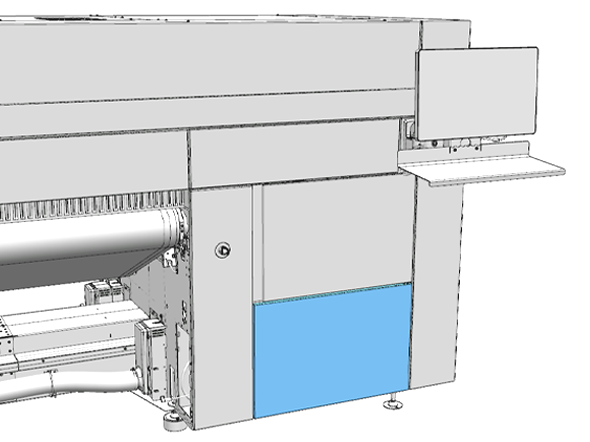
On the output side of the printer, locate the cooling unit compartment under the maintenance door. |
|
|
3 |
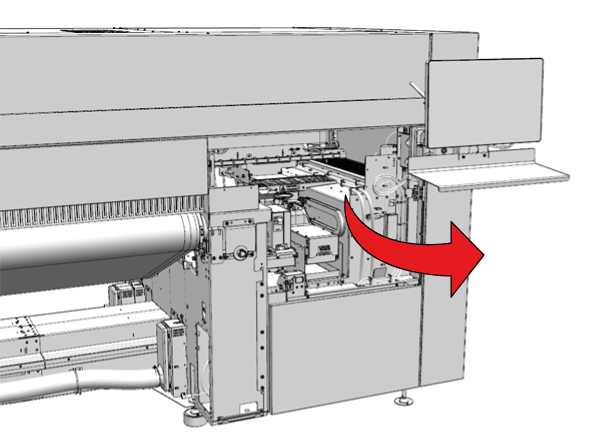
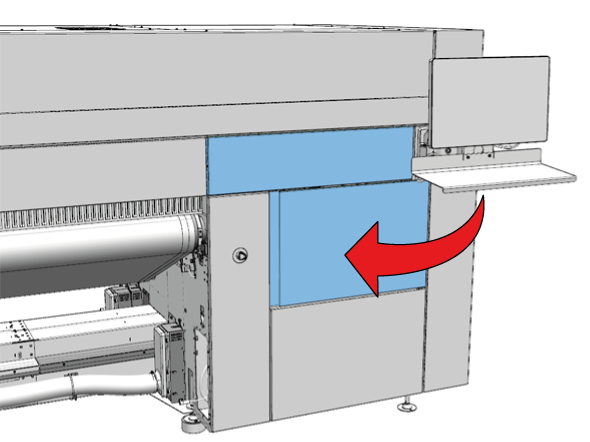
Open the maintenance door. |
|
|
4 |
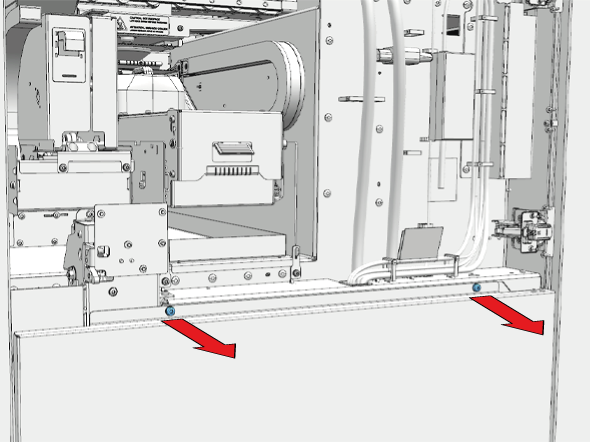
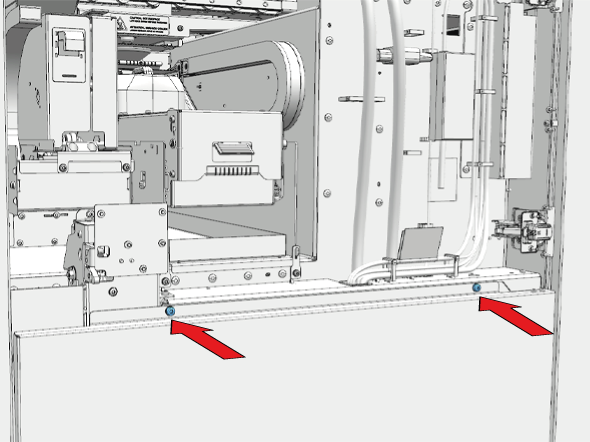
Loosen 2 screws to remove the cover. |
|
|
5 |
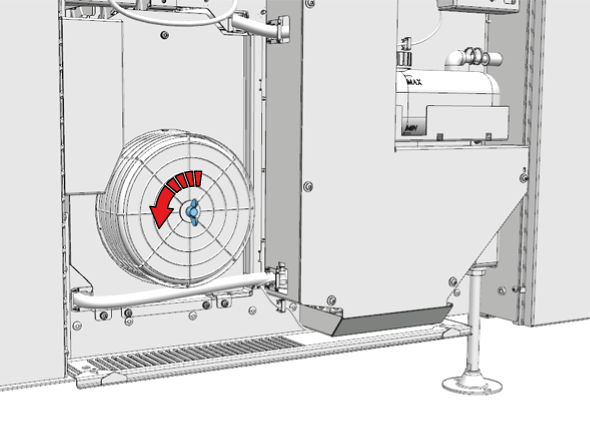
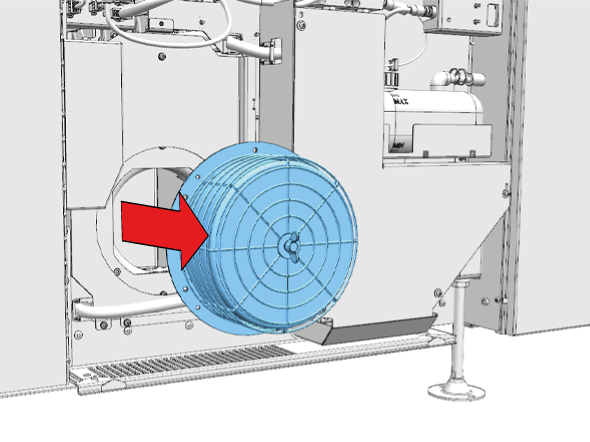
Loosen the screw on the filter frame by hand to remove the frame. |
|
|
6 |
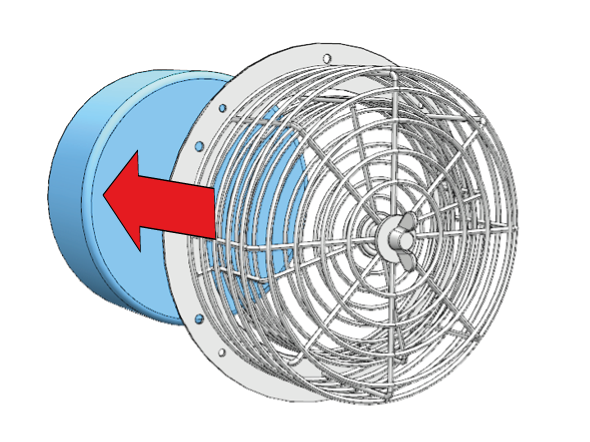
Remove the filter frame and take out the filter. |
|
|
7 |
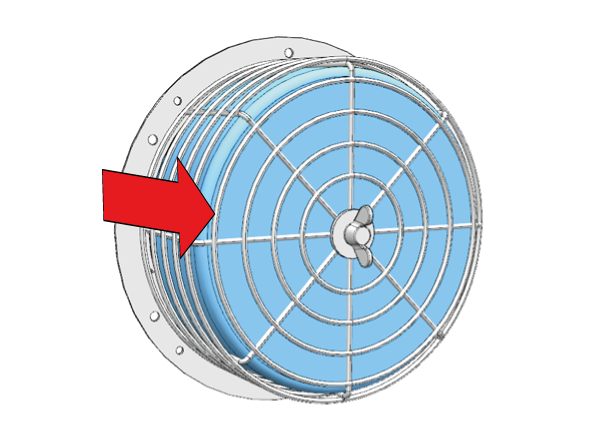
Take a new filter and place it in the frame. |
|
|
8 |
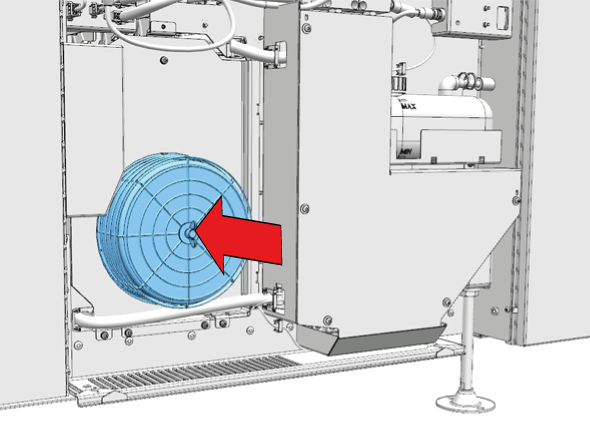
Put the filter frame back in place and tighten the screw by hand. |
|
|
9 |
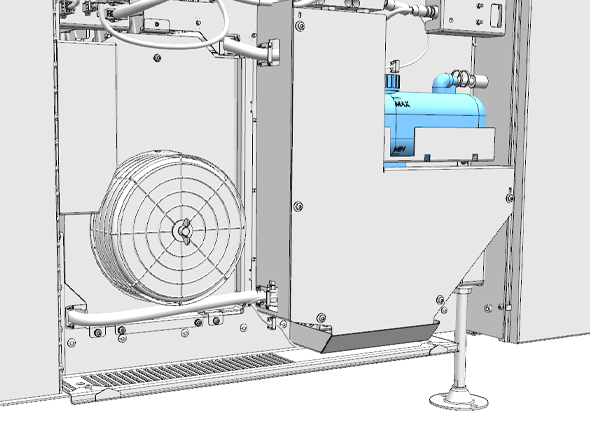
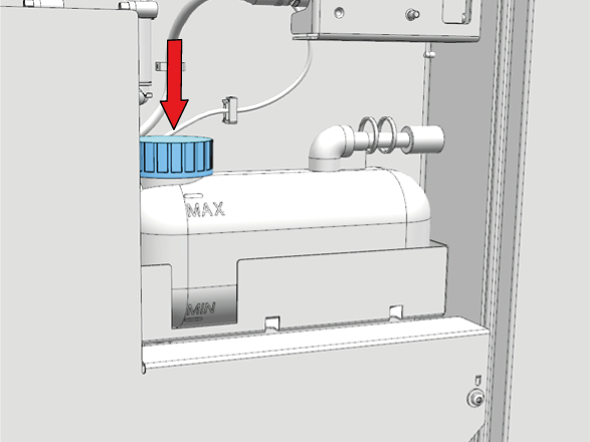
Locate the cooling liquid reservoir. |
|
|
10 |
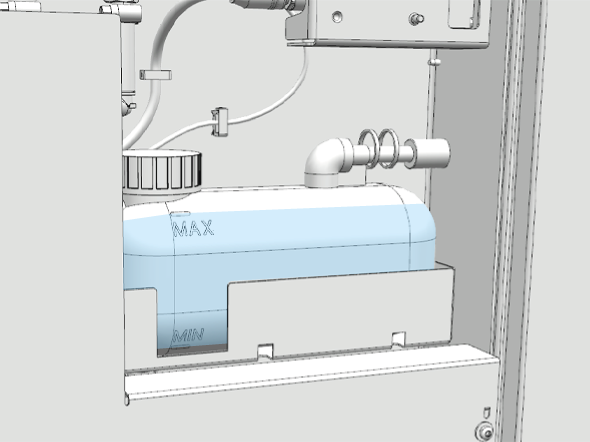
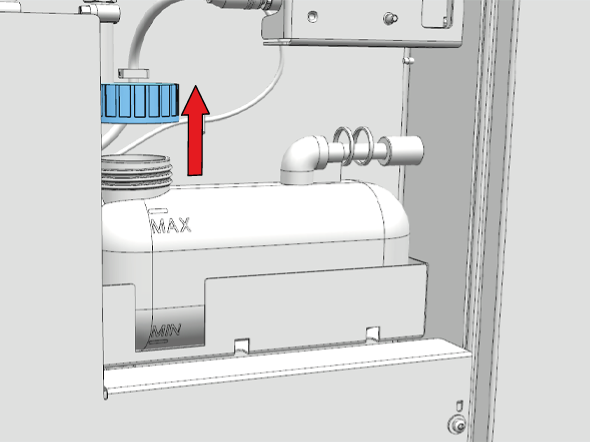
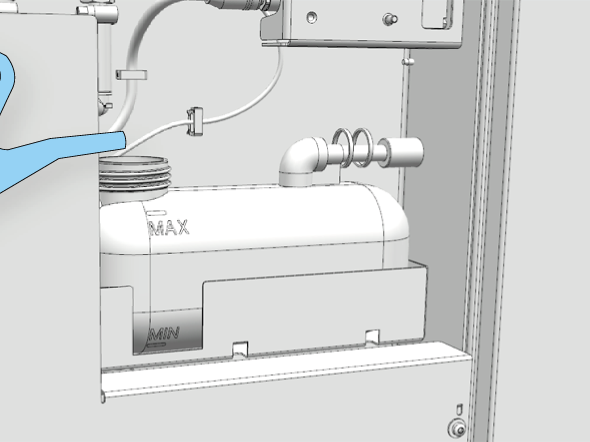
Check the liquid level. The liquid level must reach between the lines indicated on the reservoir. If the liquid level is near or below the lowest line, you must refill the reservoir:
|
|
|
11 |
Close the cover. |
|
|
12 |
Close the maintenance door. |
|
|
13 |
Dispose the used filter as chemical waste according to local regulations. |
|
|
14 |
On the user interface, tap [Confirm] to end the maintenance action. |