
When you tap the copy tile on the multi-touch user panel, you can make your own settings.
Apart from the preset tiles, you can select the advanced settings under [Show all settings]. These settings are used for extended copy jobs. The following table gives an overview and a short description of the available settings on the printer. You can find a detailed description of each setting in WebTools Express.
|
Setting |
Settings values |
Function |
|---|---|---|
|
[Media type] |
Any type List of media types |
The type of media you use. |
|
[Media size] |
Any size List of media sizes |
The size of media you use. |
|
[Media source] |
[Auto] 'Roll 1 to 6' (description of media type and media size loaded on the specific roll) |
Define the media feed to copy or print on. When you select [Auto] the printer automatically selects the media roll. 
|
|
Setting |
Settings values |
Function |
|---|---|---|
|
[Cut size] |
[Cut method]:
|
When set to [Synchro], the print is cut dependent of the image size. When set to [Standard], the print is cut to a standard media size. When set to [Custom], you must enter the sizes manually. 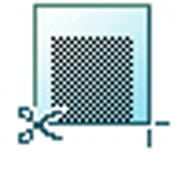
|
|
[Custom cut length] |
Cuts the print at the defined length. From 210 to 20,000 mm, or 8.3 to 7874 inches. |
|
|
[Add a leading strip] |
Adds a blank strip at the beginning of the output. From 0 to 400 mm, or 0 to 16 inches. 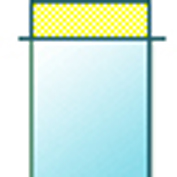
|
|
|
[Add a trailing strip] |
Adds a blank strip at the end of the output. From 0 to 400 mm, or 0 to 16 inches. 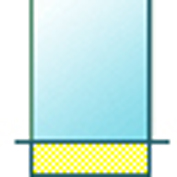
|
|
|
[Remove strip] |
[Top] |
[Erase a strip from the beginning of the original.] From 0 to 400 mm, or 0 to 16 inches. 
|
|
[Bottom] |
[Erase a strip from the bottom of the original.] From 0 to 400 mm, or 0 to 16 inches. 
|
|
|
[Left] |
[Erase a strip from the left side of the original.] From 0 to 400 mm, or 0 to 16 inches. 
|
|
|
[Right] |
[Erase a strip from the right side of the original. ] From 0 to 400 mm, or 0 to 16 inches. 
|
|
|
[Positioning] |
[Alignment]:
|
[Aligns the image on the media.] 
|
|
[Horizontal shift] |
[Shifts the image in the horizontal direction (after alignment to one of the positions given in 'Alignment').] From - 1067 to 1067 mm, or - 42 to 42 inches. 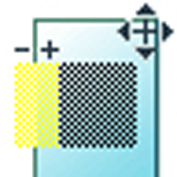
|
|
|
[Vertical shift] |
[Shifts the image in the vertical direction (after alignment to one of positions given in 'Alignment').] From - 1219 to 1219 mm, or - 48 to 48 inches. 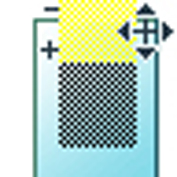
|
|
|
[Scale] |
[1:1] |
Scales the image to the original size. |
|
[To media size] |
Scales to the selected media width. You can only use this setting, when a specific media roll is selected. |
|
|
[To standard size] |
Scales the image to fit the media size you select from a list. 
|
|
|
[Custom] |
Scales the image to a custom percentage. 10 - 1000% 
|
|
Setting |
Settings values |
Settings values |
Function |
|---|---|---|---|
|
[Quality] |
[Scan quality] |
[Normal] [High] |
Define the quality of the scan.
Select [Normal] when productivity is an important factor. |
|
[Print quality] |
[Automatic] [High speed] [Economy - fast] [Economy] [Production - fast] [Production] [Quality - fast] [Quality] [High quality - fast] [High quality] |
Define the print quality of your output.
In case of a fast and standard mode, the fast mode is faster and uses less toner than the standard mode, while the standard mode output has a higher toner coverage. |
|
|
[Color mode] |
[Color] [Grayscale] |
Define the default output in color or greyscale. |
|
|
[Original] |
[Original type] |
[Folded lines/text] [Lines/text] [Map] [Colored original] [Artwork] [Photo] [Blueprint] [Dark original] |
Define the type of original you use. The choice depends on the chosen [Color mode]. For more information on choosing the correct original type, see The original type. 
|
|
[Background compensation] |
[Automatic] [On] [Off] |
Reduce the background noise of the image.
The applied background compensation method depends on the chosen original type. 
|
|
|
[Original] |
[Original width] |
[Auto] |
The width of the original is automatically detected by the scanner. 
|
|
[Standard] |
Select the width of the original as a standard size. 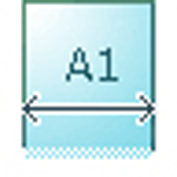
Depends on the media type and size you have configured in WebTools Express |
||
|
[Custom] |
The width of the original is a custom size. You can enter a size within the range of 210 to 914 mm, or 8.5 to 36 inches. 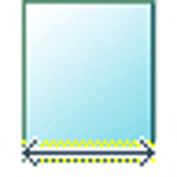
|
||
|
[Image] |
[Color highlighting] |
[On] [Off] |
Set to [On]:
|
|
[Lighter/Darker] |
Value from -5 to 5 |
Define the lightness and the contrast of a copy. Increase the value for lighter prints, and decrease for darker prints. When you make a copy darker, the information becomes darker while the background is less affected. When you make a copy lighter, weak information is not clipped to white. |
|
|
[Mirror] |
[On] [Off] |
[When "On", the image is mirrored along the vertical axis (the media transport direction).] Set to [On] for strongly curled transparent originals that have to be fed upside down in the scanner. Or for (dark) transparent originals that have the information printed on the back. 
|
|
|
[Area to erase] |
[Area to erase: X origin] |
From 0 to 914 mm, or 0 to 36 inches |
[The origin of the area to erase on the horizontal axis, starting from the left.] 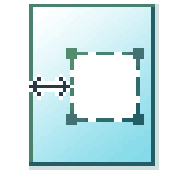
|
|
[Area to erase: Y origin] |
From 0 to 6000 mm, or 0 to 250 inches. |
[The origin of the area to erase on the vertical axis, starting from the top.] 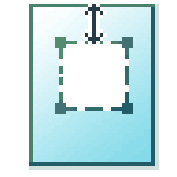
|
|
|
[Area to erase: width] |
From 0 to 914 mm, or 0 to 36 inches. |
[The width of the area to erase.] 
|
|
|
[Area to erase: length] |
From 0 to 6000 mm, or 0 to 250 inches. |
[The length of the area to erase.] 
|
|
Setting |
Settings values |
Function |
|---|---|---|
|
[Delivery] |
[Top Delivery Tray] |
Location on top of the printer that deposits the sheet face-down. Not all media types can be delivered to the [Top Delivery Tray]. |
|
[Back output] or [Fold]. |
Select the [Back output] to deliver your output face-up, at the back of the printer. Select the folding device when it is configured, and you want to fold your output. |
|
|
[Fold template] |
When a folding device is configured, you can select the preferred fold template, to fold with predefined settings. |