
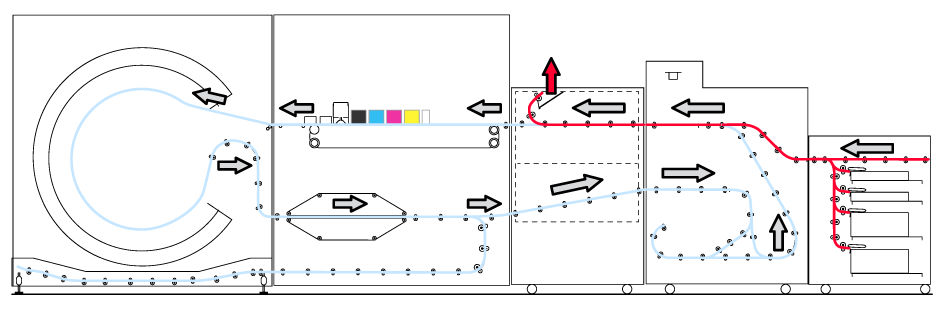
Sentry rejects are the delivery of sheets in the sentry tray. The printer detects that one or more sheets have deformations that may cause damage to the print engine. Sentry rejects cause loss of media, ink and production time (runnability).
The sentry measures deformations and calculates if the deformation height is larger than the current print gap. Based on this calculation, the system ejects a sheet and any necessary follow-up sheets into the sentry tray.
The printer automatically corrects the order and contents of the document pages when sheets are removed due to sentry rejects.
Sentry rejects can occur when sheets pass for the first time (first pass) or for the second time (second pass) through the sentry.
When media sheets already have deformations before they enter the sentry, these sheets are rejected during the first pass.
Media sheets can have curl (1), bulges or wavy edges (2) or can be damaged in another way (3).
 Media deformations
First pass sentry rejects may be caused by incorrect media storage or media handling. You recognize first pass sentry rejects by ejected sheets that have not been printed.
 First pass sentry rejects
The drying process of the one-sided printed sheets can also cause deformations. Then, the sentry rejects these sheets during the second pass.
You recognize second pass sentry rejects by ejected sheets that have been printed on the front side or that arrive quickly after each other. Most of these sheets are not ejected because of a deformation, but because the printer is restoring the page sequence.
It depends on the media surface, the ink amounts and the location of the inks on the sheet if sheets deform after the first printing process.
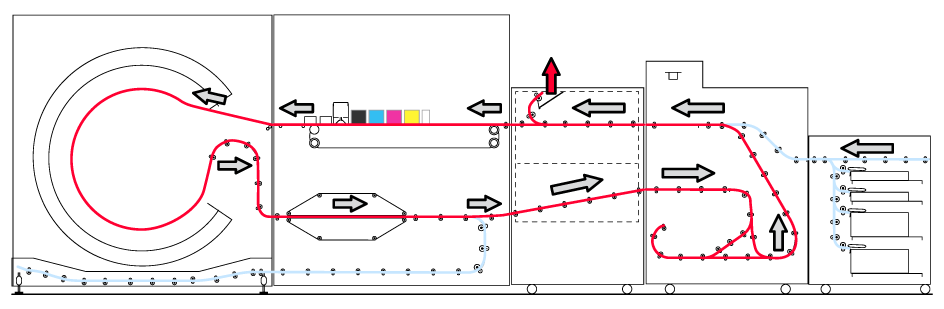 Second pass sentry rejects
Correct media handling has been explained in this operation guide and remains the most important advice to prevent sentry rejects.
Unpack the media just before loading into a paper tray.
Before unpacking a ream, position it according to the direction of the arrow on the label.
Remove the first sheet in a ream.
Inspect the stacks on sheet malformations. Remove deformed sheets.
When the media size changes in the paper tray, first load a part of a stack, adjust the rulers, and then load the other remaining sheets.
Ensure the paper tray parts do not touch the media during loading.
Remove media from the paper modules when the printer is shut down for more than two days.
Rewrap remaining media using the original orientation and package materials or use plastic closeable boxes.
The following instructions can be followed when sentry rejects still occur.
|
Instructions |
First pass rejects |
Second pass rejects |
|---|---|---|
|
Read the sentry rejects overview to get more information about the possible cause. |
Yes |
Yes |
|
When you notice that the ejected sheets are curled, do the following. Take the media stack, turn it over, and load the media face-down. |
Yes |
Yes |
|
Remove the media stack and put a new stack in the paper tray. |
Yes |
|
|
When you cut media in-house, cut media according to the guidelines (see procedure below). |
Yes |
|
|
Assign and load the correct job media to the paper tray. |
Yes |
|
|
Increase small margins or print on larger media. A margin between 10 and 20 mm is recommended when you notice many second pass sentry rejects. |
Yes |
|
|
When the relative humidity of the packaging deviates from the relative humidity of the storage room or paper module paper malformations can occur. The default relative humidity of the paper module can be set in the Settings Editor. |
Yes |
Yes |
|
Use other media, for example use thicker media when the used media are thin. |
Yes |
Yes |
|
Use a media print mode that uses a larger print gap parameter. |
Yes |
|
|
When the job uses cover media or other critical media, print these pages in a separate job. Thereafter, load the printed sheets, and add these to the job as insert sheets. |
Yes |
|
|
Adjust the CMYK curves of a media print mode to reduce the ink amounts (see procedure below). |
Yes |
|
|
First print the sides that have the lowest ink coverage, which means these are printed during the first pass (see procedure below). |
Yes |
When paper is cut in-house into the required sized, you need to be extra careful to avoid sentry rejects.
Use sharp knives in the cutting device to avoid bad and rough sheet edges.
Cut the paper in the correct size. The difference between the actual sheet size and the media attribute size cannot be larger than + / - 2 mm / 0.079".
Cut the sheet corners in exact 90 degrees angles.
Select the job and touch .
Use the option to select [Back/front].
Use the option to select [Face up reverse].
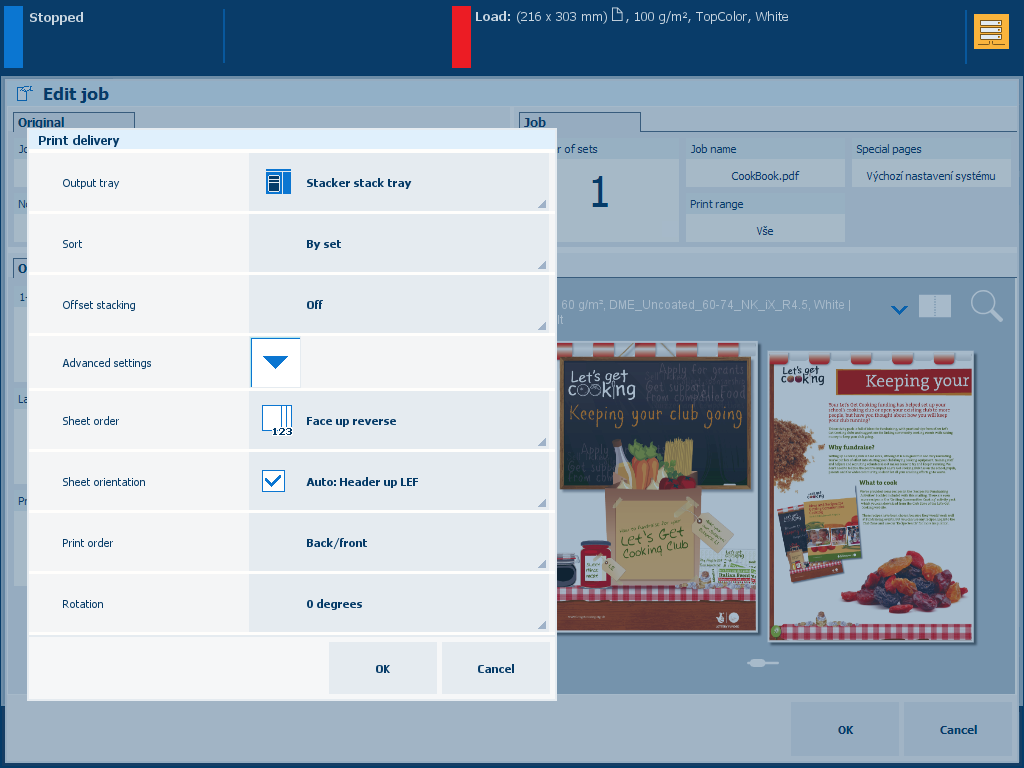 Print delivery
Touch .
Touch [Edit CMYK curves].
Select the media family, halftone, and media print mode combination.
Reduce the output densities.