After you have defined the settings in the Touchstone Setup panel, you can open the Touchstone Preview panel.
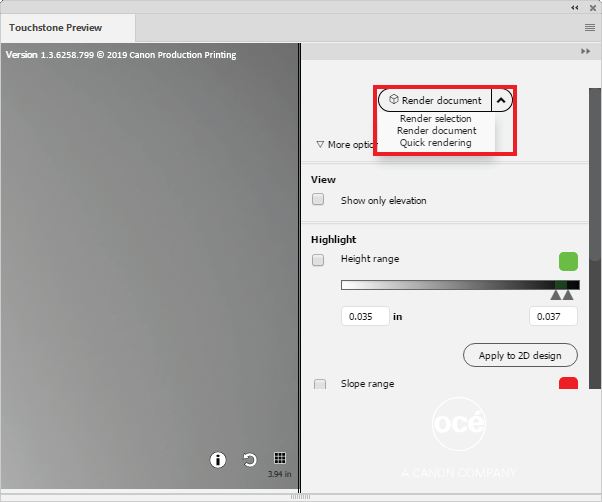
To generate or update the 3D preview of your elevated artwork you can select one of the following options.
Select [Render document] to render the complete artwork.
Select a part of your artwork and select [Render selection] to render only the selected part of your artwork.
Choose [Quick rendering] to render the document in a lower resolution in order to speed up the rendering process.
To speed up the rendering process even more you can select [More options] and uncheck color management.
It is not possible to generate highlights in [Quick rendering] mode.
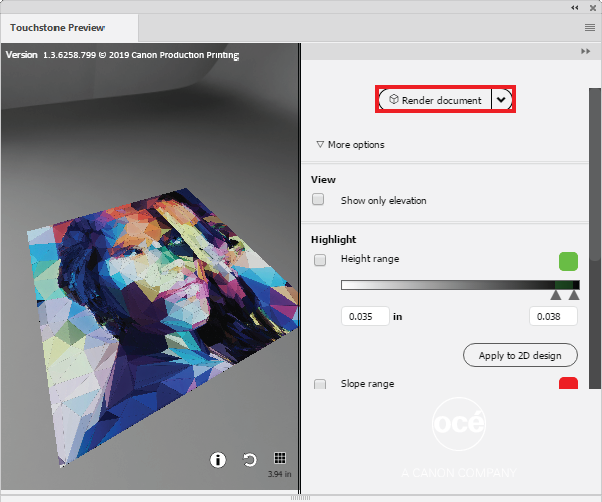
You can rotate, shift, or zoom in and out on the preview as follows.
Click and hold the left mouse button to rotate the preview.
Click and hold the right mouse button to shift the preview.
Rotate the mouse wheel to zoom in and out on the preview.
You can now switch on and off the preview options at the right to carefully examine your design.
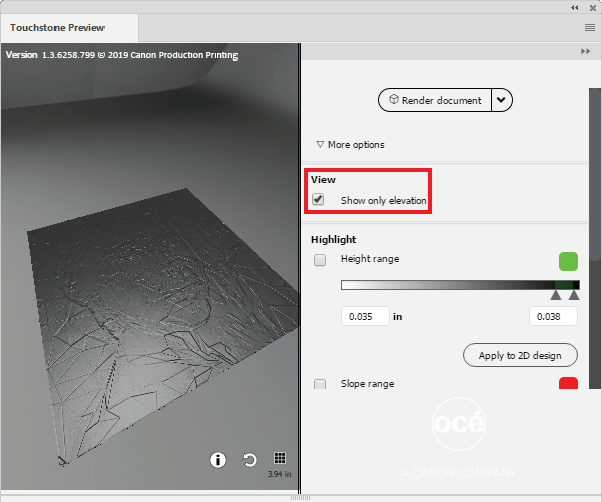
To show only the elevation in your design tick the checkbox indicated below.
To highlight areas with a specific height range tick the checkbox indicated below. To change the height range you can adjust the range values or drag the ruler in the correct position.
This feature is particularly useful to identify isolated high pixels that can result in unnecessary extra print time. Lowering those areas could still provide the overall intended look and feel of the artwork but reduces the print time.
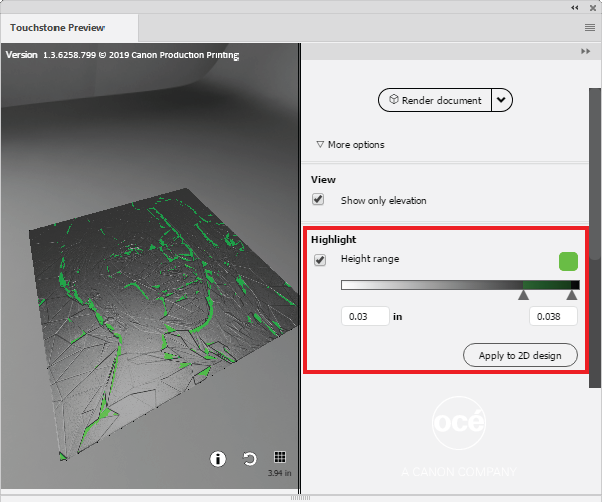
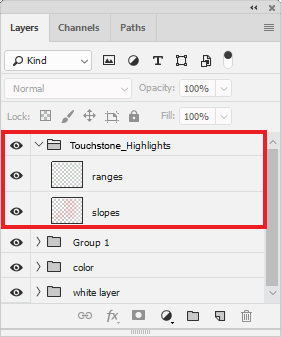
When you want to use the highlighted information to adapt your design, you can click on [Apply to 2D design], to add the highlighted information in a separate layer group to your design. This layer group is called 'Touchstone_Highlights' and will not become a part of your final design.
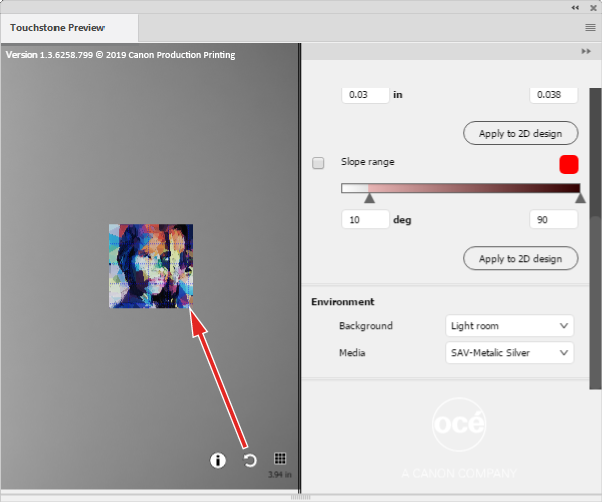
To highlight areas with a specific slope range tick the checkbox indicated below.
To change the slope range you can adjust the range values or drag the ruler in the correct position. To change the highlight color click on the colored button.
Slopes that are too steep (between 60 and 90 degrees) can show darkened edges on the side of your printed artwork.
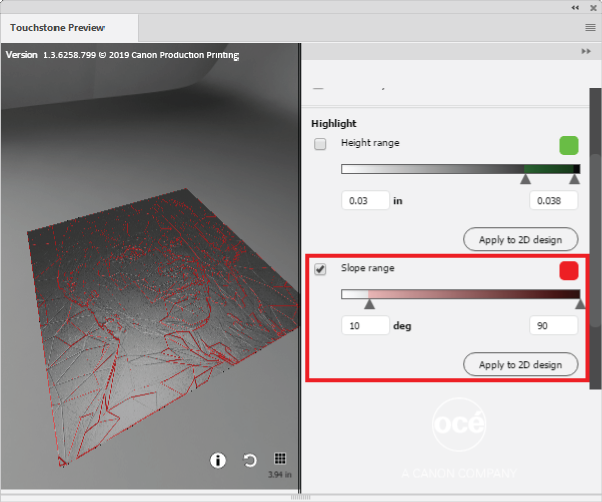
When you want to use the highlighted information to adapt your design, you can click on [Apply to 2D design], to add the highlighted information in a separate layer group to your design. This layer group is called 'Touchstone_Highlights' and will not become a part of your final design.
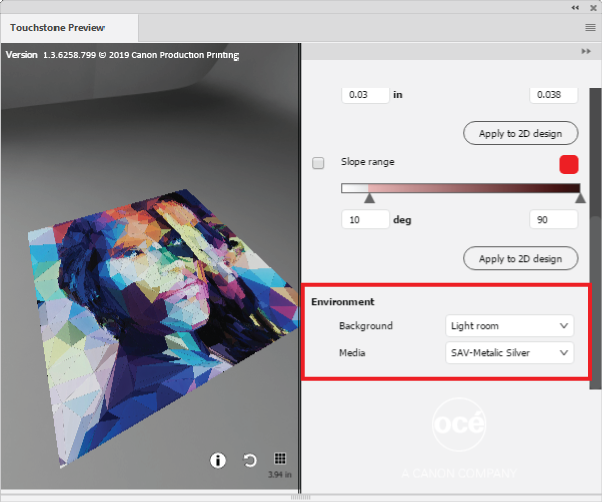
The environment section allows you to choose a different background for your artwork and to select a specific media type.
The media type is only relevant when your design contains areas that have no elevation and no color.
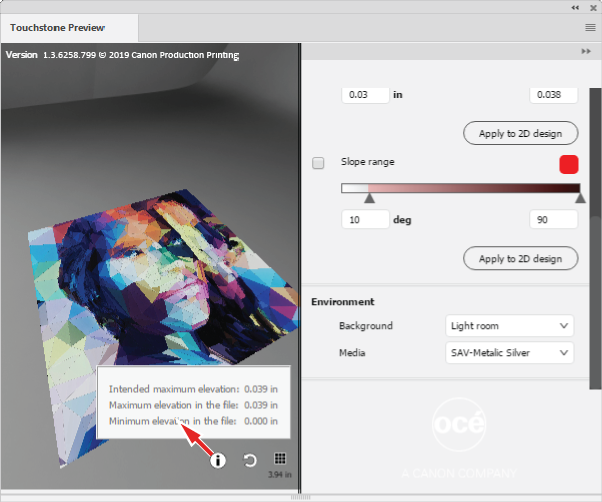
For information on the elevation in your design click on the info button in the lower right corner.
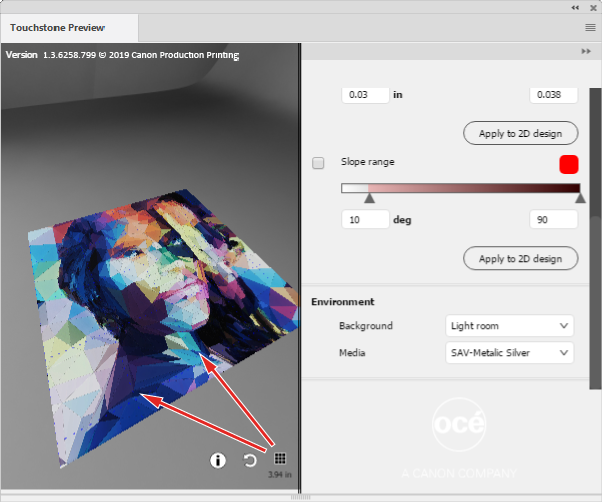
To apply a grid to your design click on the grid button. This grid will help you to estimate the size of your design in the preview. The distance between the grid lines is 10 centimeters.
To reset your preview click on the refresh button.